![]()
Fingerboard Radius On-Line Help
|
Fingerboard Radius On-Line Help
|
|
The following is a pictorial help for making the Fingerboard Radius Fixture and is for use only for CoolTool customers who have purchased these drawings ... |
|
|
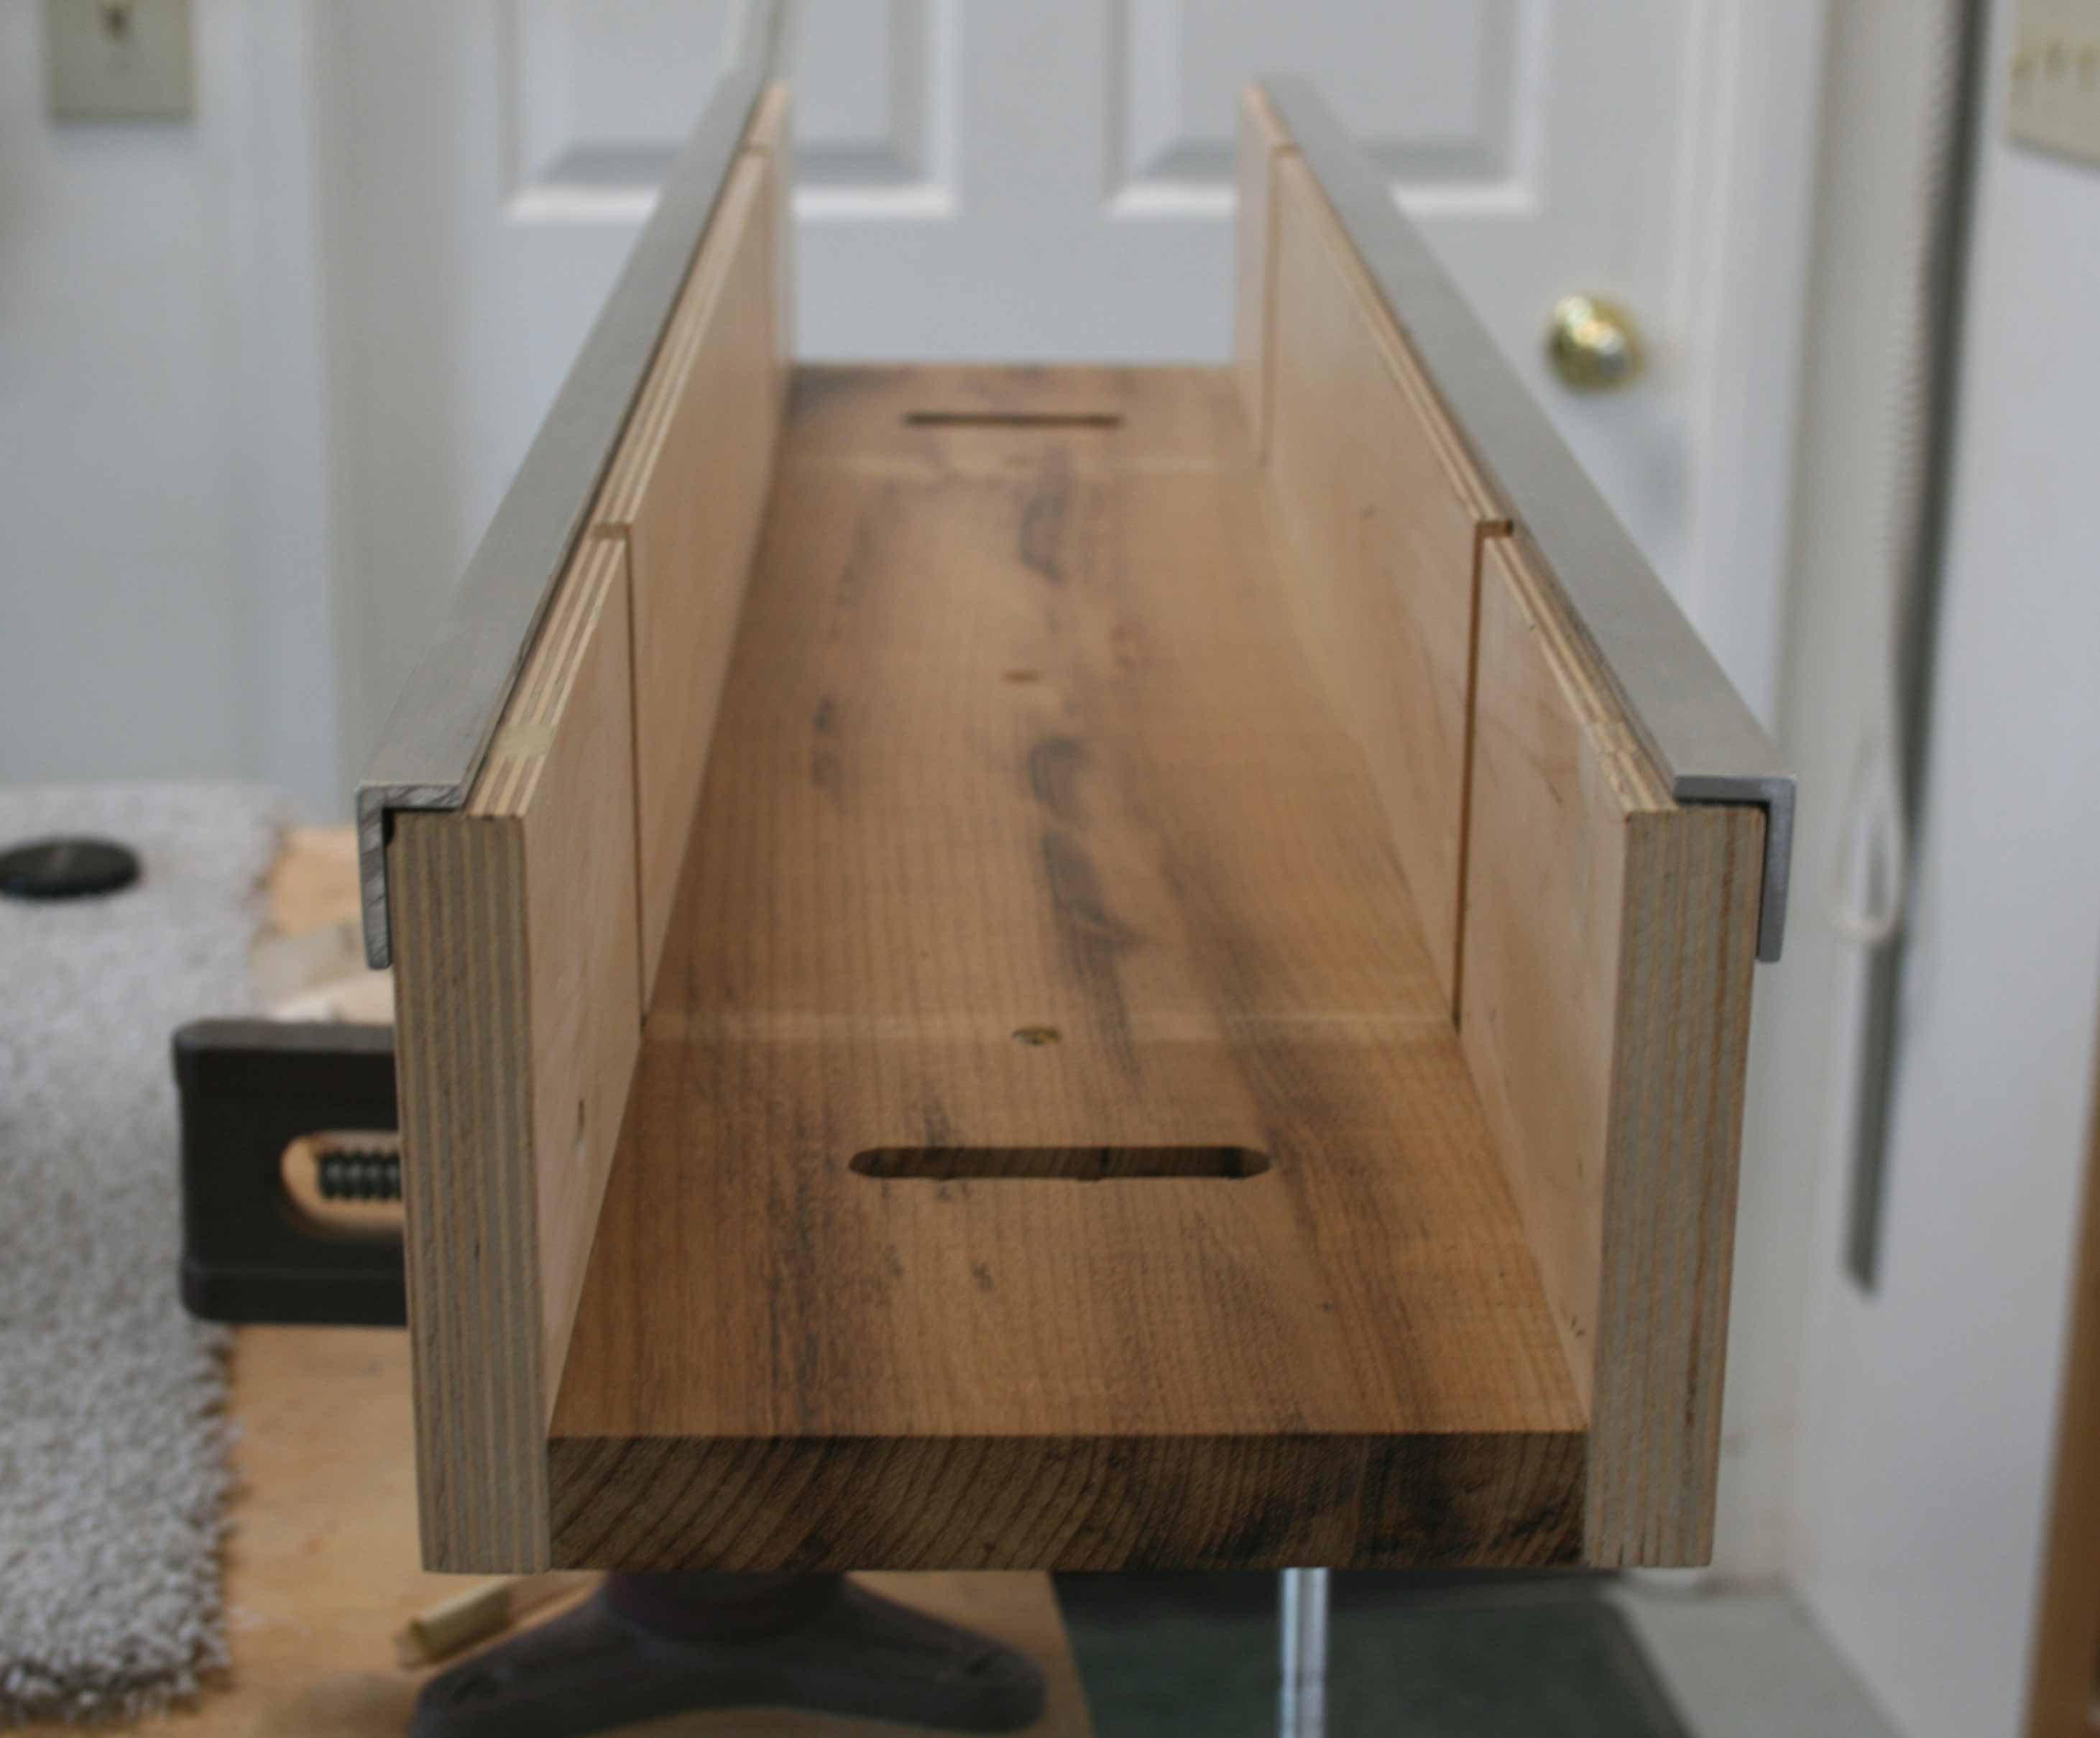
Step 1: Make the 3-sided box. Follow the drawings on sheet 2 to make the bottom and sides. Make the bottom slots by drilling 1/2" diameter holes on each end and cutting out the middle. This is a clearance slot for 1/4" carriage bolt. |
|
|
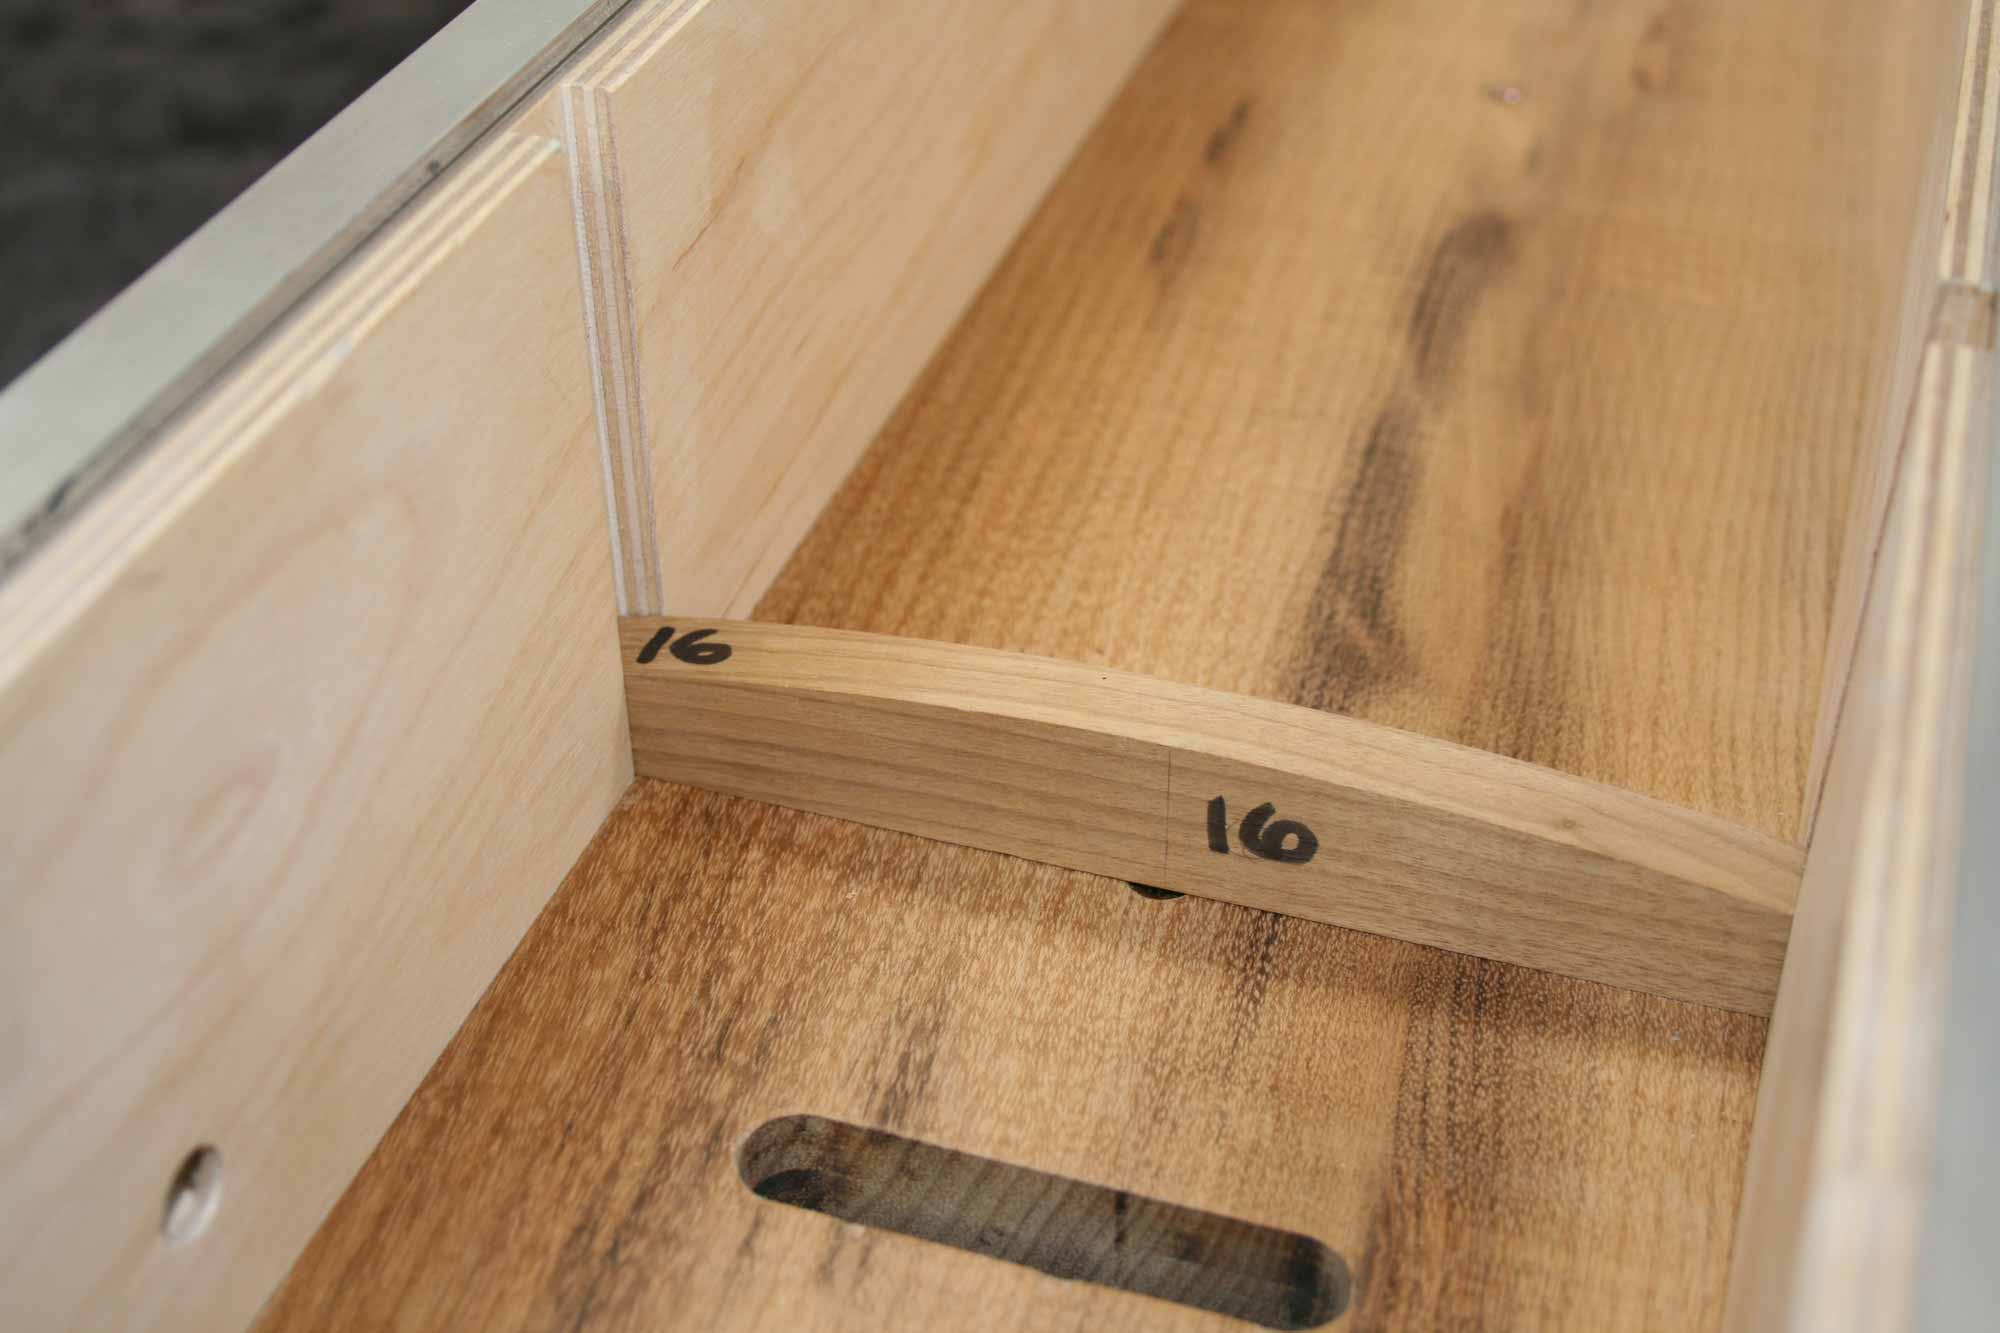
When making the sides, note that the dados face each other so the radius block can slip down to the bottom. Make the bottom brace and attach so the bottom part is very straight. |
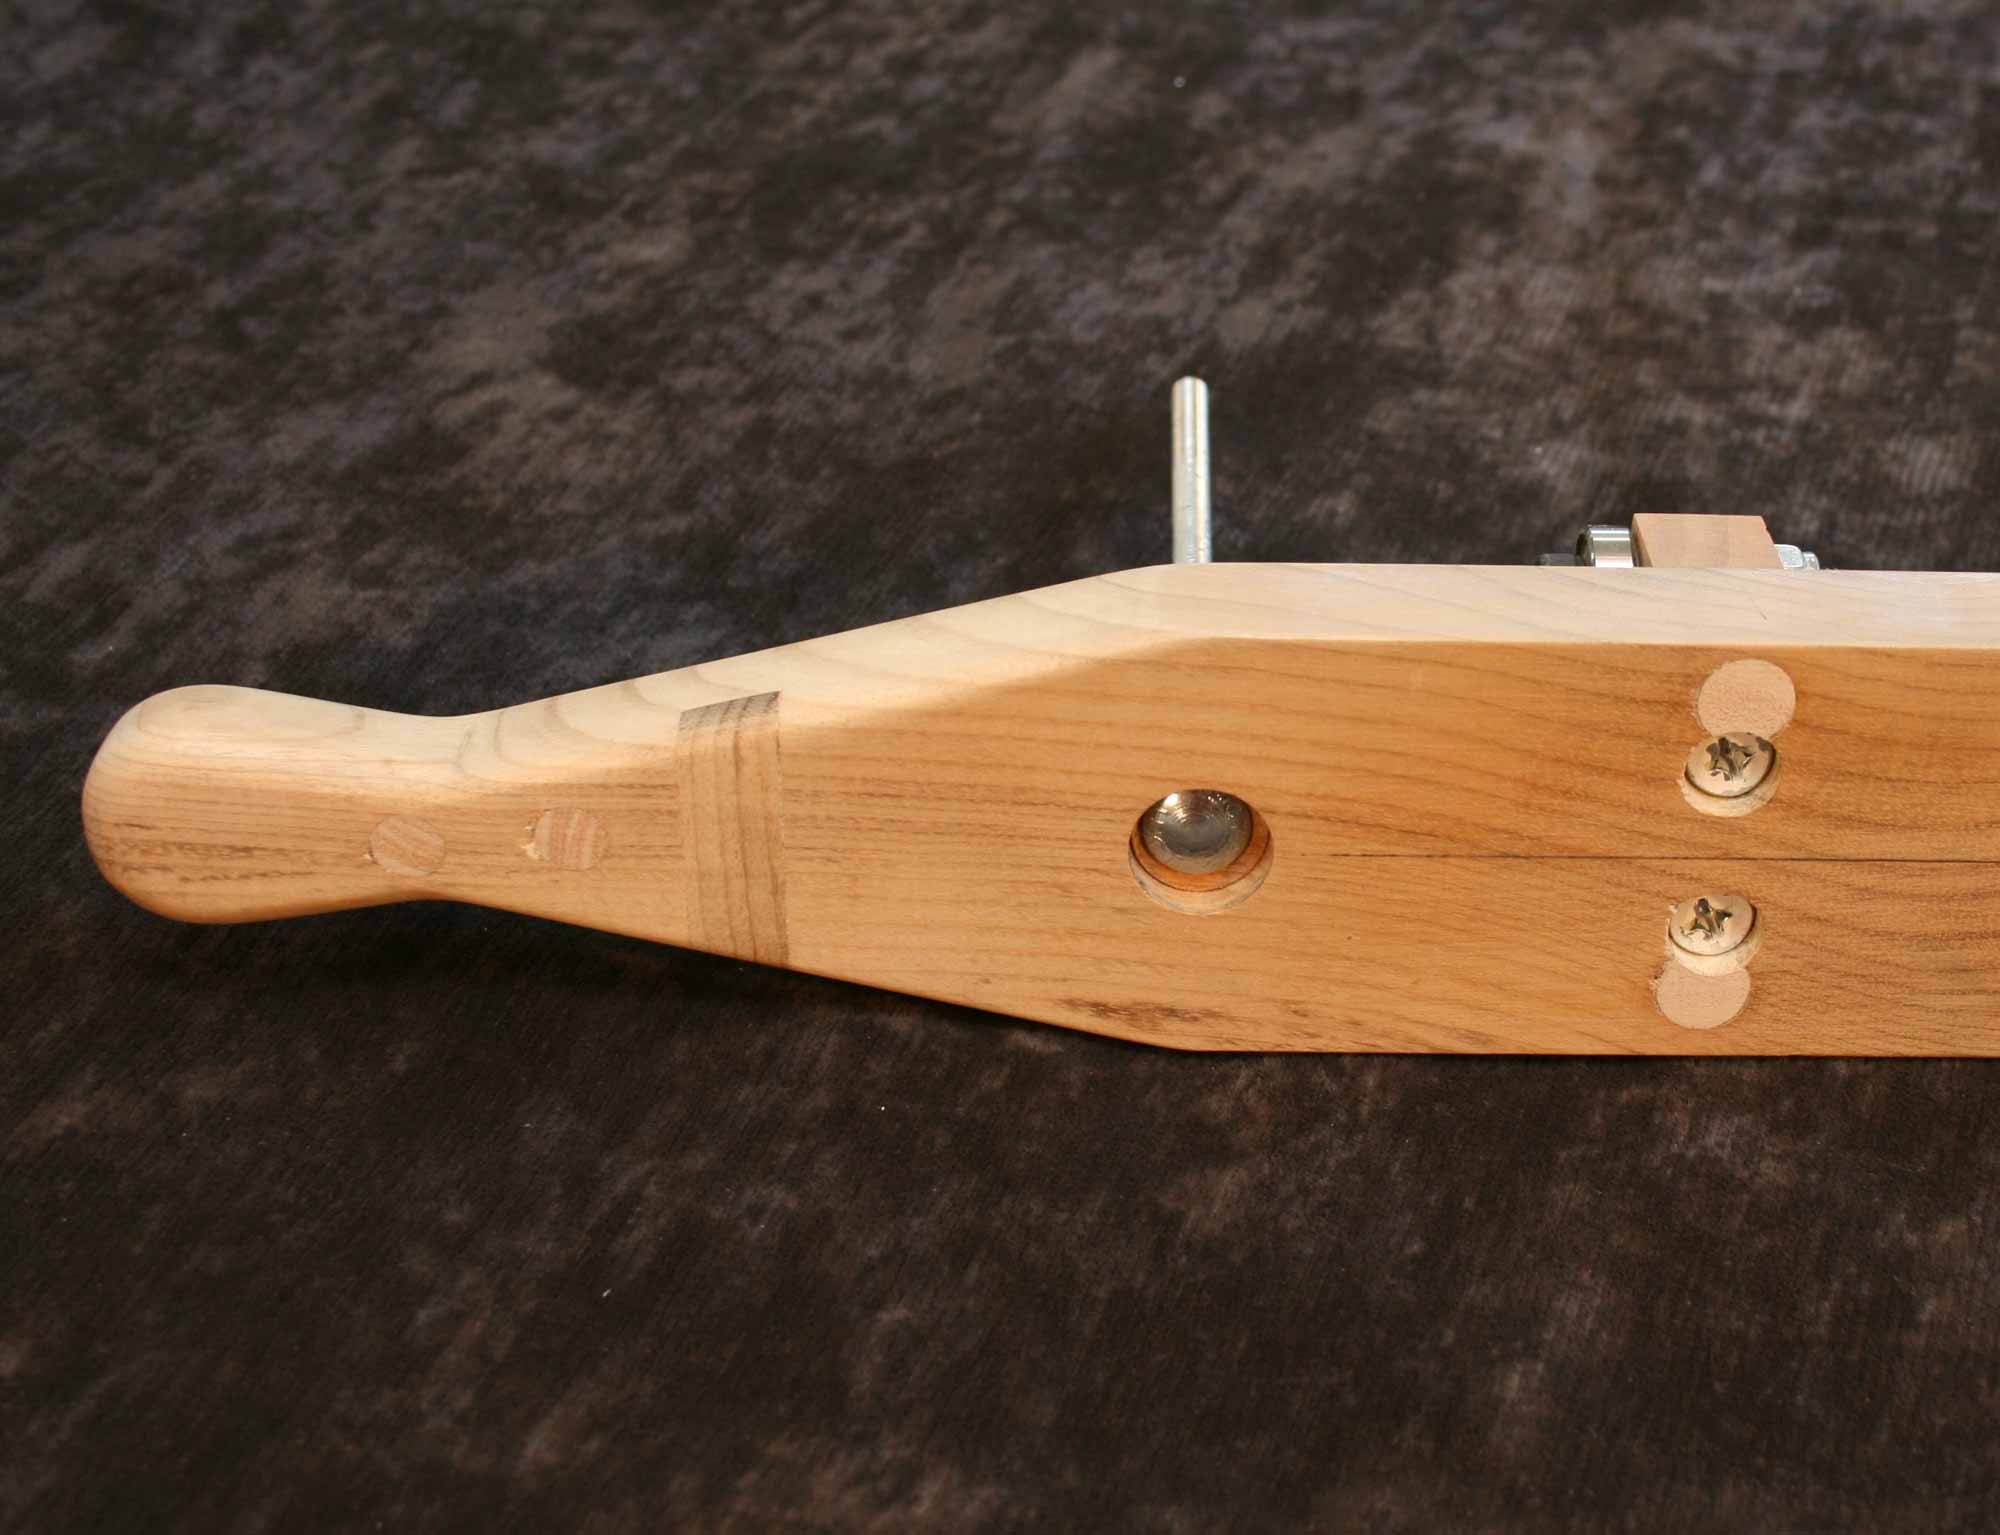 |
Step 2: Make the carriage. You can see by the photos that I did quite a bit of trial and error coming up with this fixture. Make the end shape any way that feels comfortable to you, it's not critical. |
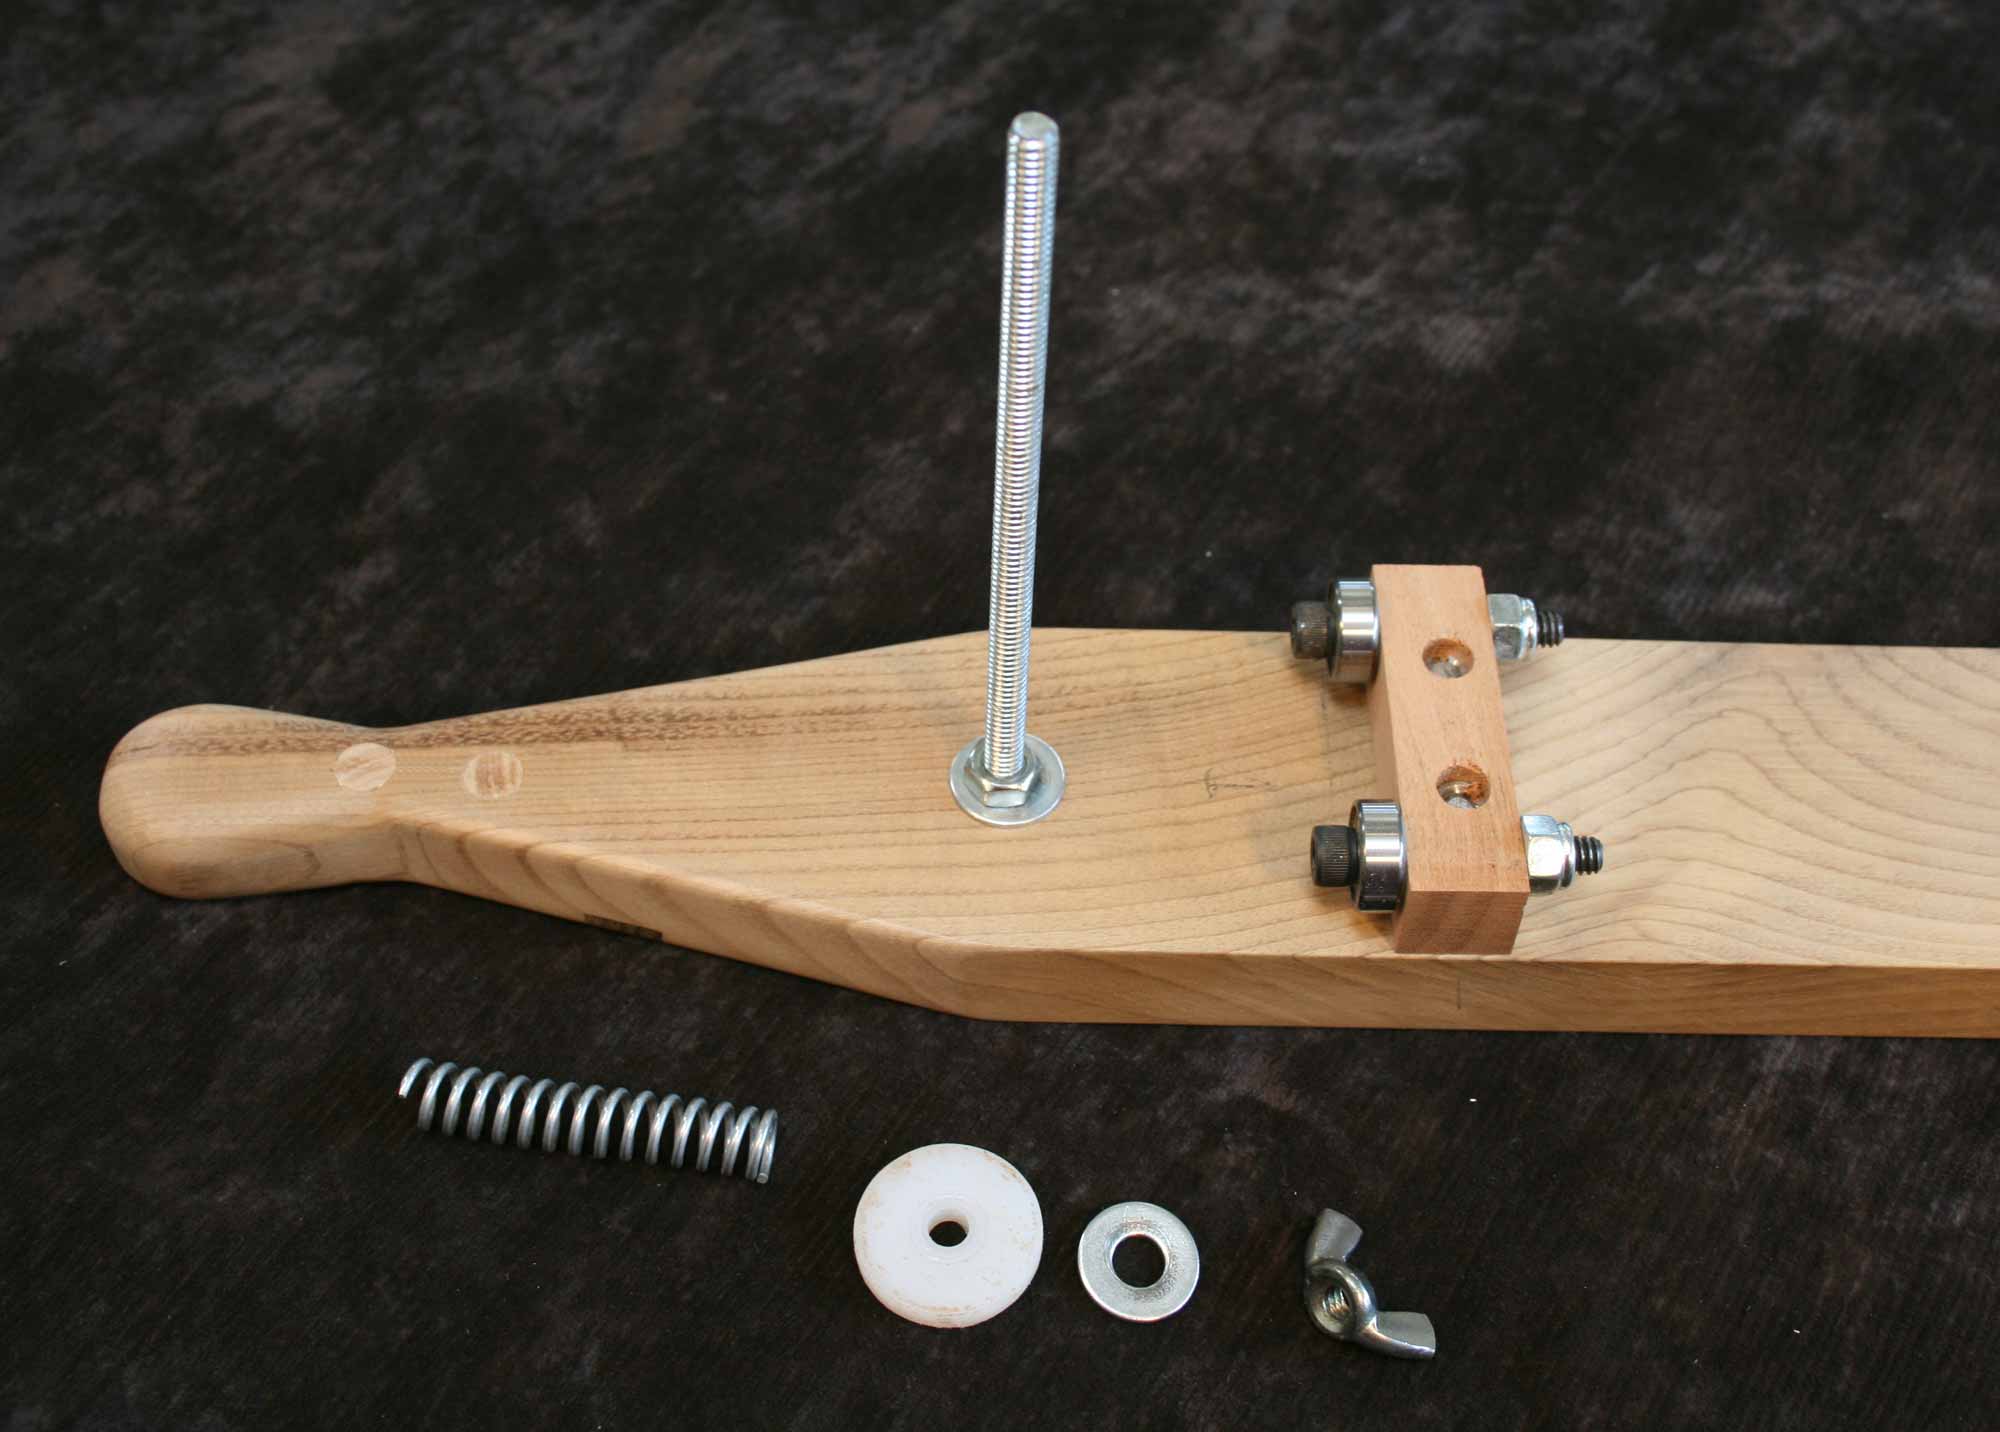 |
Make the wheel mounts as shown on the drawing and assemble the carriage. |
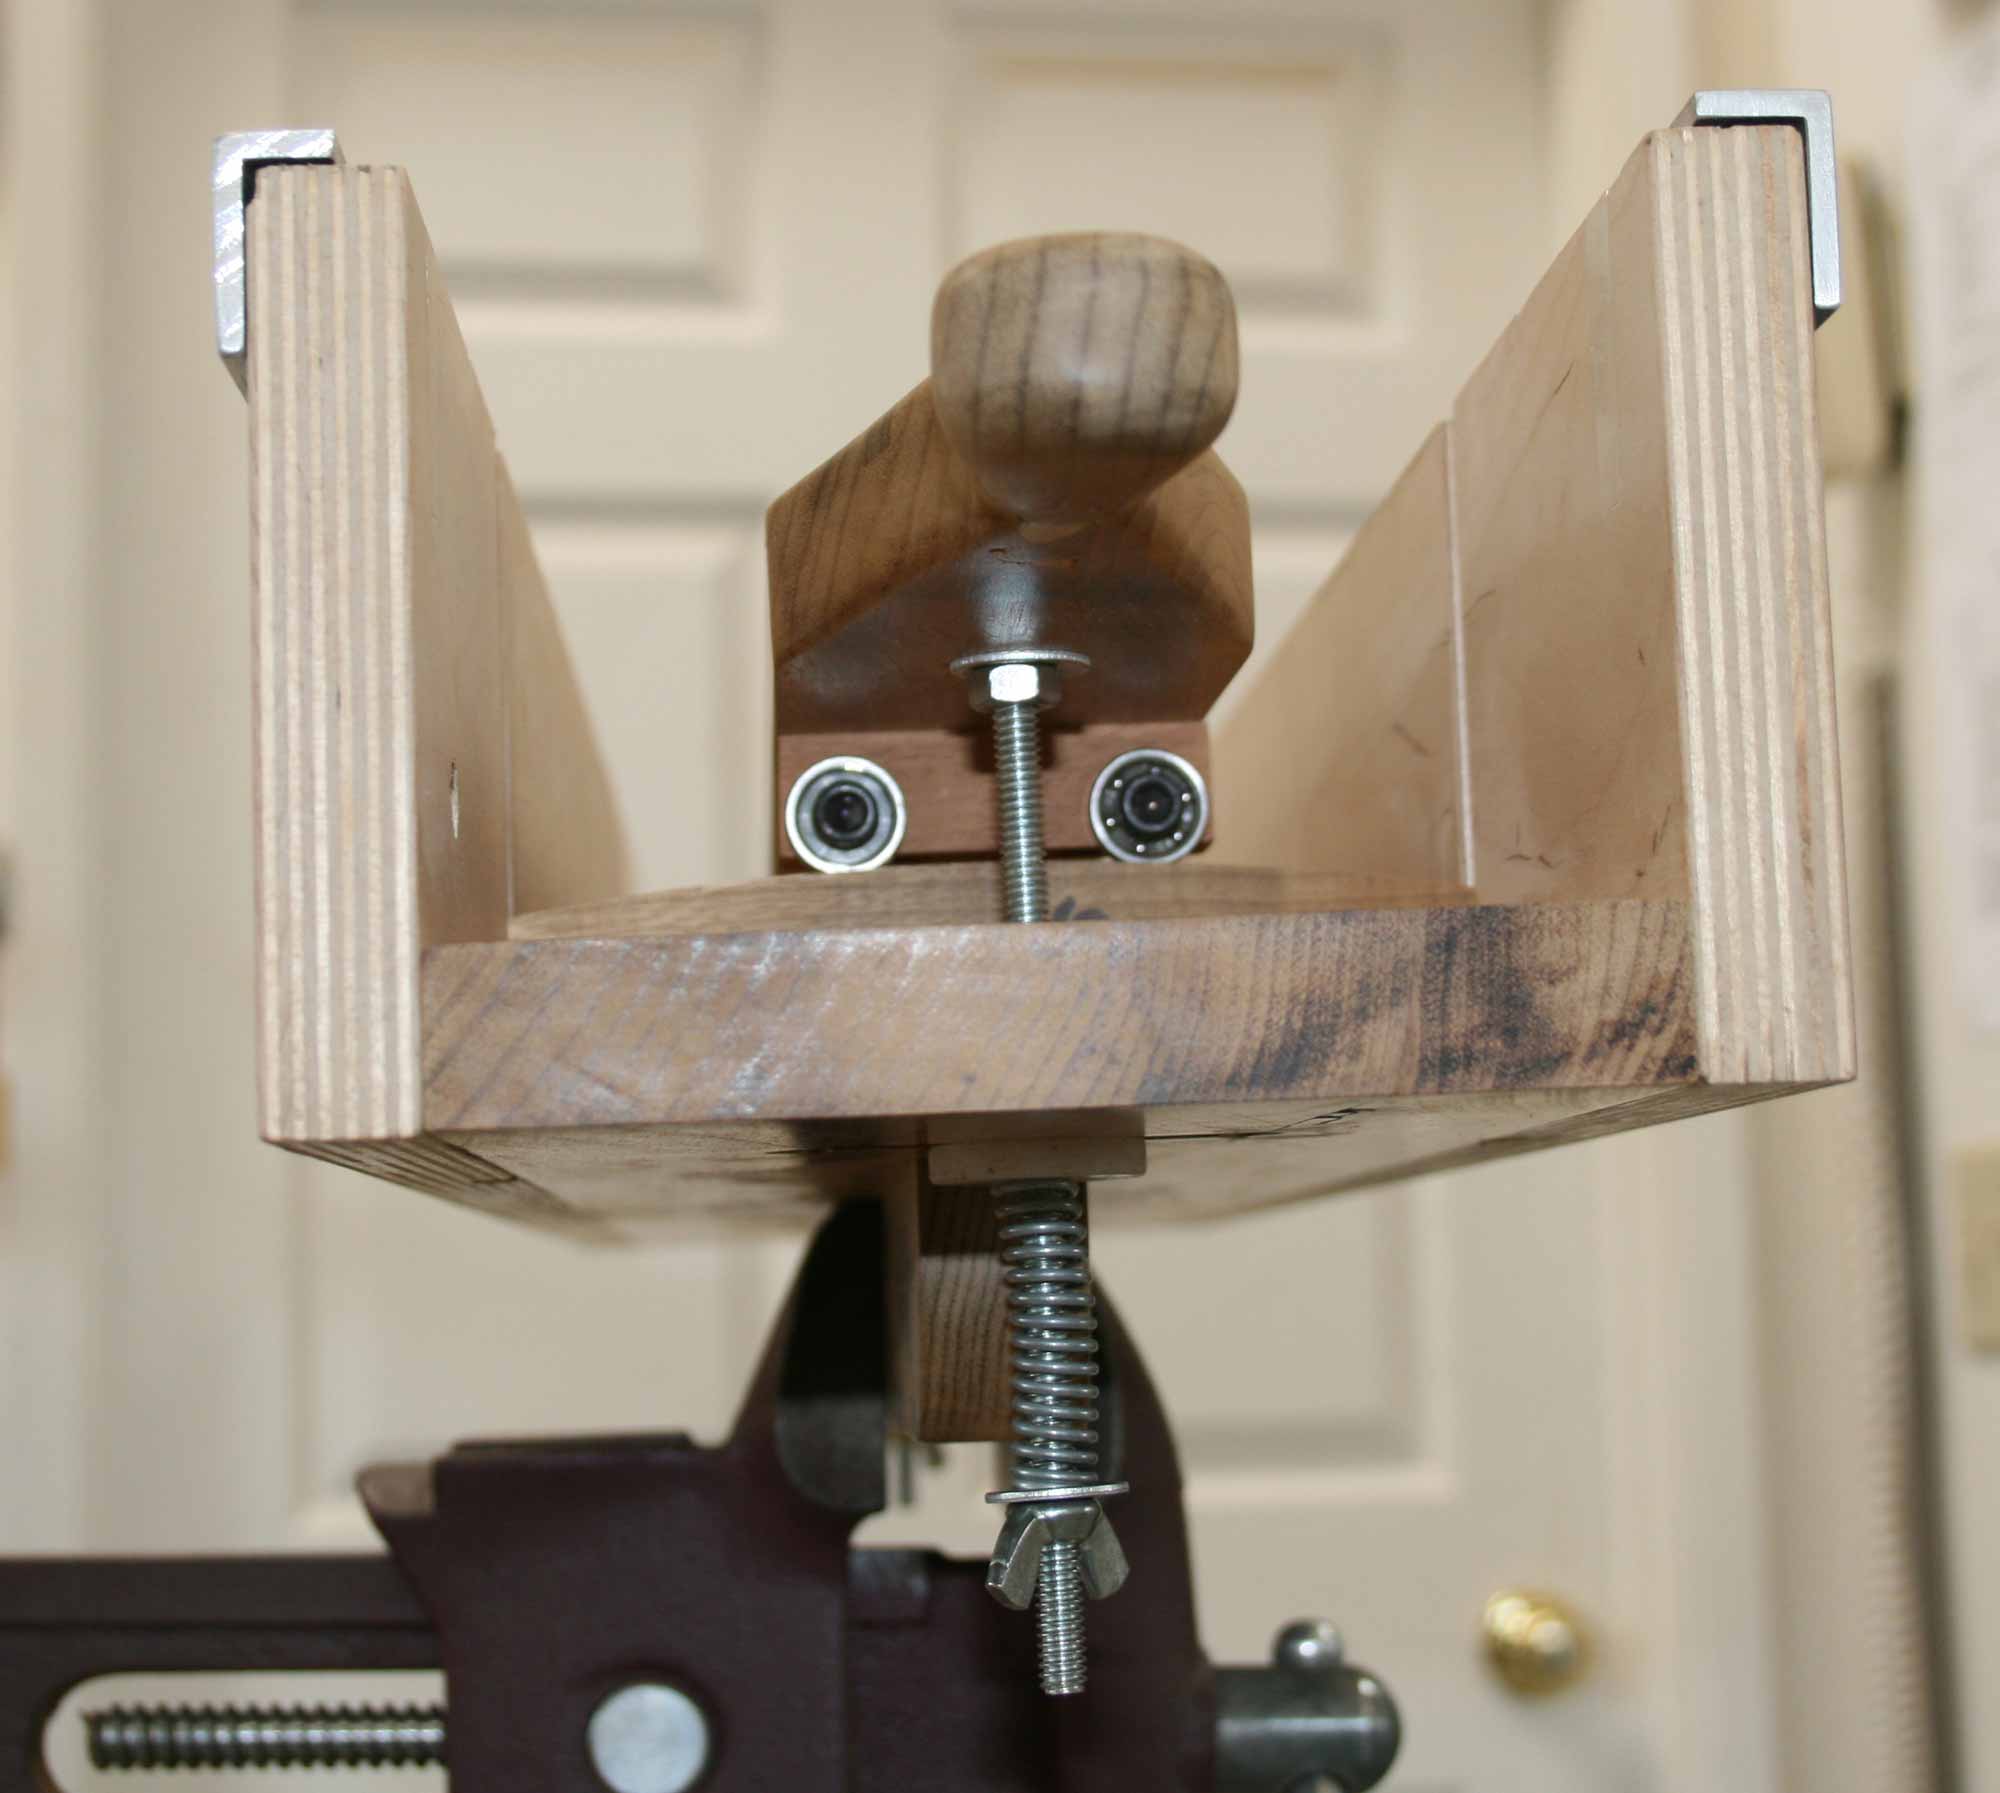 |
Slip the radius blocks in the box assembly and lower the carriage assembly down into the slots and fasten by placing the UHMW washer, spring, flat washer and wing nut as shown by the exploded view on the drawing. Adjust the tension so that the carriage moves easily but stays put when you release it. |
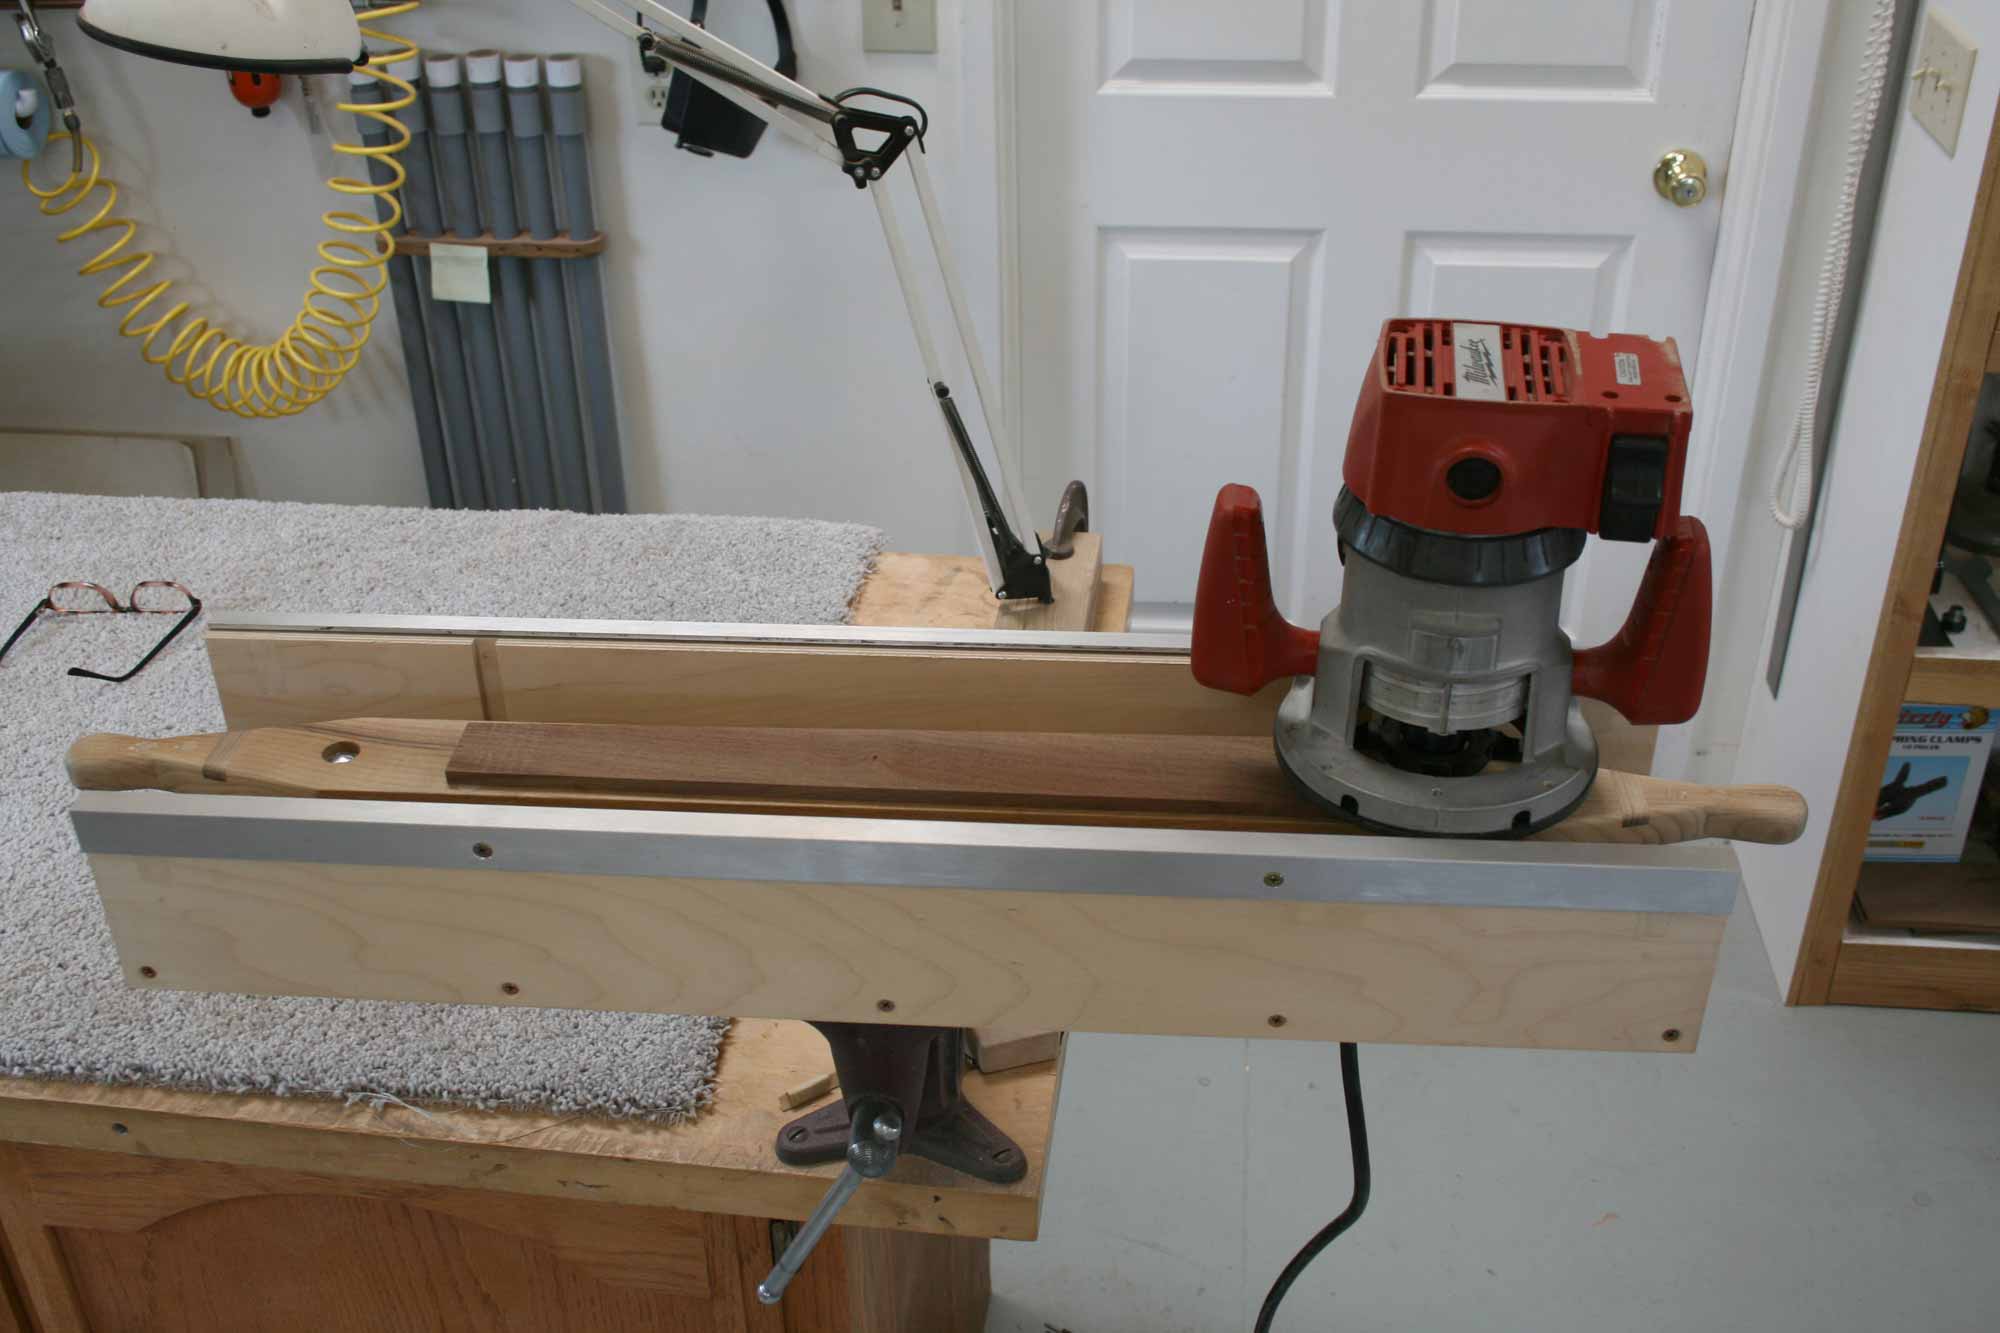 |
That's about it. The aluminum angle keeps the router from slipping off the edge of the box. Instructions for use are on the drawings. |
|
Neck relief is an interesting subject and one well worth exploring so that we can enjoy consistently great action on all of our instruments. The best time to deal with this is during the build, long before the frets are installed.
For the luthier to create “perfect” action, a fingerboard would have to be shaped the same as the string that is vibrating above it. Of course, the string does all kinds of crazy shapes and orbits after being plucked. One of its earliest and most fundamental forms is a parabolic curve.
We see this shape in suspension bridge designs and it is easy to observe if we suspend a chain or rope between two posts. It is much different than an arc in that it starts out fairly flat and then curves up quickly at the center of the span. Note the illustration below. I have exaggerated the scale of the curve by a factor of 10 to clarify what is happening on the guitar.
For us, the nut and saddle are the ends of suspension. The 12th fret is roughly the center. The actual relief is centered half way down from the center of the span, a mirror image of the location where we pluck the string on the other end. This is easy to prove to yourself: attach both ends of a very long bungee cord (say 20’ or so) to stable objects. Have a friend pluck the bungee about one quarter of the way down and observe what happens at the other end. You will see the exact same movement on your end mirrored around the mid point!
This imitates what is happening to the plucked string. So if we can shape the fingerboard to match, that is, start out with a fairly flat curve from the nut to the 6th fret then coming up more rapidly as it moves toward the 12th fret, we will achieve the best action. So the relief is concentrated toward the upper frets and is not evenly centered around the lowest point at the 6th fret.
These, of course, are fine points, but it is just a bunch of little things like this that make the difference between a good guitar and a great one.
|
|
|
Rick wrote an article for Guitarmaker magazine about this fixture that could be of further help. It is in issue #65. If you are not a member of ASIA (Association of Stringed Instrument Artisans), consider joining as this organization offers a lot of good information for luthiers. Click here |
|