![]()
Bolt-on Neck Kit Online Help
|
Bolt-on Neck Kit Online Help
|
|
The following is a pictorial help for the Bolt-on Neck Kit and is for use only for CoolTool customers who have purchased this kit ...click on the thumbnails to get a higher resolution photo. |
|
|
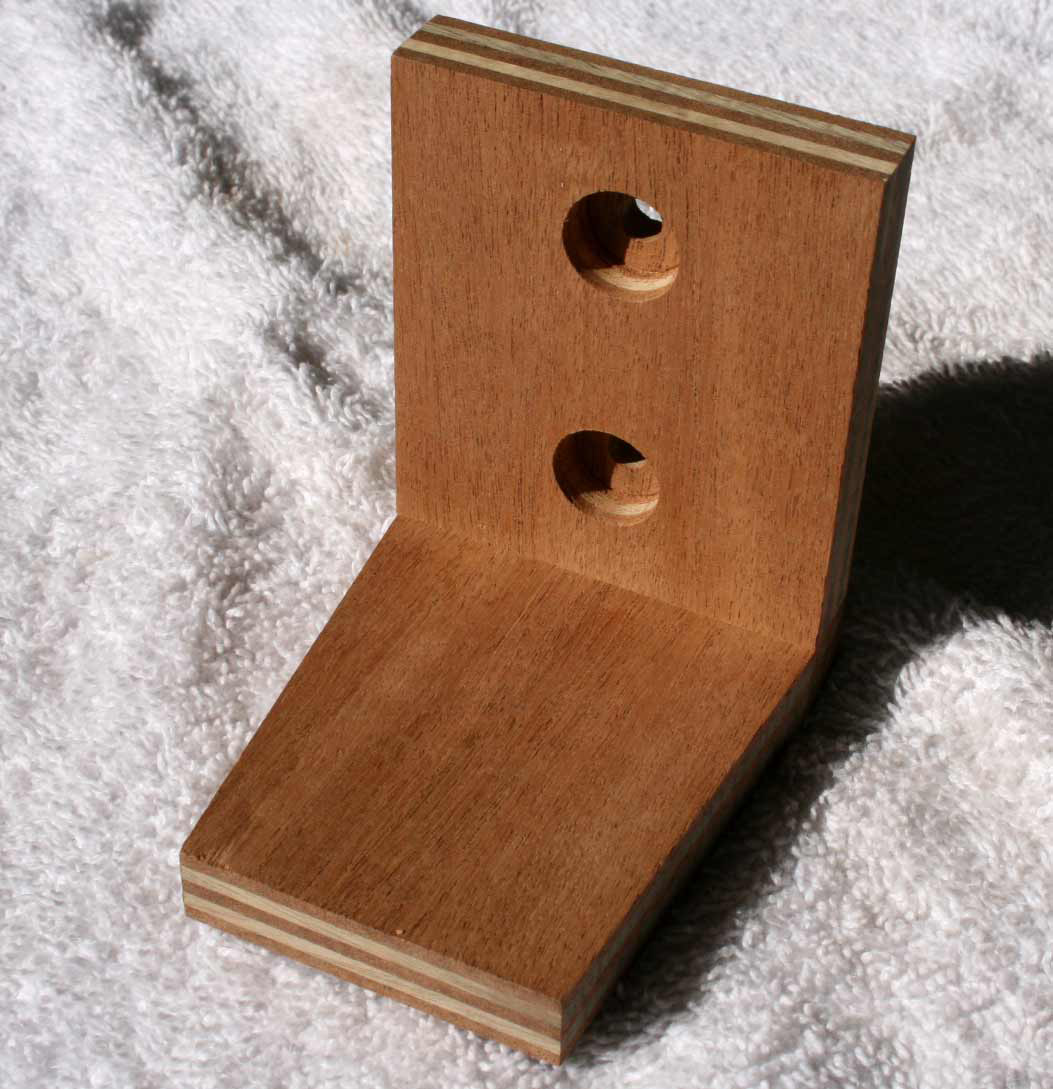
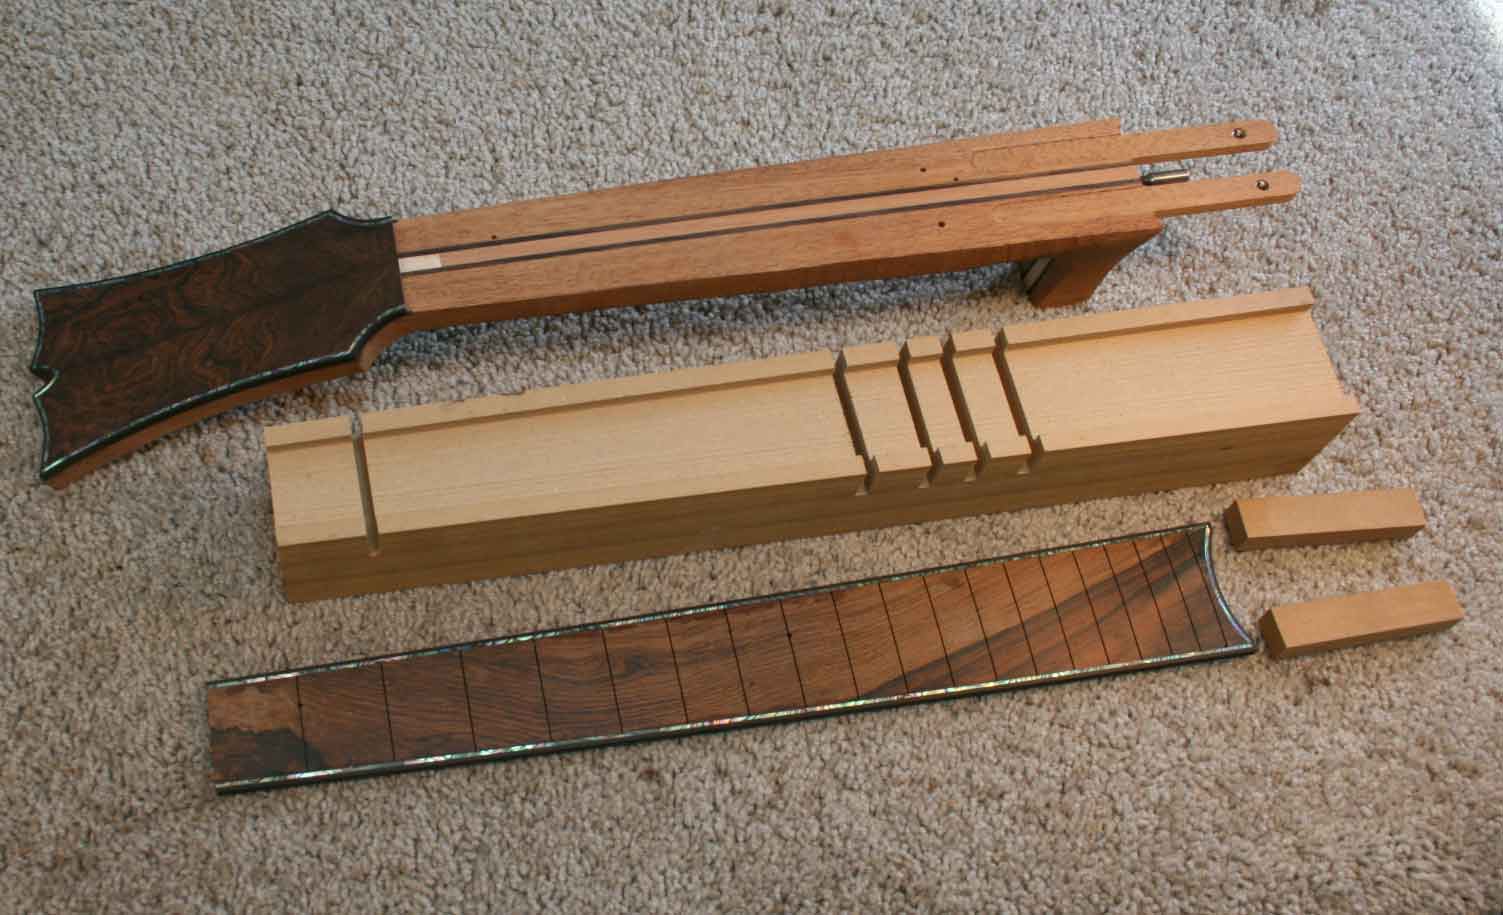
1. Make the Neck Block as shown in the drawings and glue the 2 pieces together. Contour the front of the block to match the curve of the body. |
|
|
2. Make the foot and set aside to glue on later. Any shape you like will work fine. |
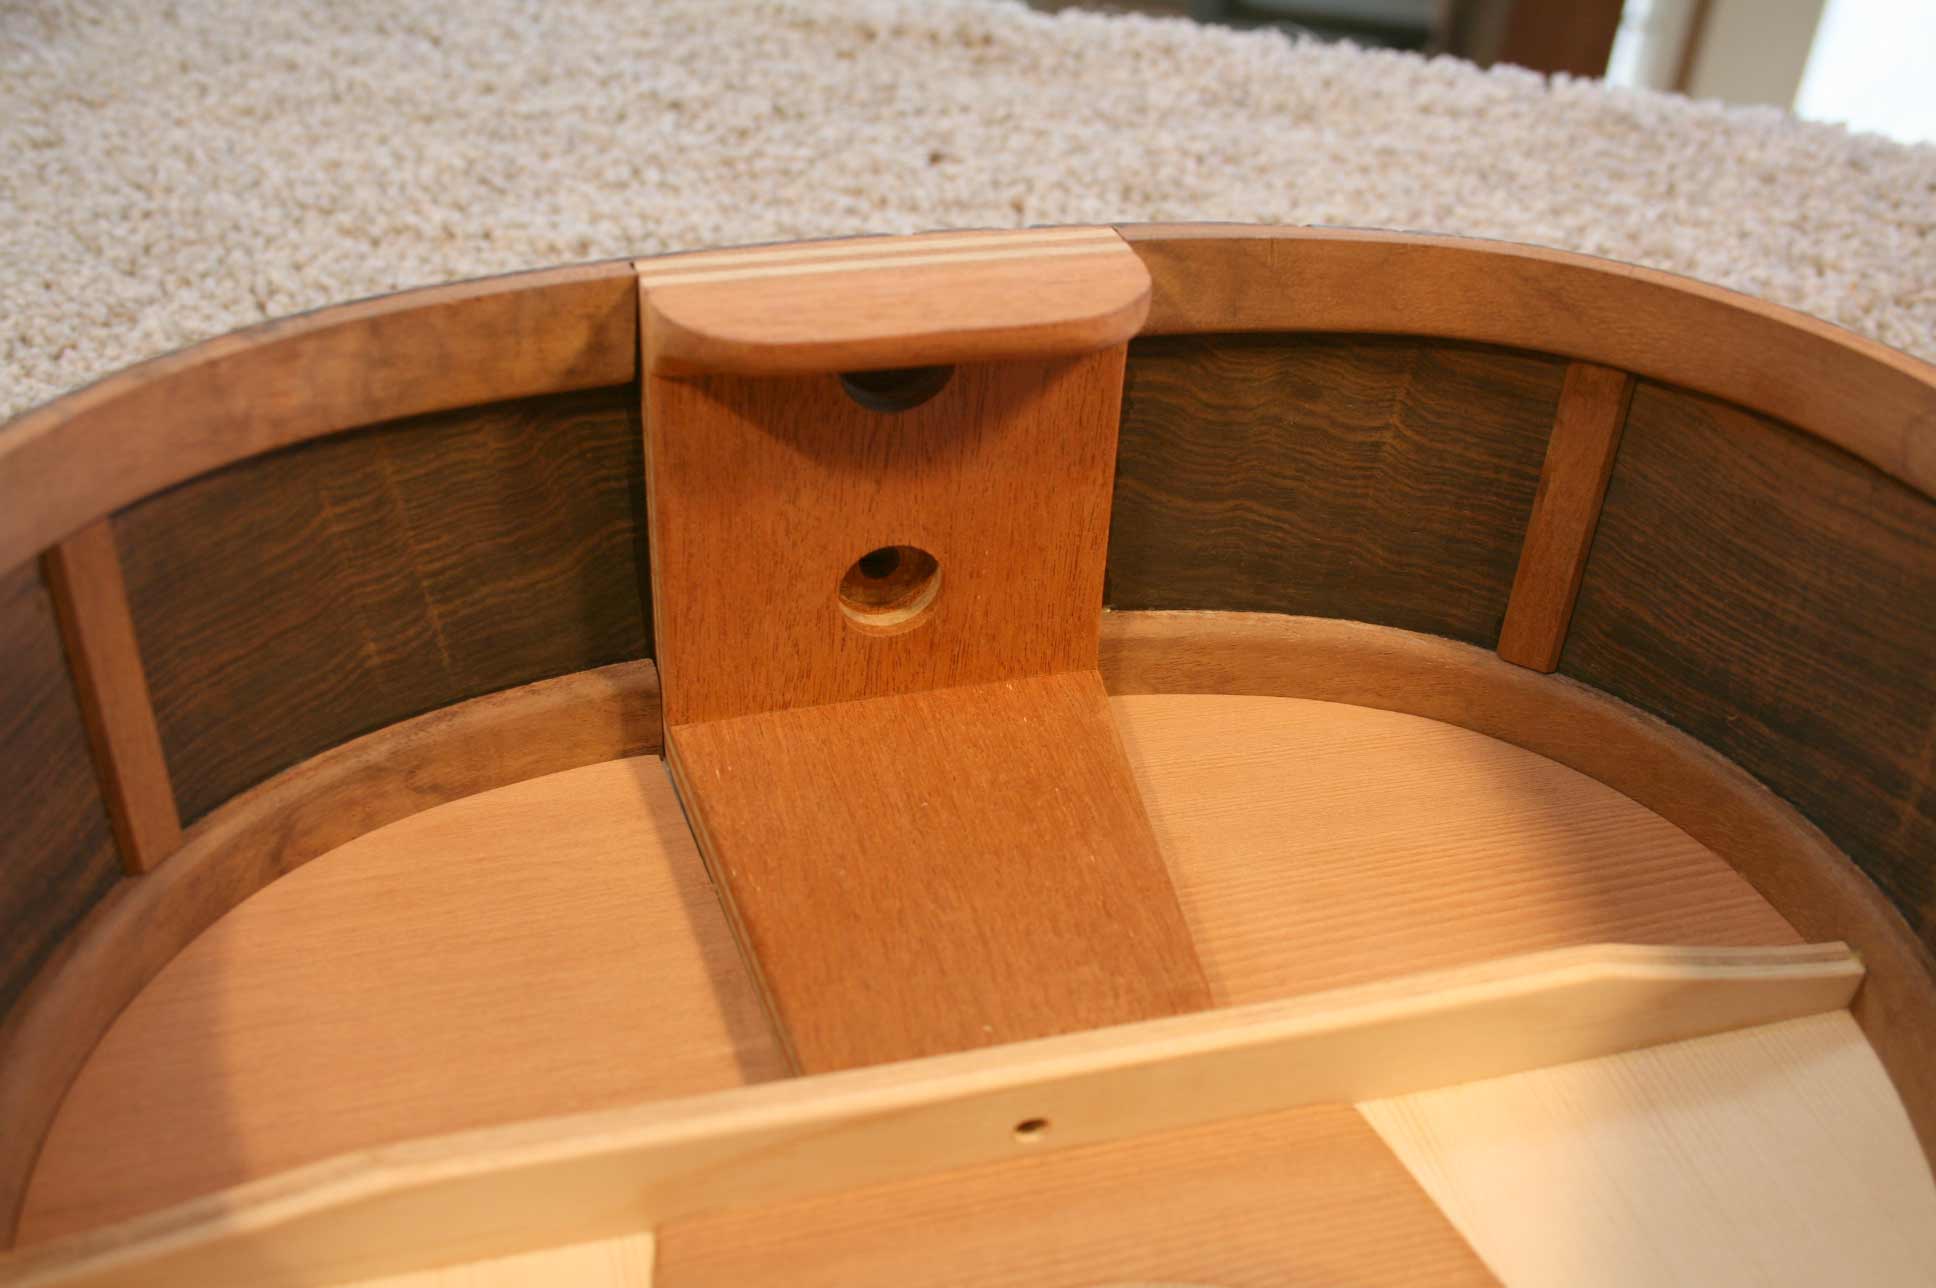 |
3. Glue the block assembly into the guitar body. Glue in the linings and the top. |
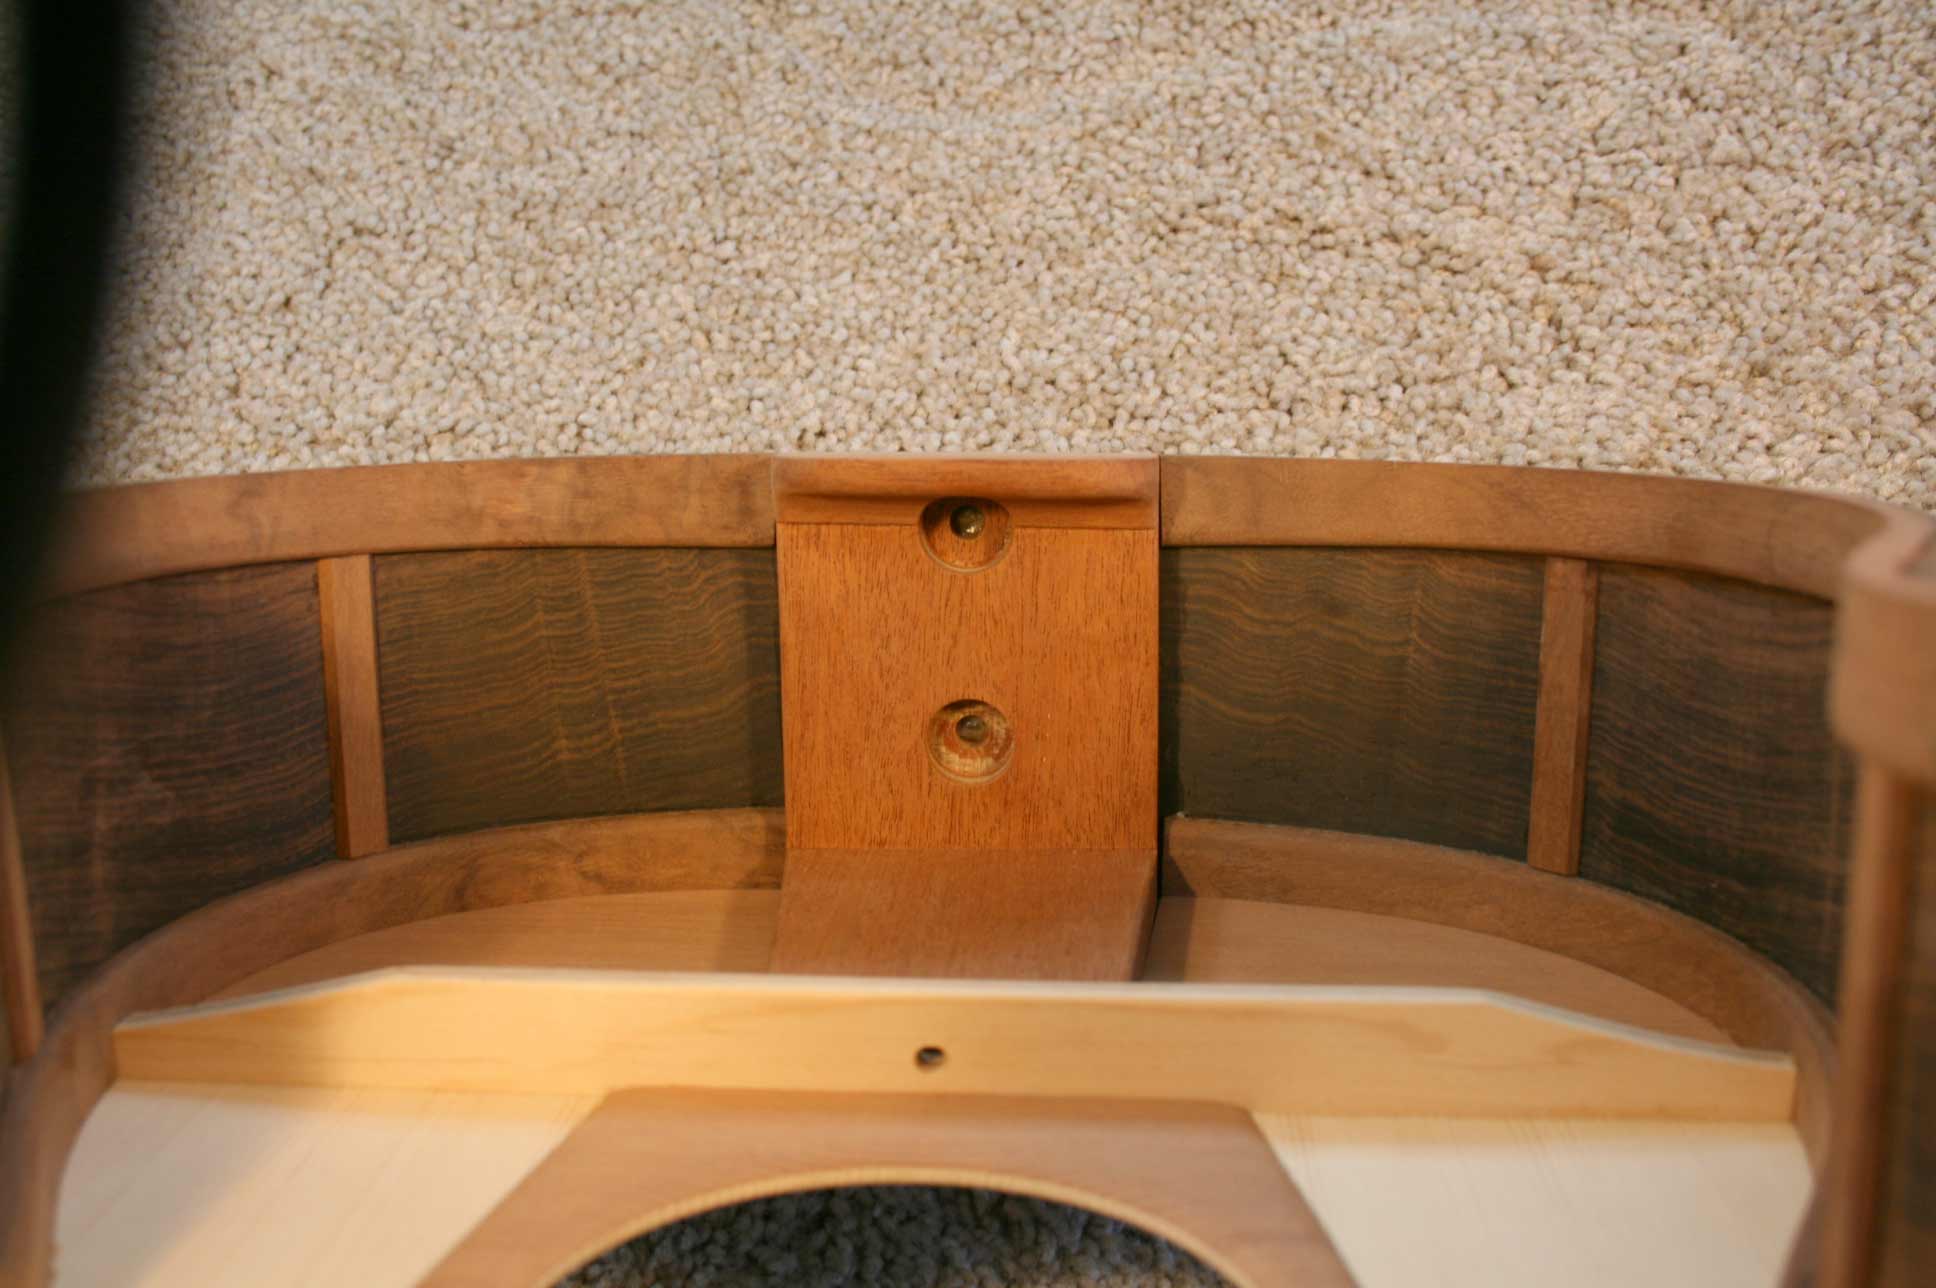 |
4. Glue the foot on...if the neck end of the body is not very deep such as this Parlor guitar, the foot will overlap one hole slightly. Remove a little material as shown to the edge of the counterbore. Radius the corners of the foot. The foot should project up past the neck block 1/16" or so to reach the dome height. |
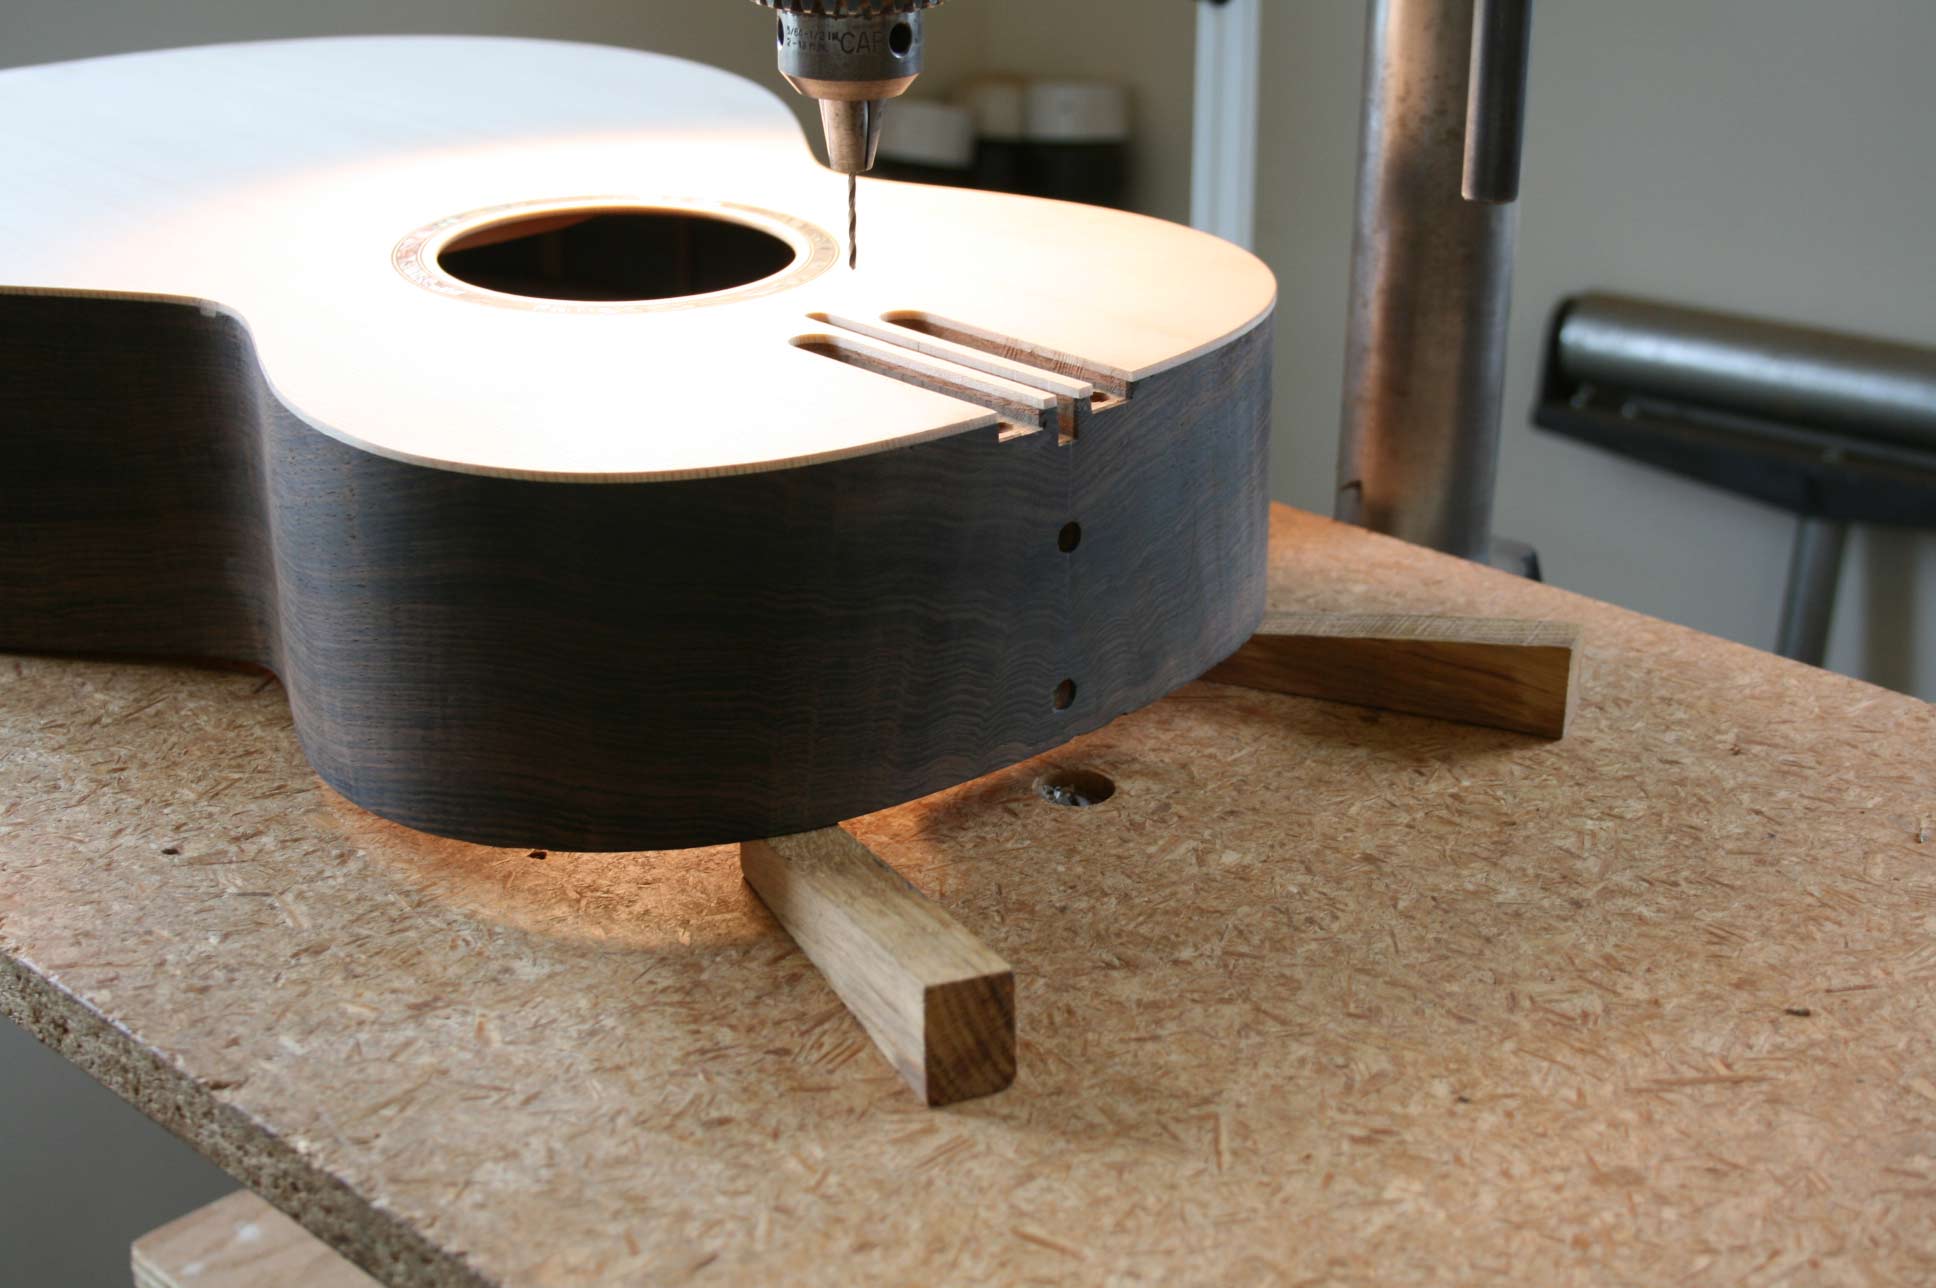
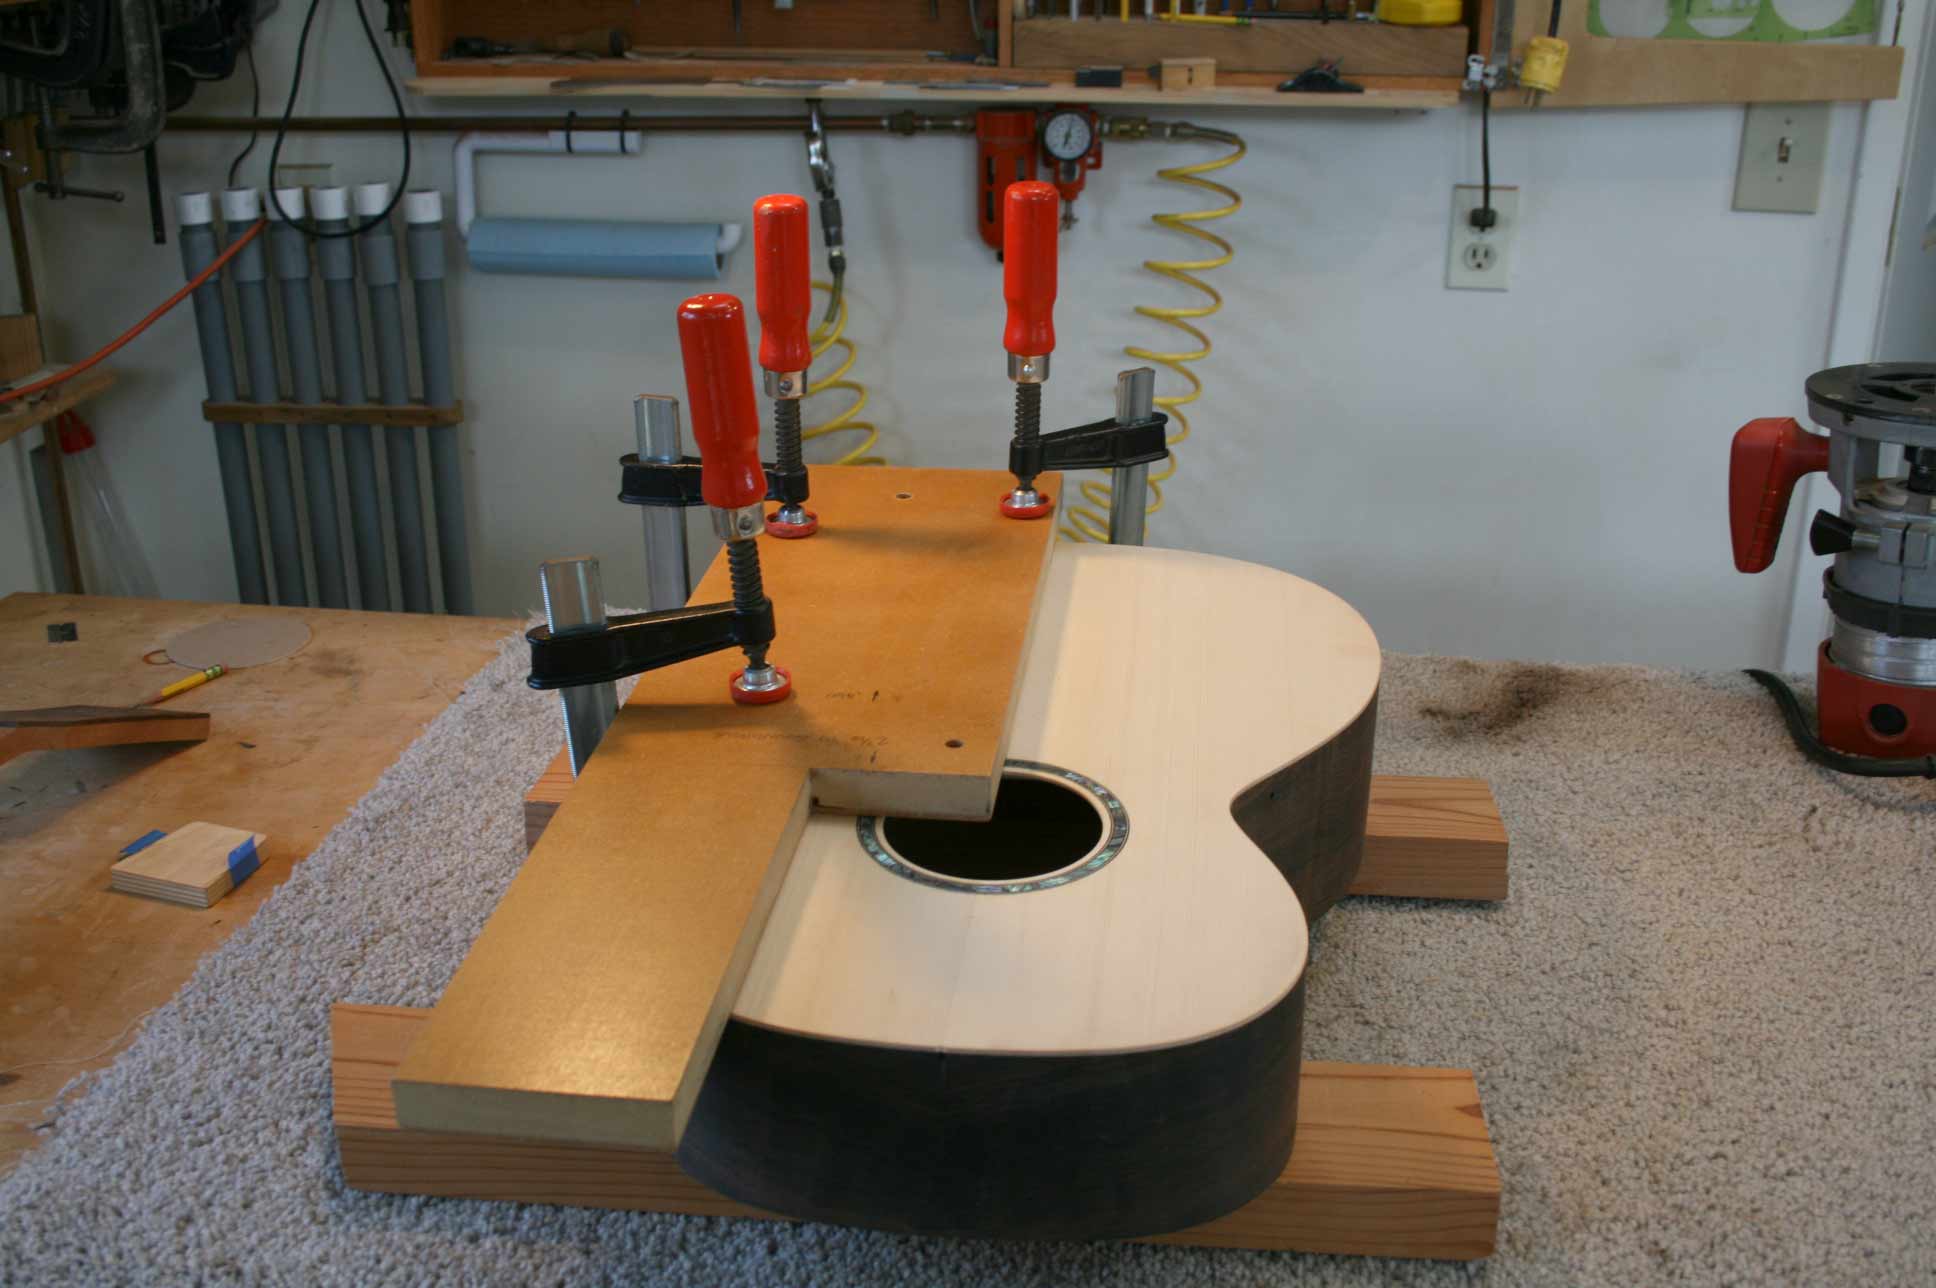 |
5. Router the body for the truss rod for internal adjustment. Use a router fixture that locates the slot dead-center on the top. We use a 2-way, 1/4" wide truss rod available from Allied Lutherie. Those are our favorite because the adjustment is very precise. On the center line of the guitar, router a 1/4" wide flat bottom slot .460" deep to near the end of the block. Carve the rest out with a chisel.
|
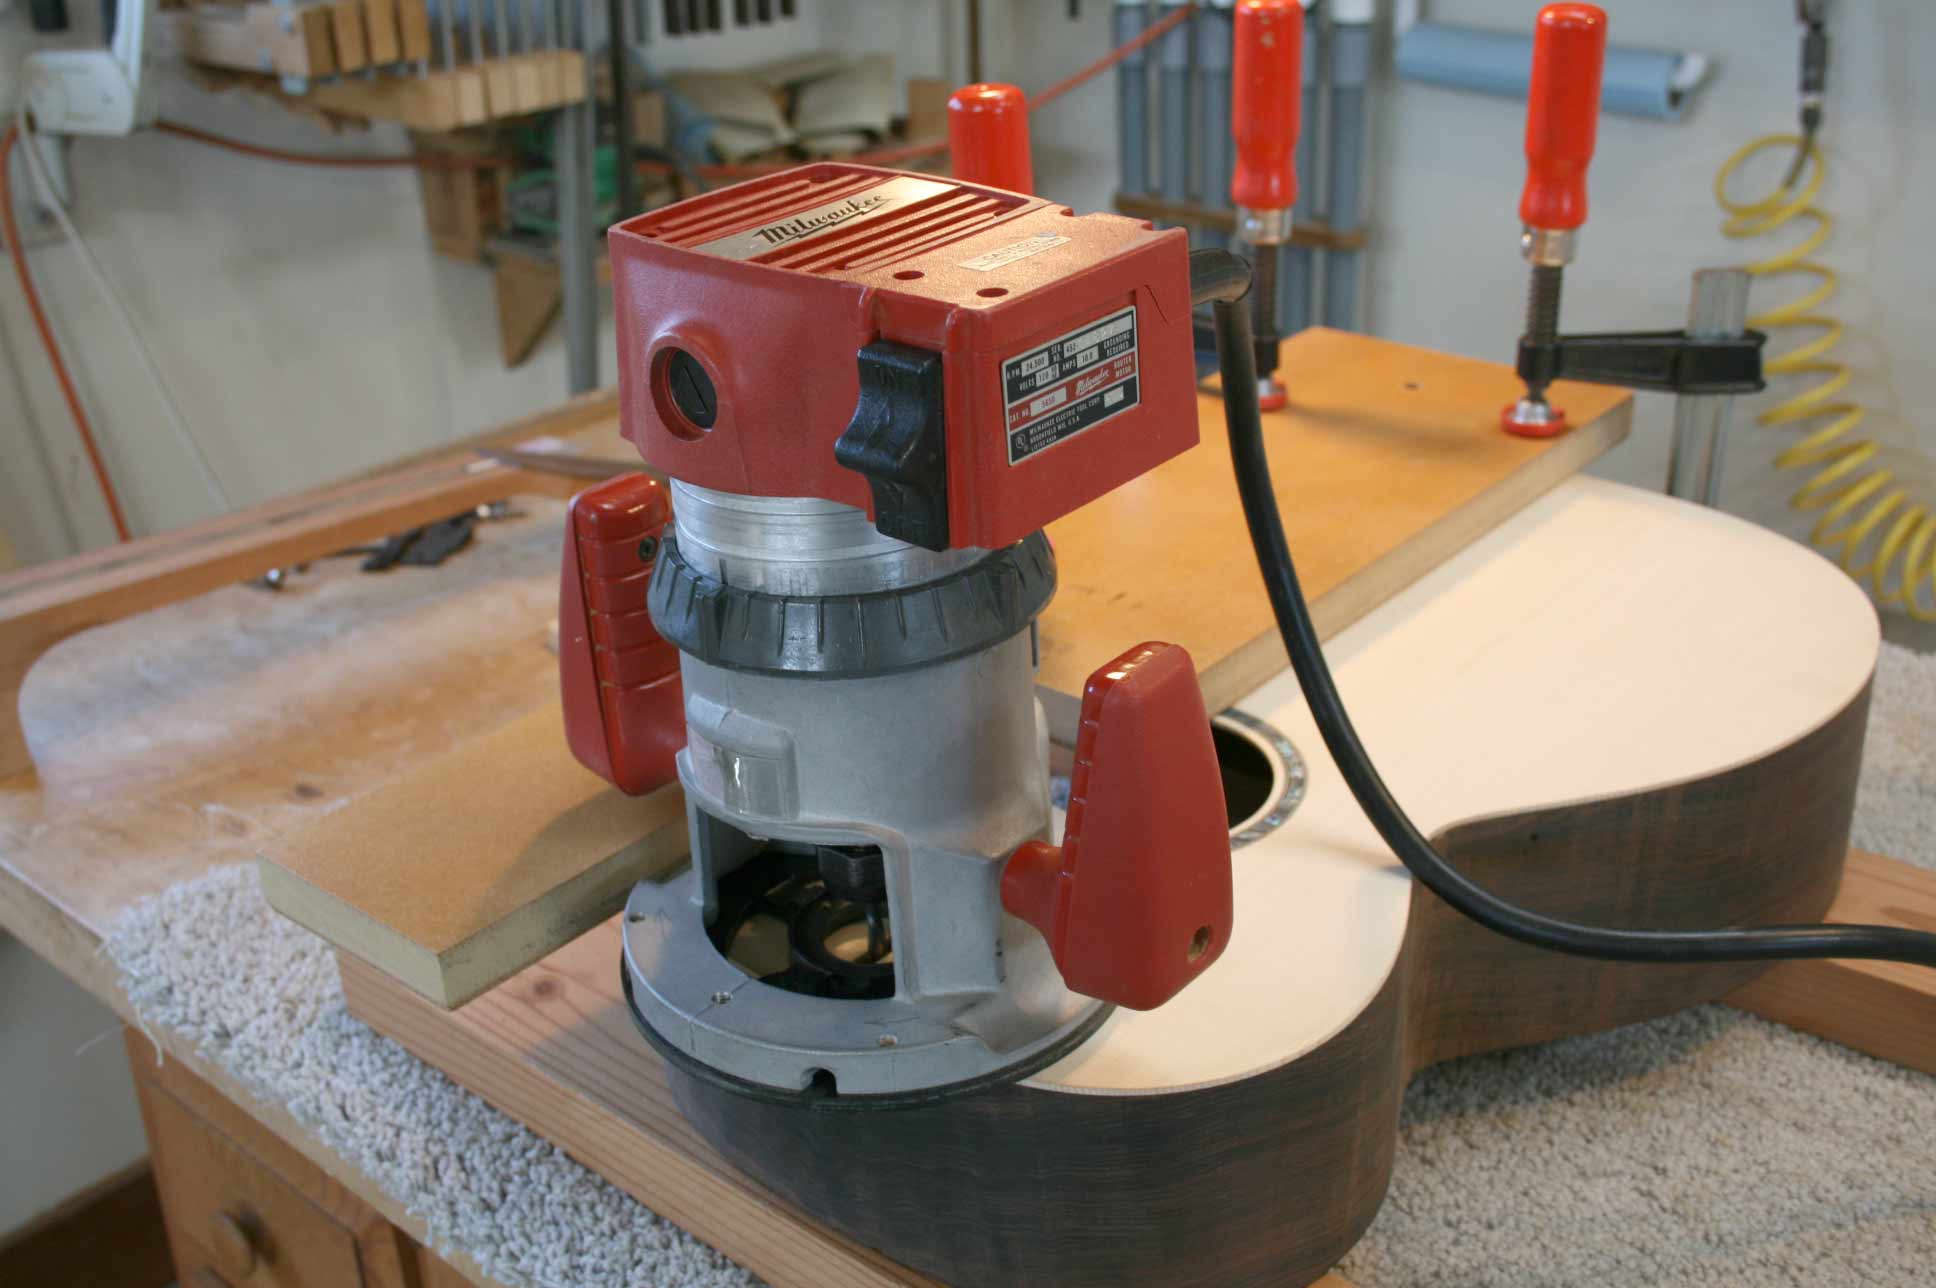 |
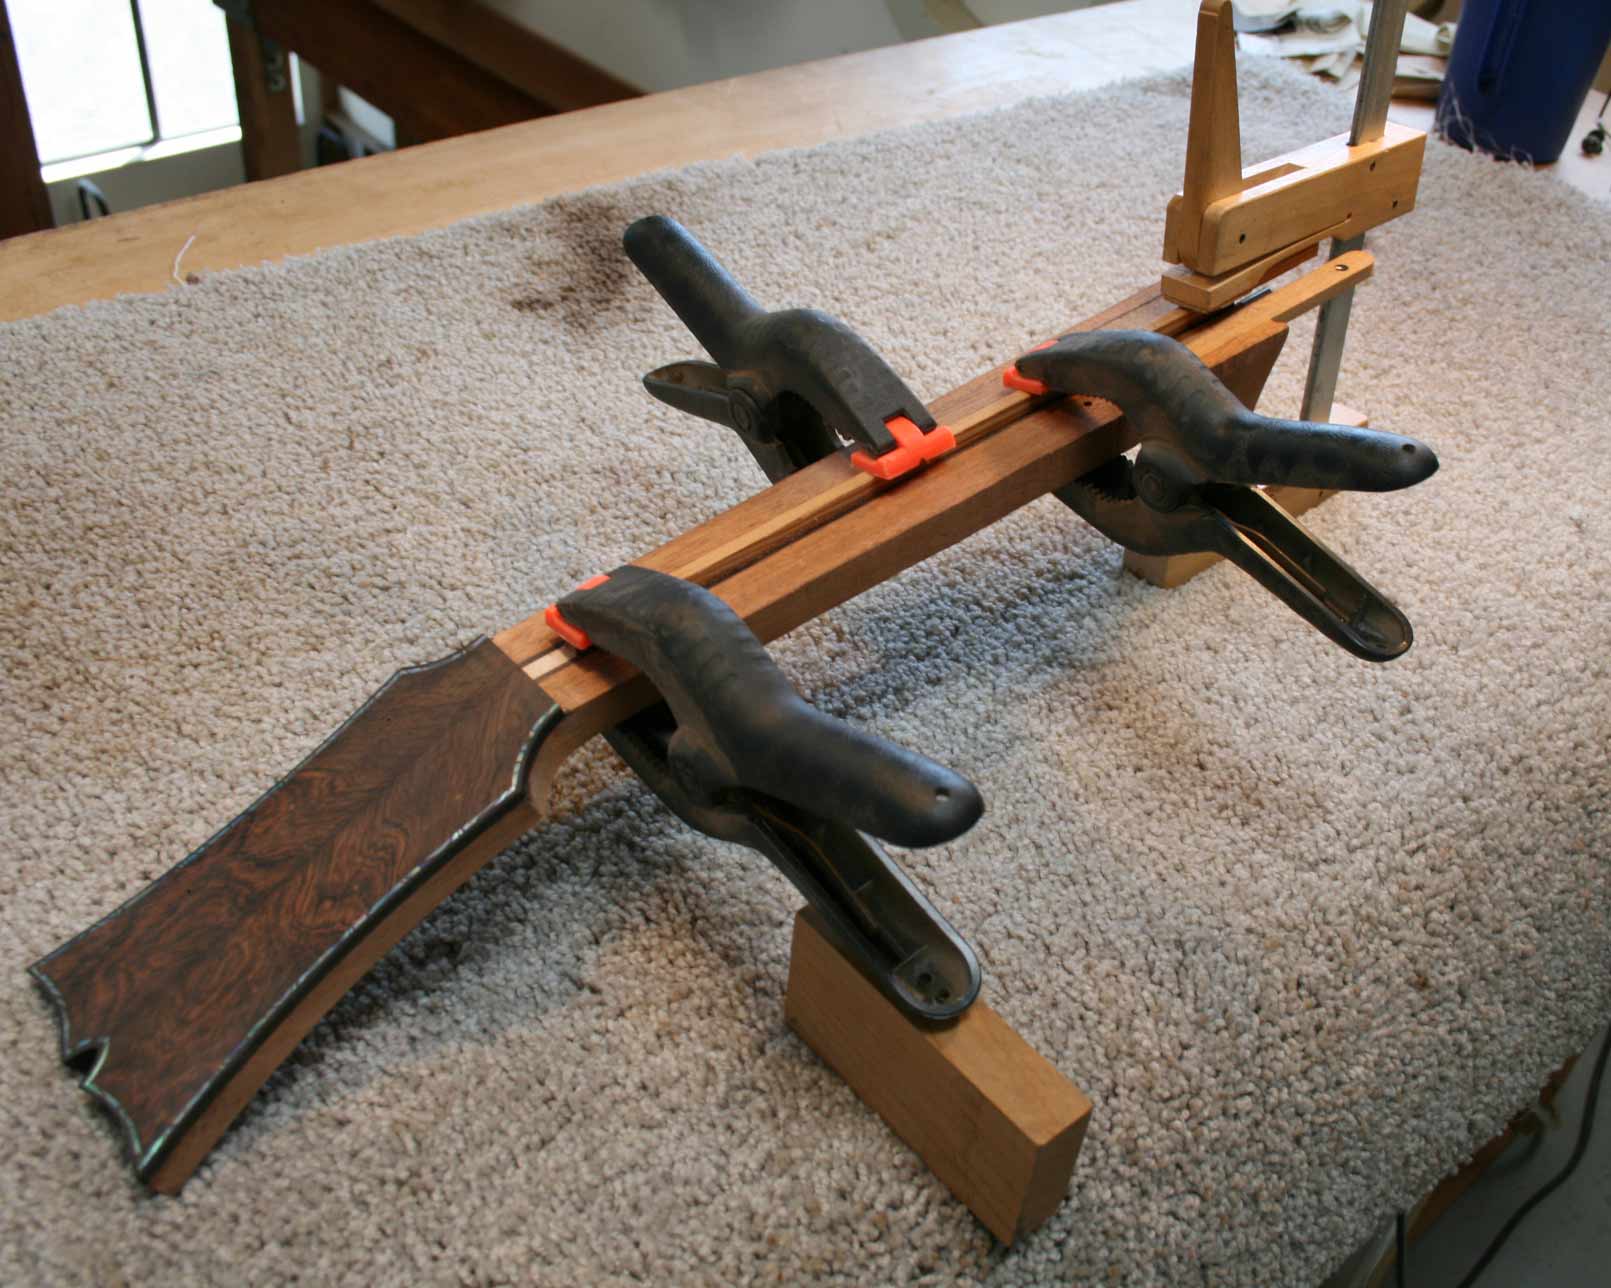
We go about half way on the first pass and full depth on the second pass. On to the neck...it should be completed to the point of gluing on the fingerboard. |
 |
6. After plowing a round bottom slot in the neck, 1/4" wide, .400" deep, rough out the neck and heel. The heel and cap pattern on the drawings is very useful here. Draw lines parallel to the heel contour 1/8" in from the edge. With your dremel, remove the material to near the lines and finish with a chisel. The depth could be .050" to .090" depending on the 'roundness' of the body where it meets the neck. It just needs to clear it. (Allied Lutherie has step-by-step instructions for installing the truss rod, more on that later)
|
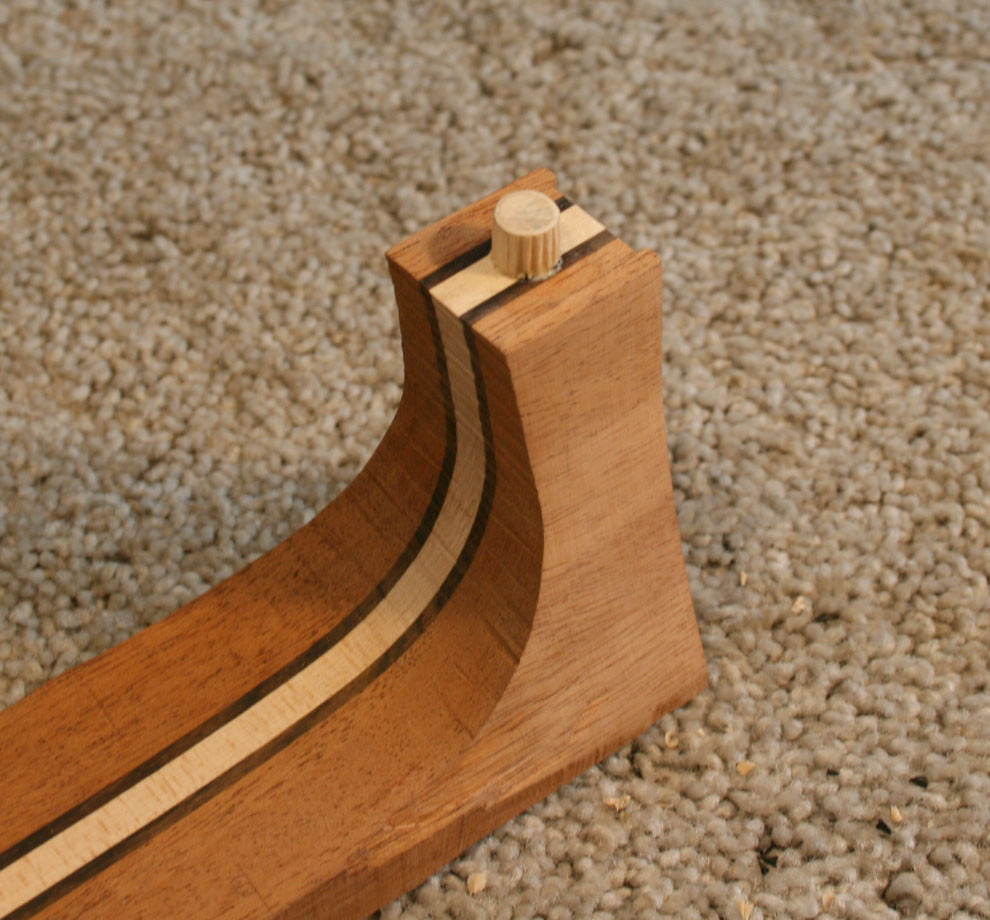 |
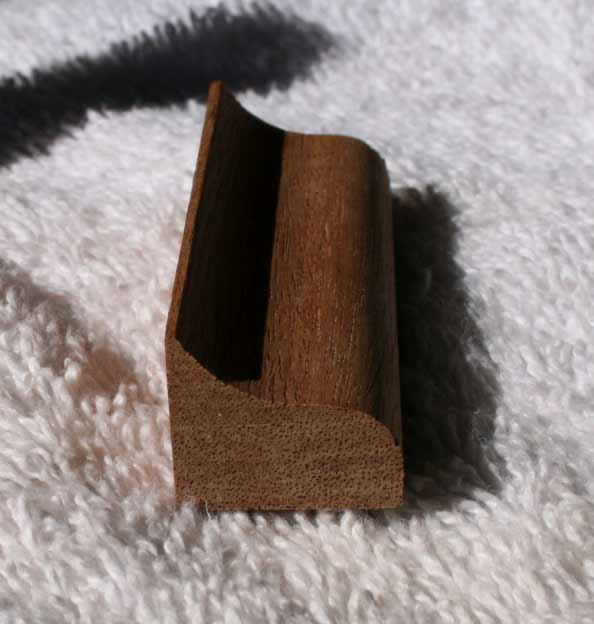
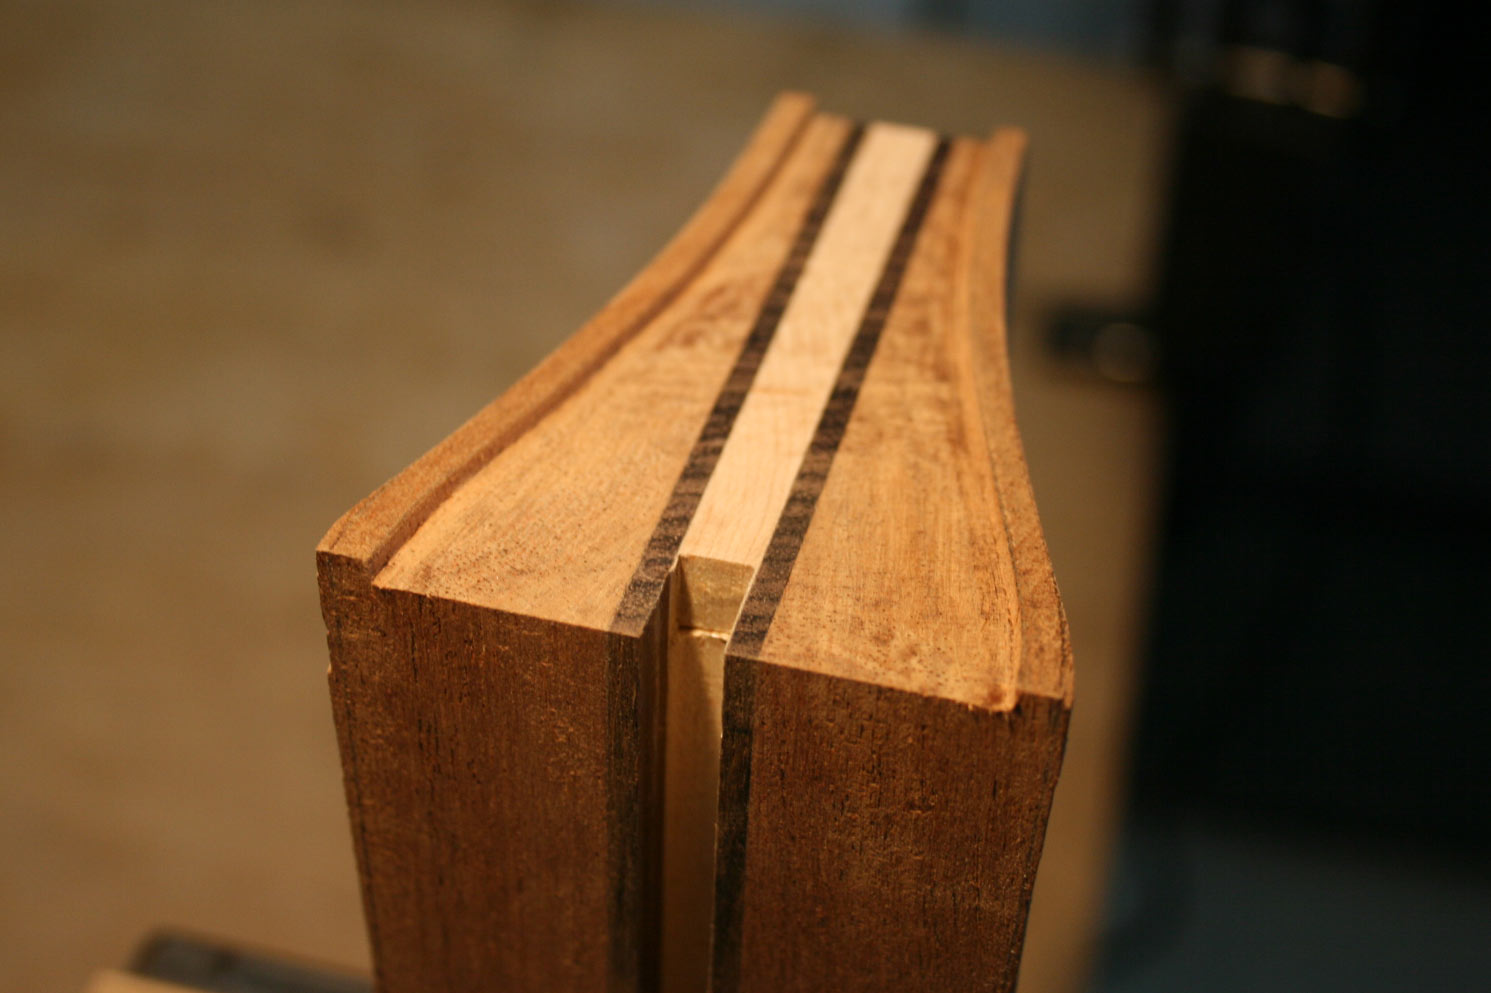
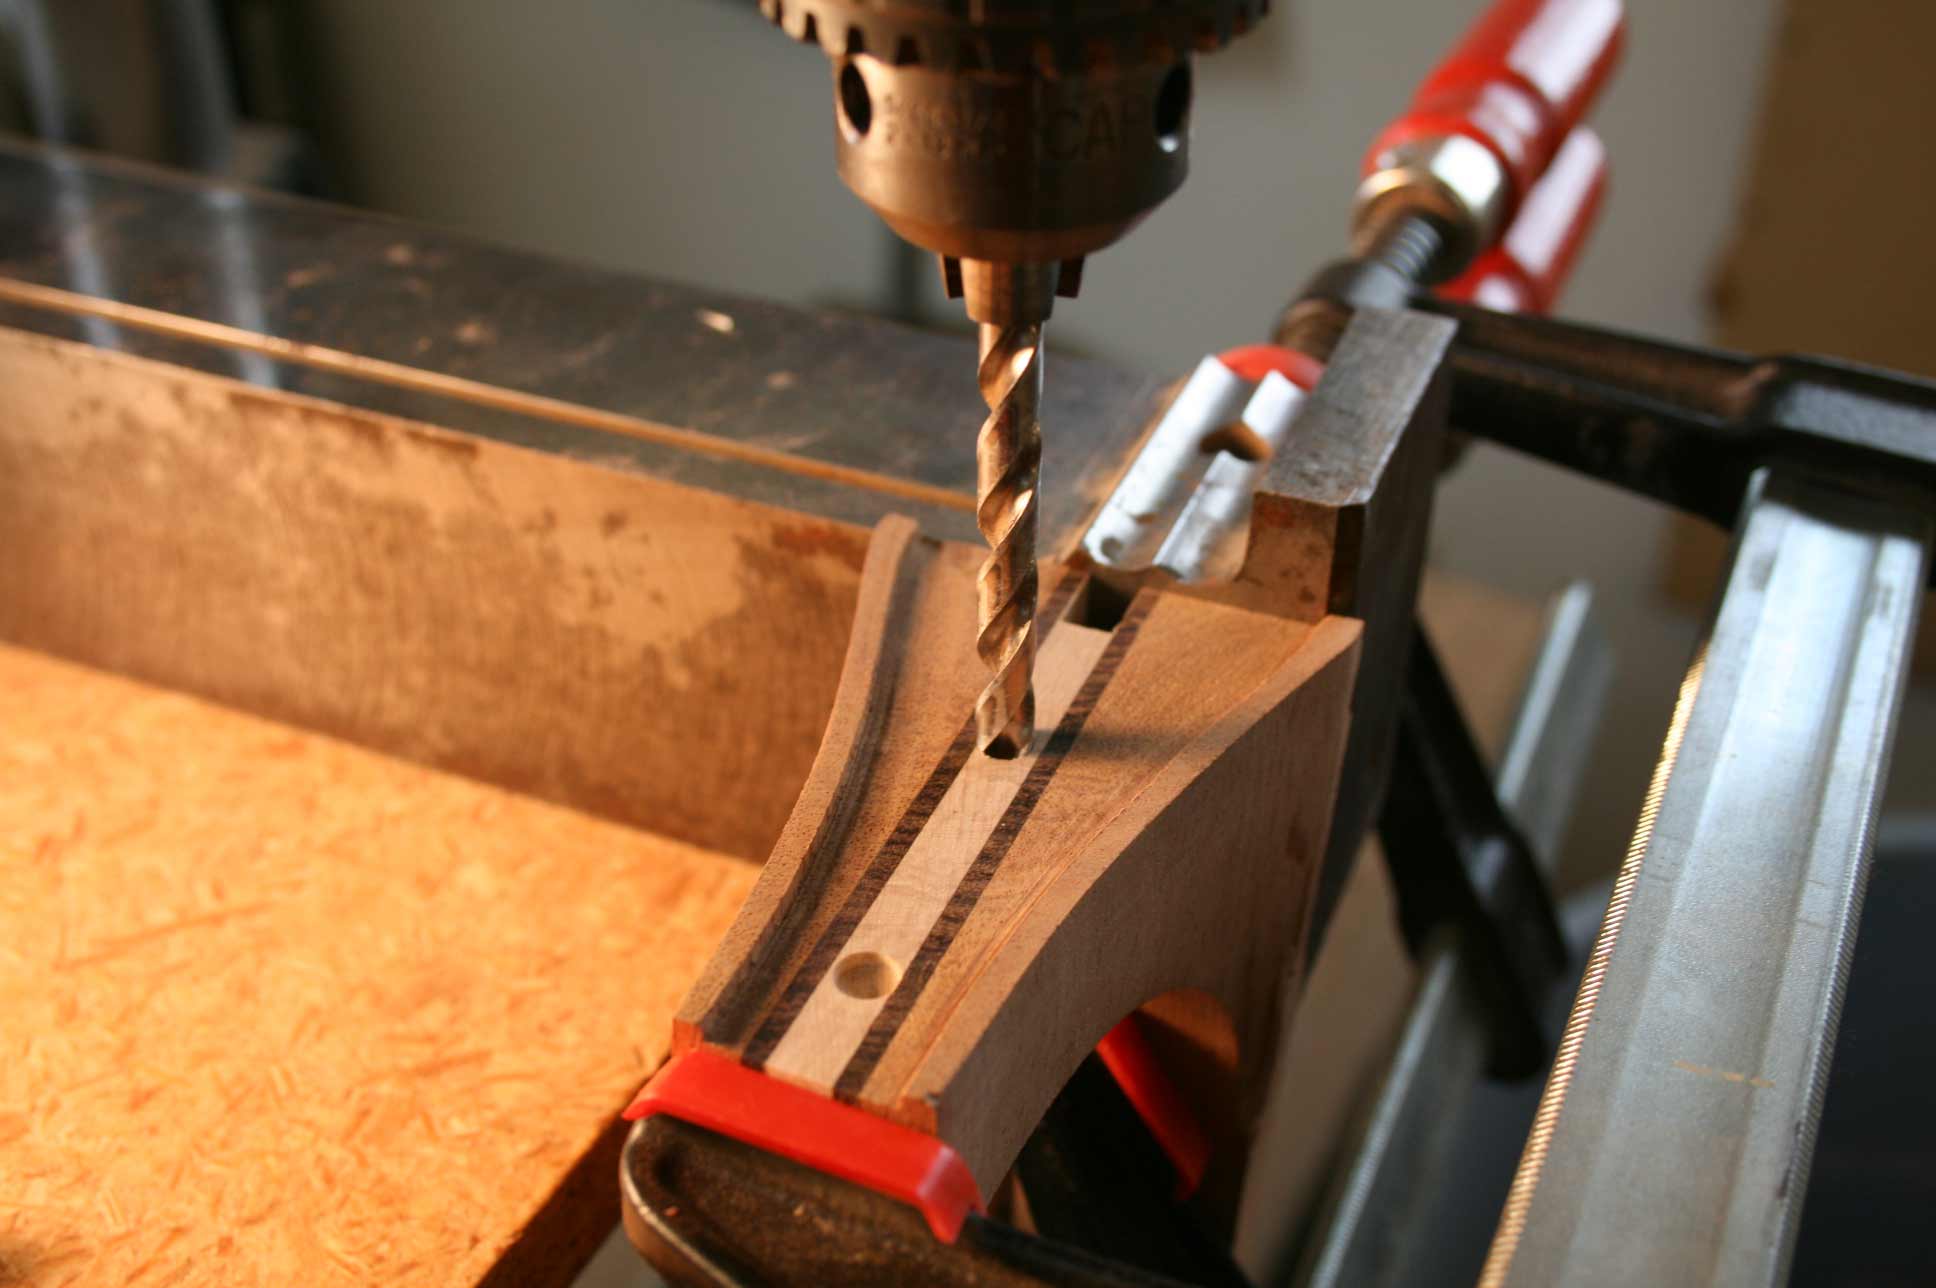
7. Drill a 3/8" diameter hole for the fluted dowel. The preferred dimension from the heel at the body joint is 9/16". Glue in the dowel. |
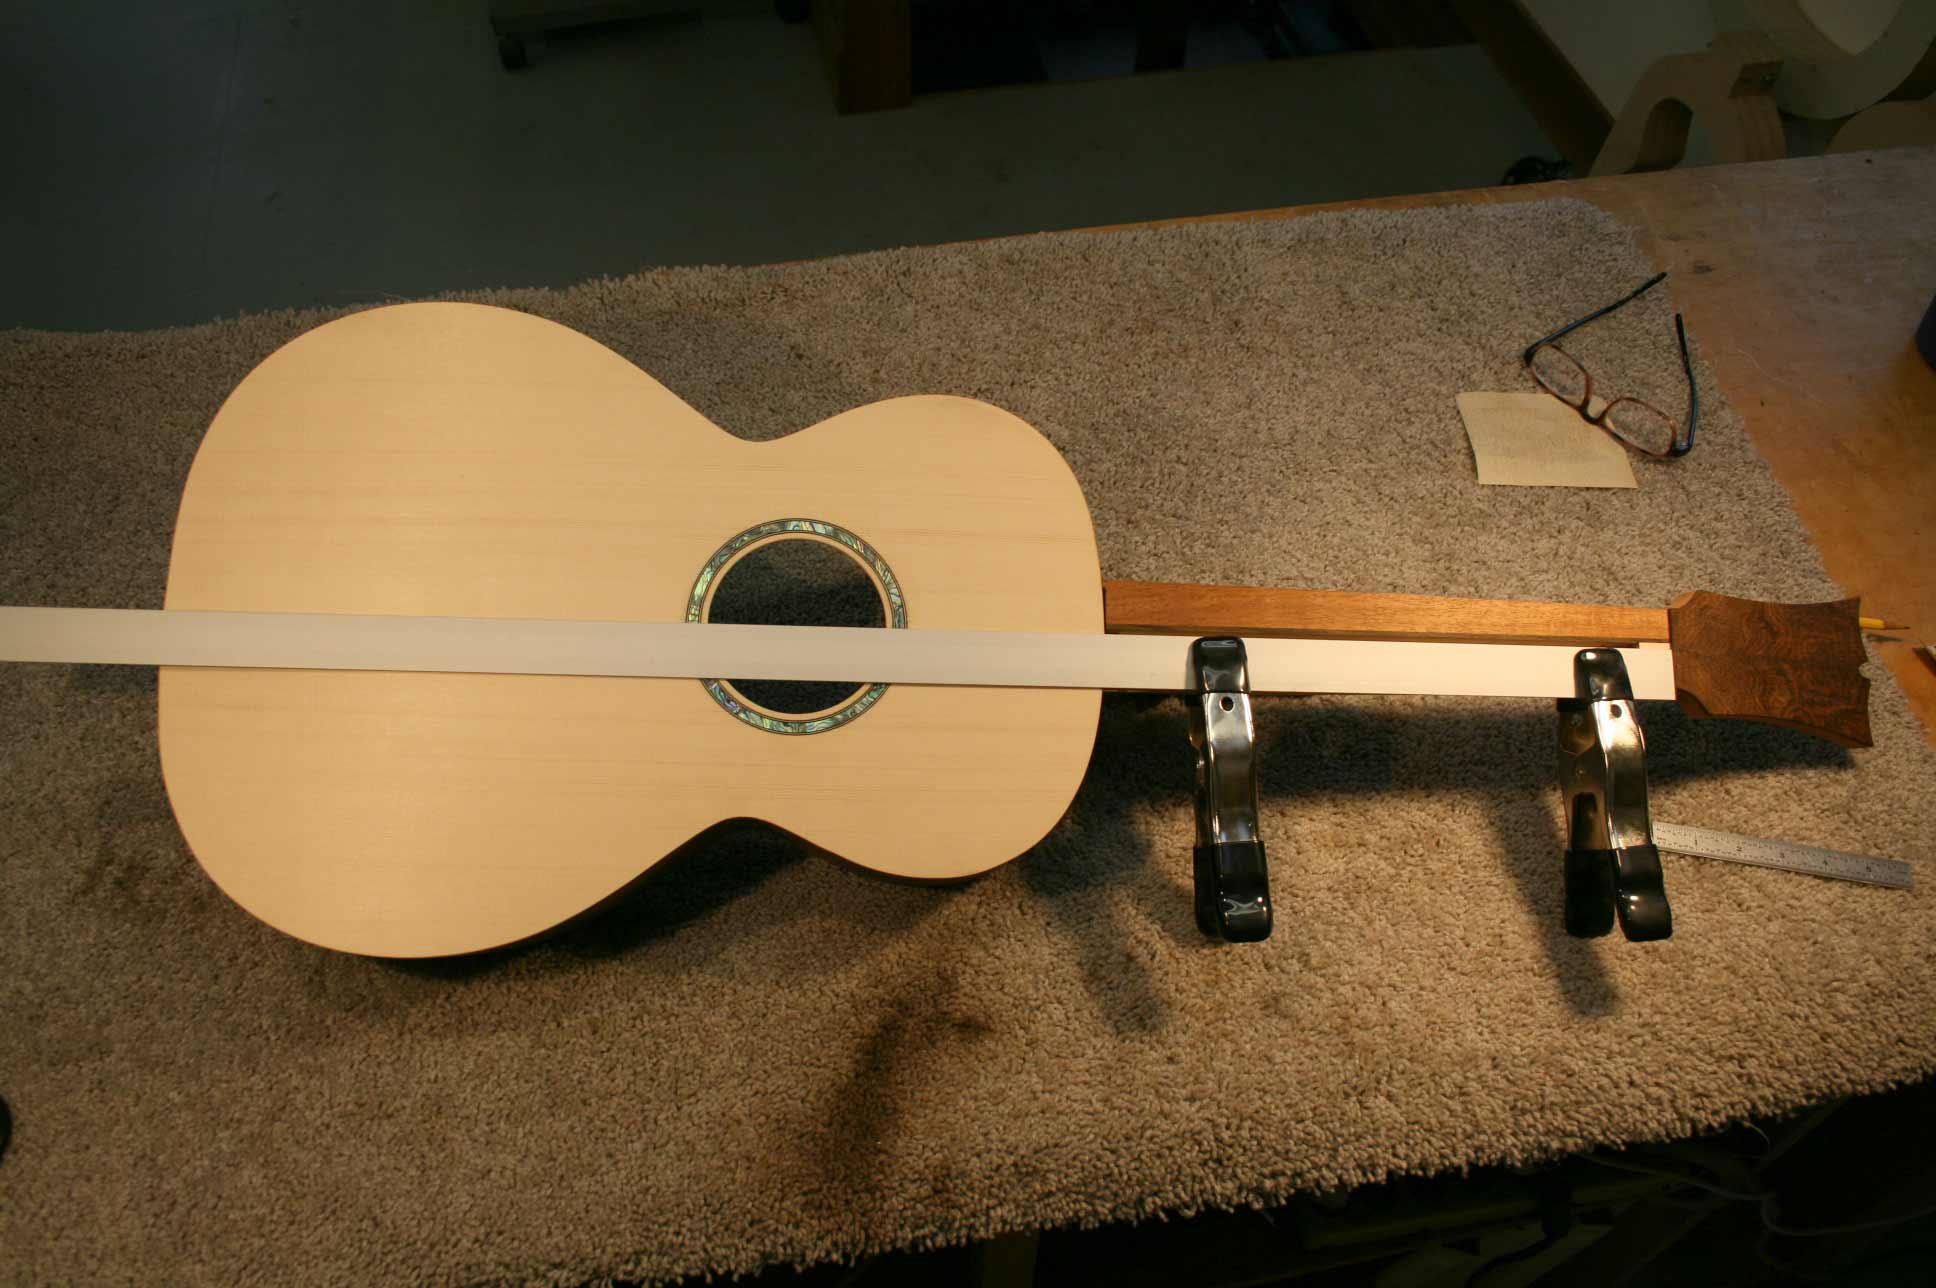 |
8. Temporarily clamp the neck to the body and check the alignment to the center of the body near the butt. It should be within 1/32" or so. Remove material off the bass or treble side of the heel as required. |
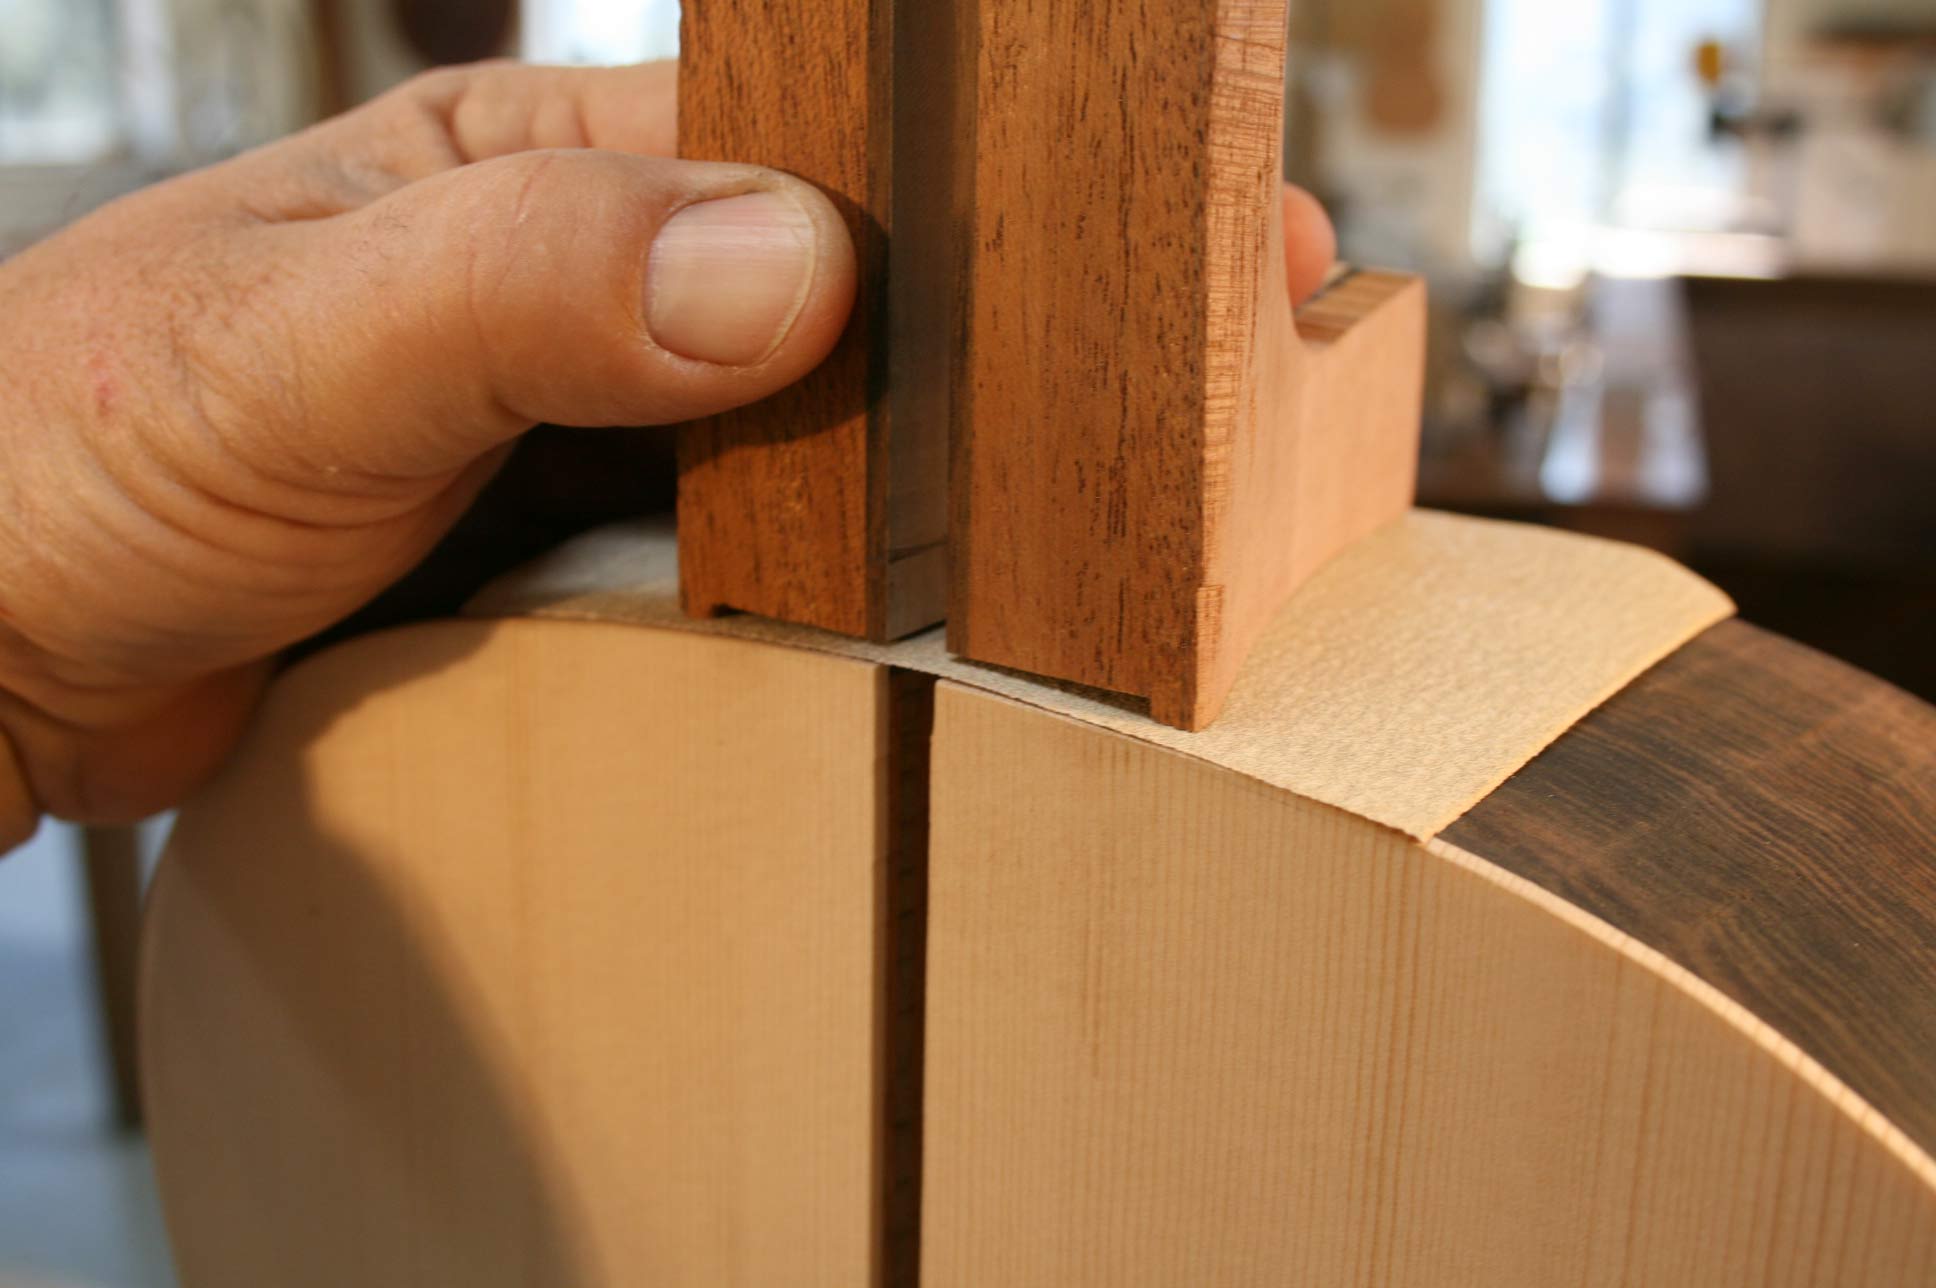 |
9. Check the fit of the neck to the body. Place a piece of 120 grit on the body and gently rub the neck back-and-forth until it matches the body. This is why I leave the neck just a little bit long at the body fret. |
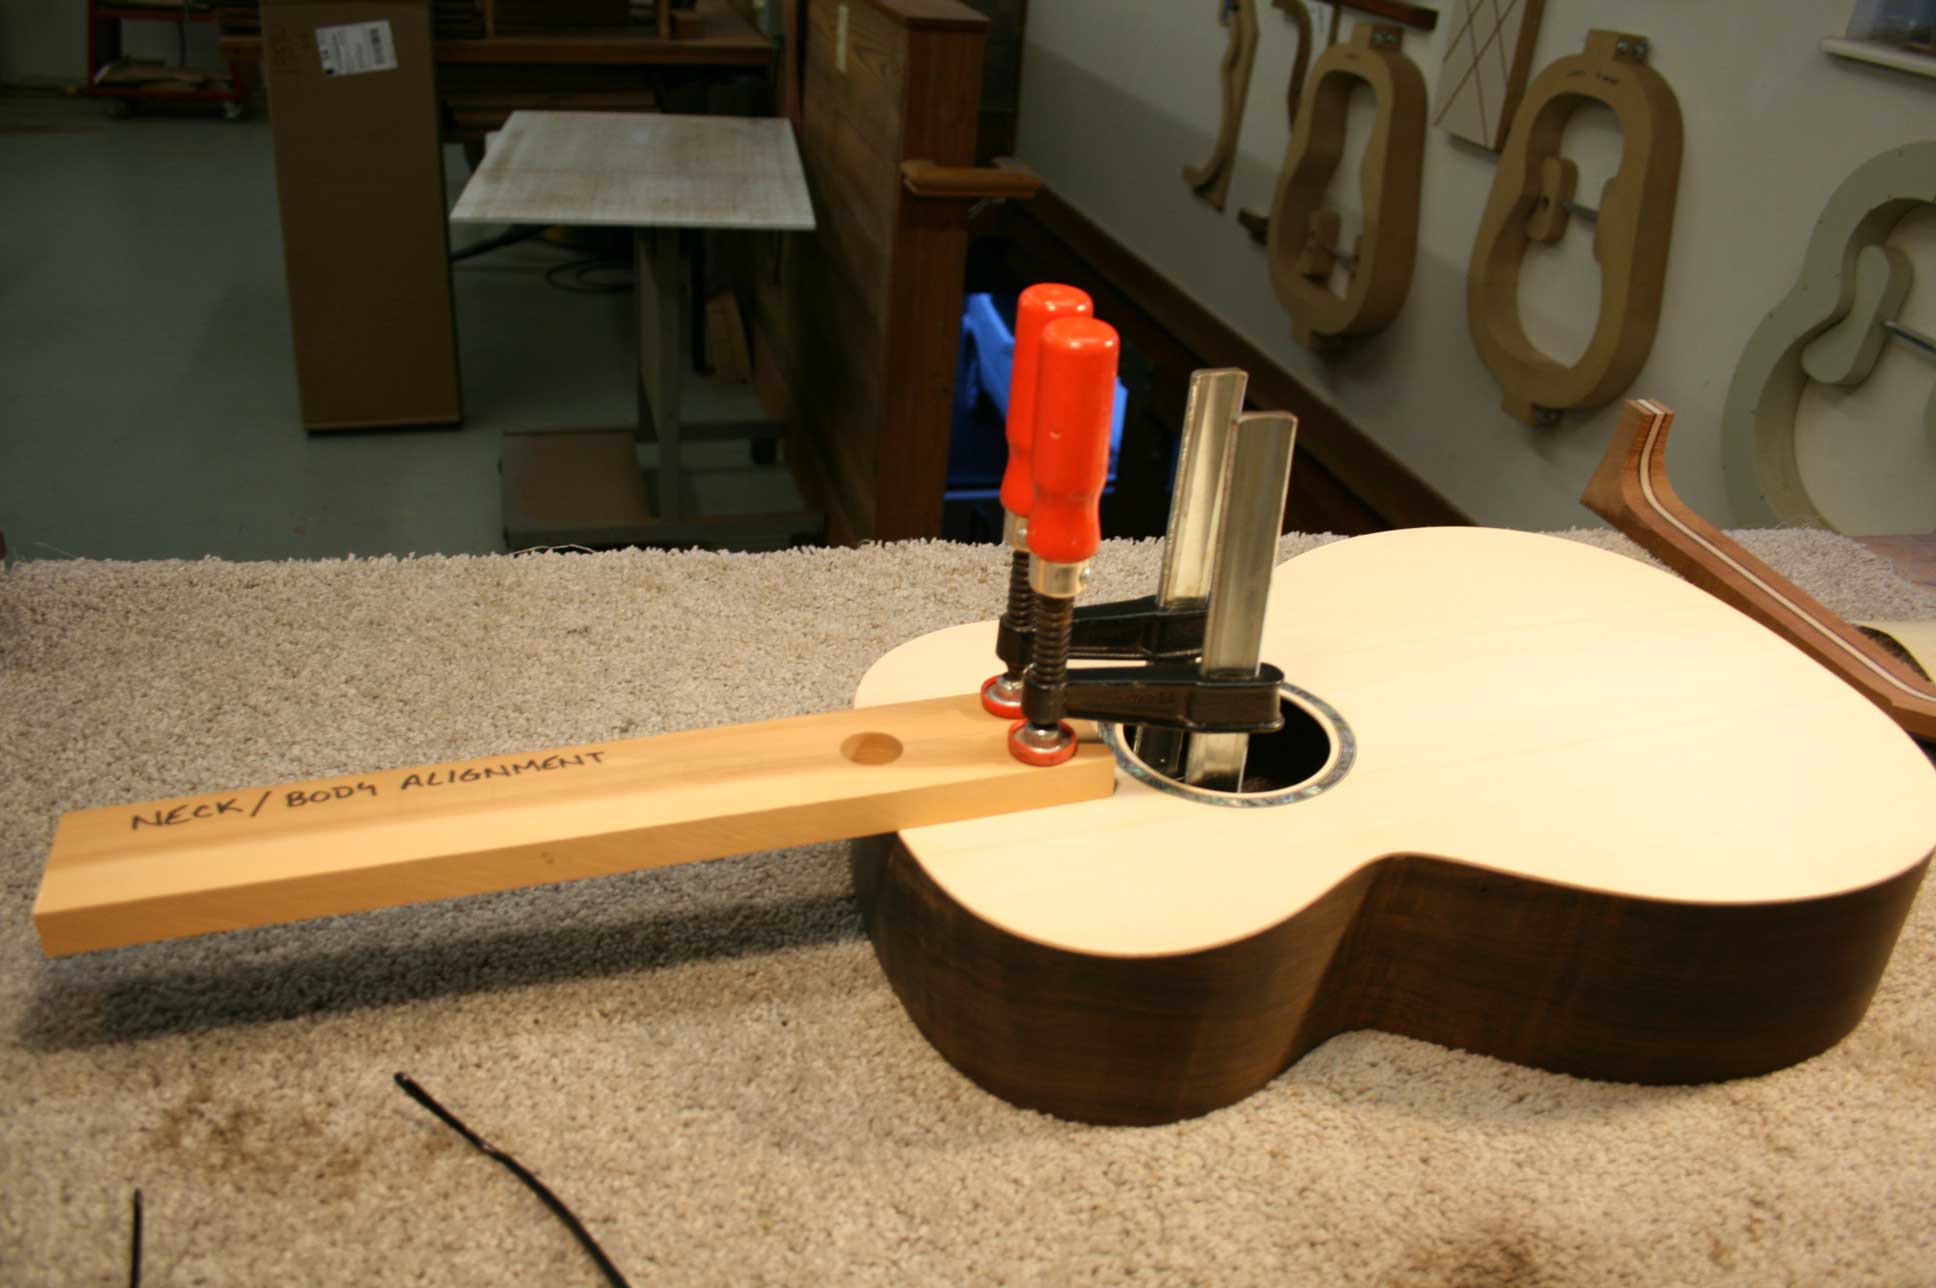 |
10. Make a 1/4"+ thick stick to align the neck and body in the truss rod slot. Clamp a 2 1/2" wide, flat board to the body. I have an inspection hole drilled at the body fret location. |
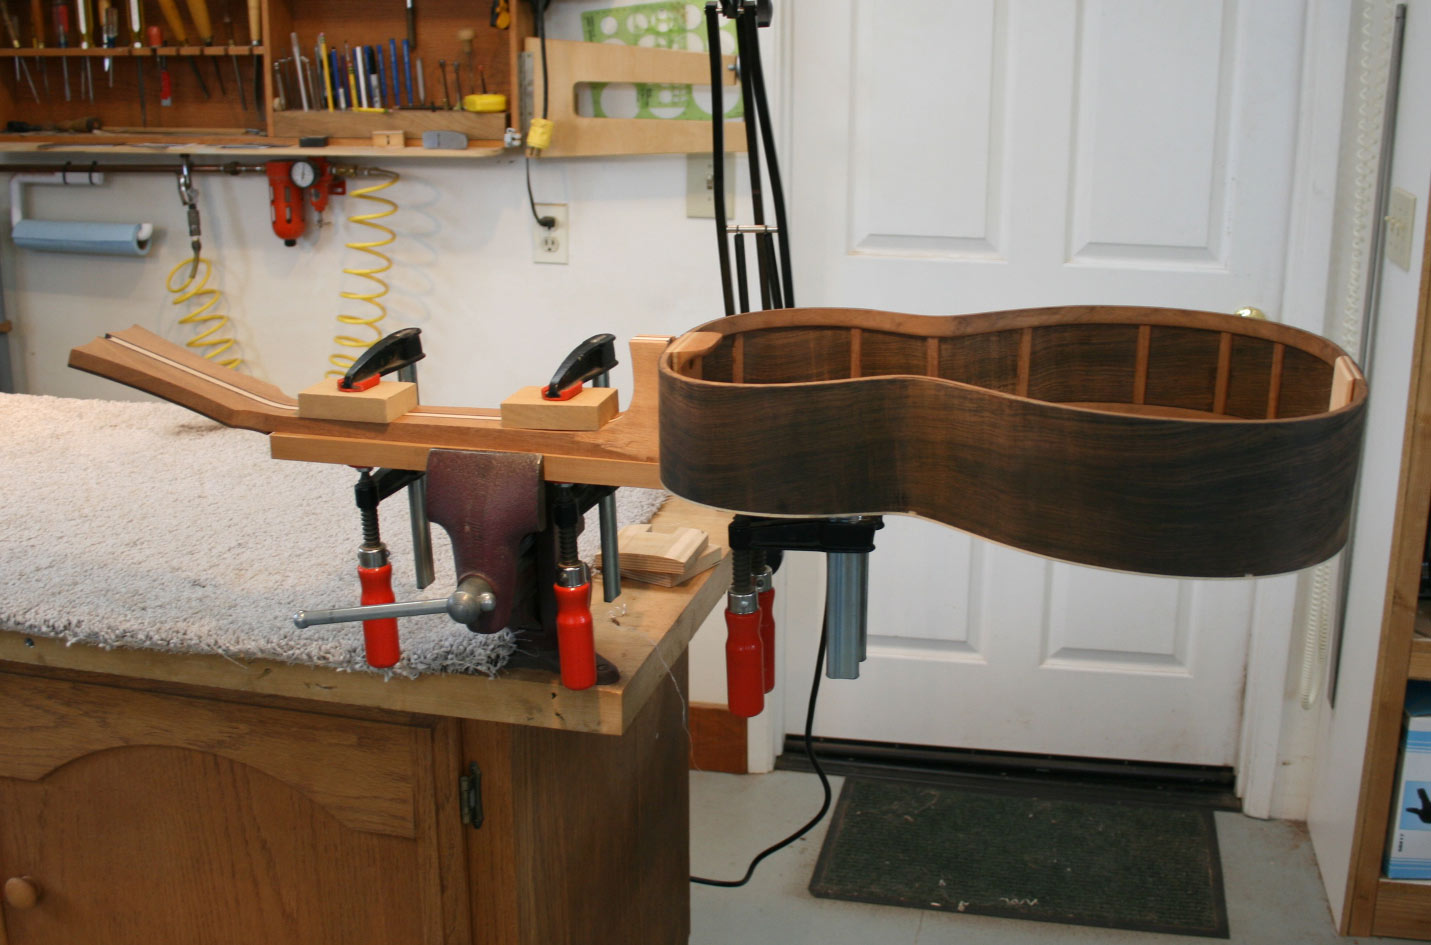 |
11. Clamp neck to the board too and clamp this assembly in the vise. |
 |
Inside view...the clamps will need to be a little more spread apart than shown. |
 |
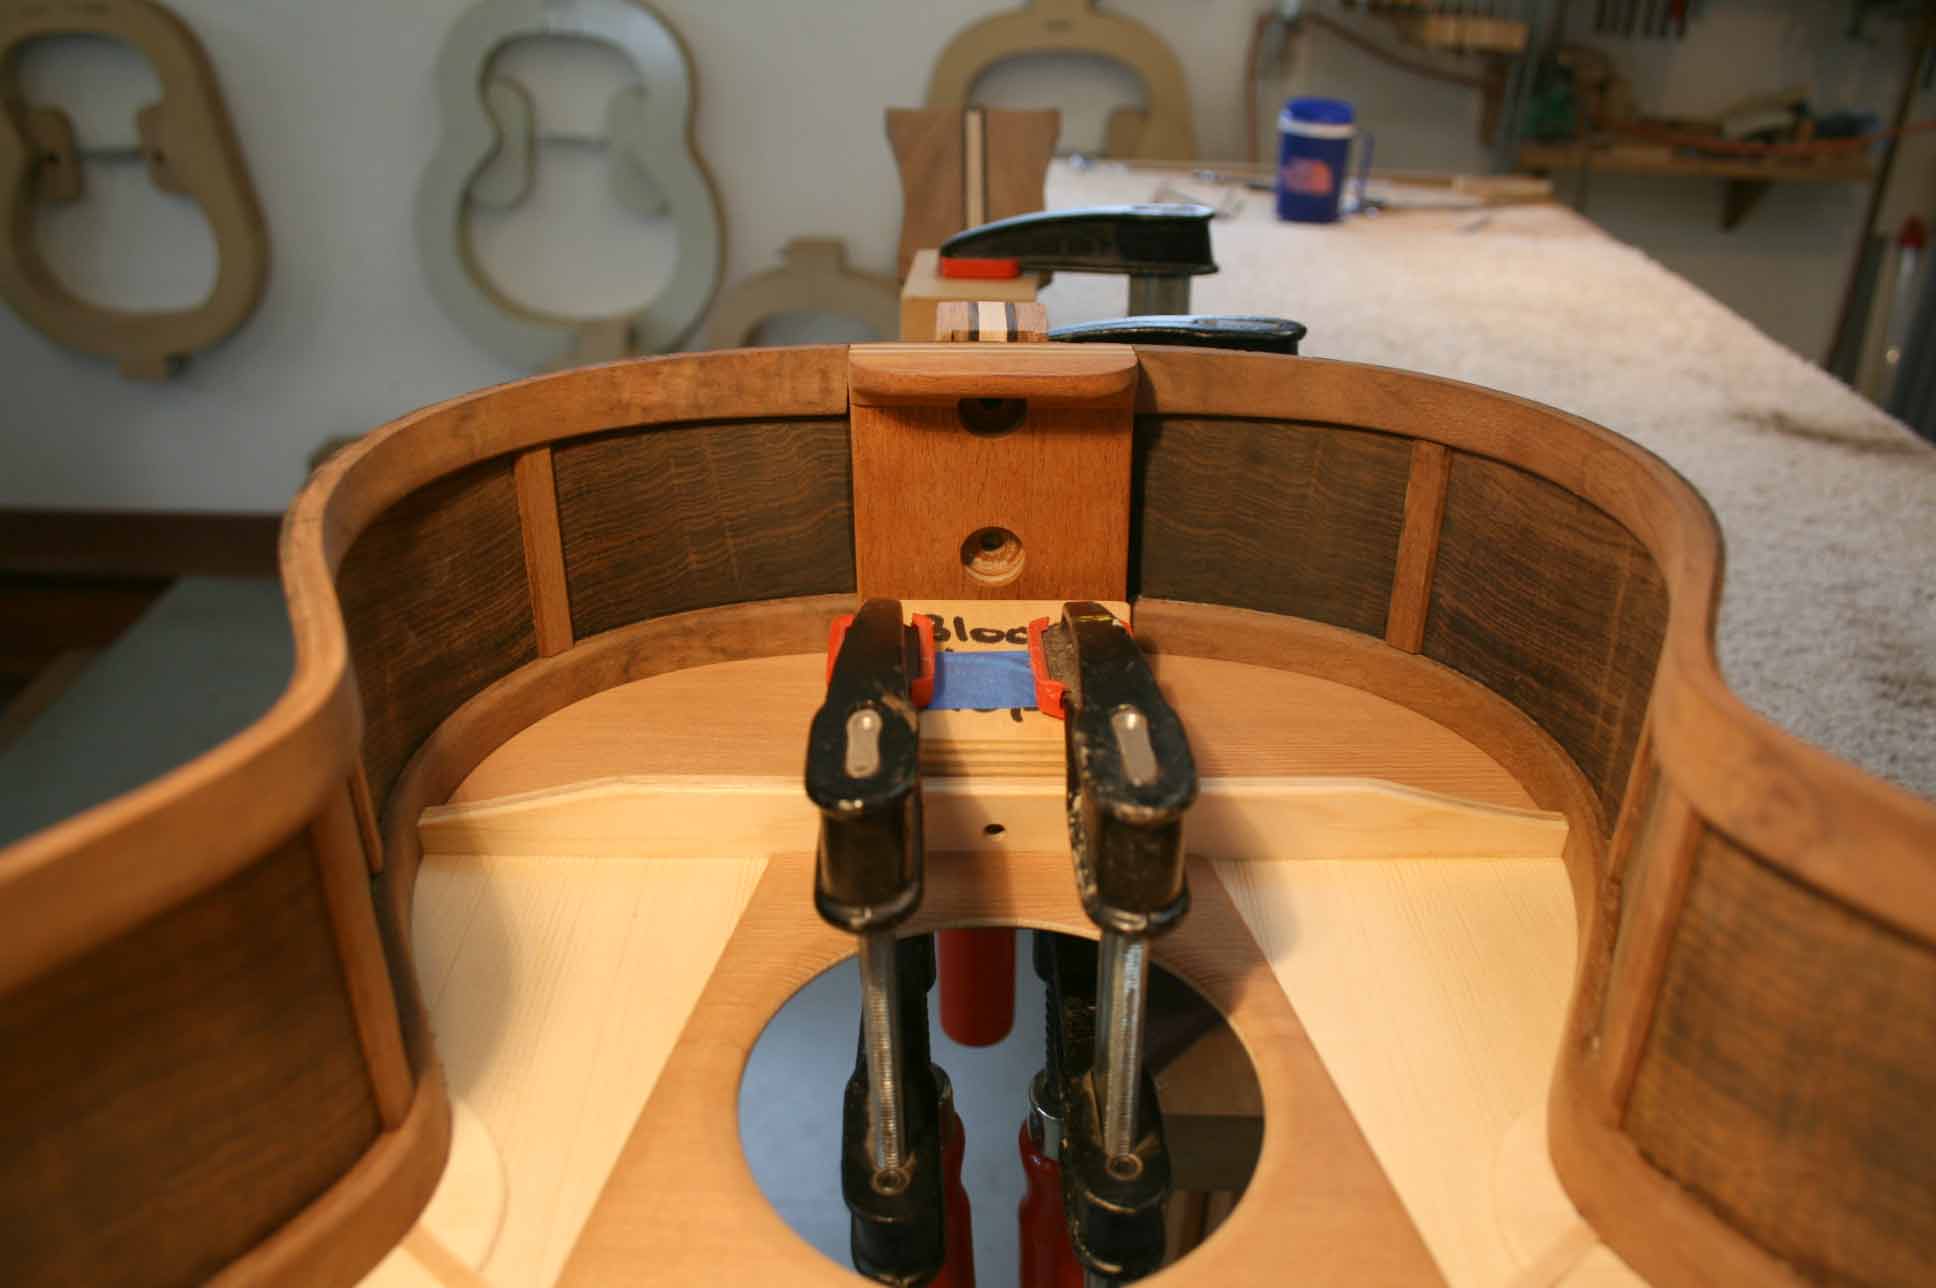
12. Use a 1/4" diameter drill, 6" long and drill through the body and a little way into the heel. |
 |
13. I have a nice chunk of steel that comes in handy for a lot of things around the shop. It also works out great to help clamp the neck straight for drilling for the threaded inserts. Clamp the neck square to the drill press and chuck up a 1/4" drill bit. Tap the neck over to align the drill bit with the partially drilled 1/4" hole.
|
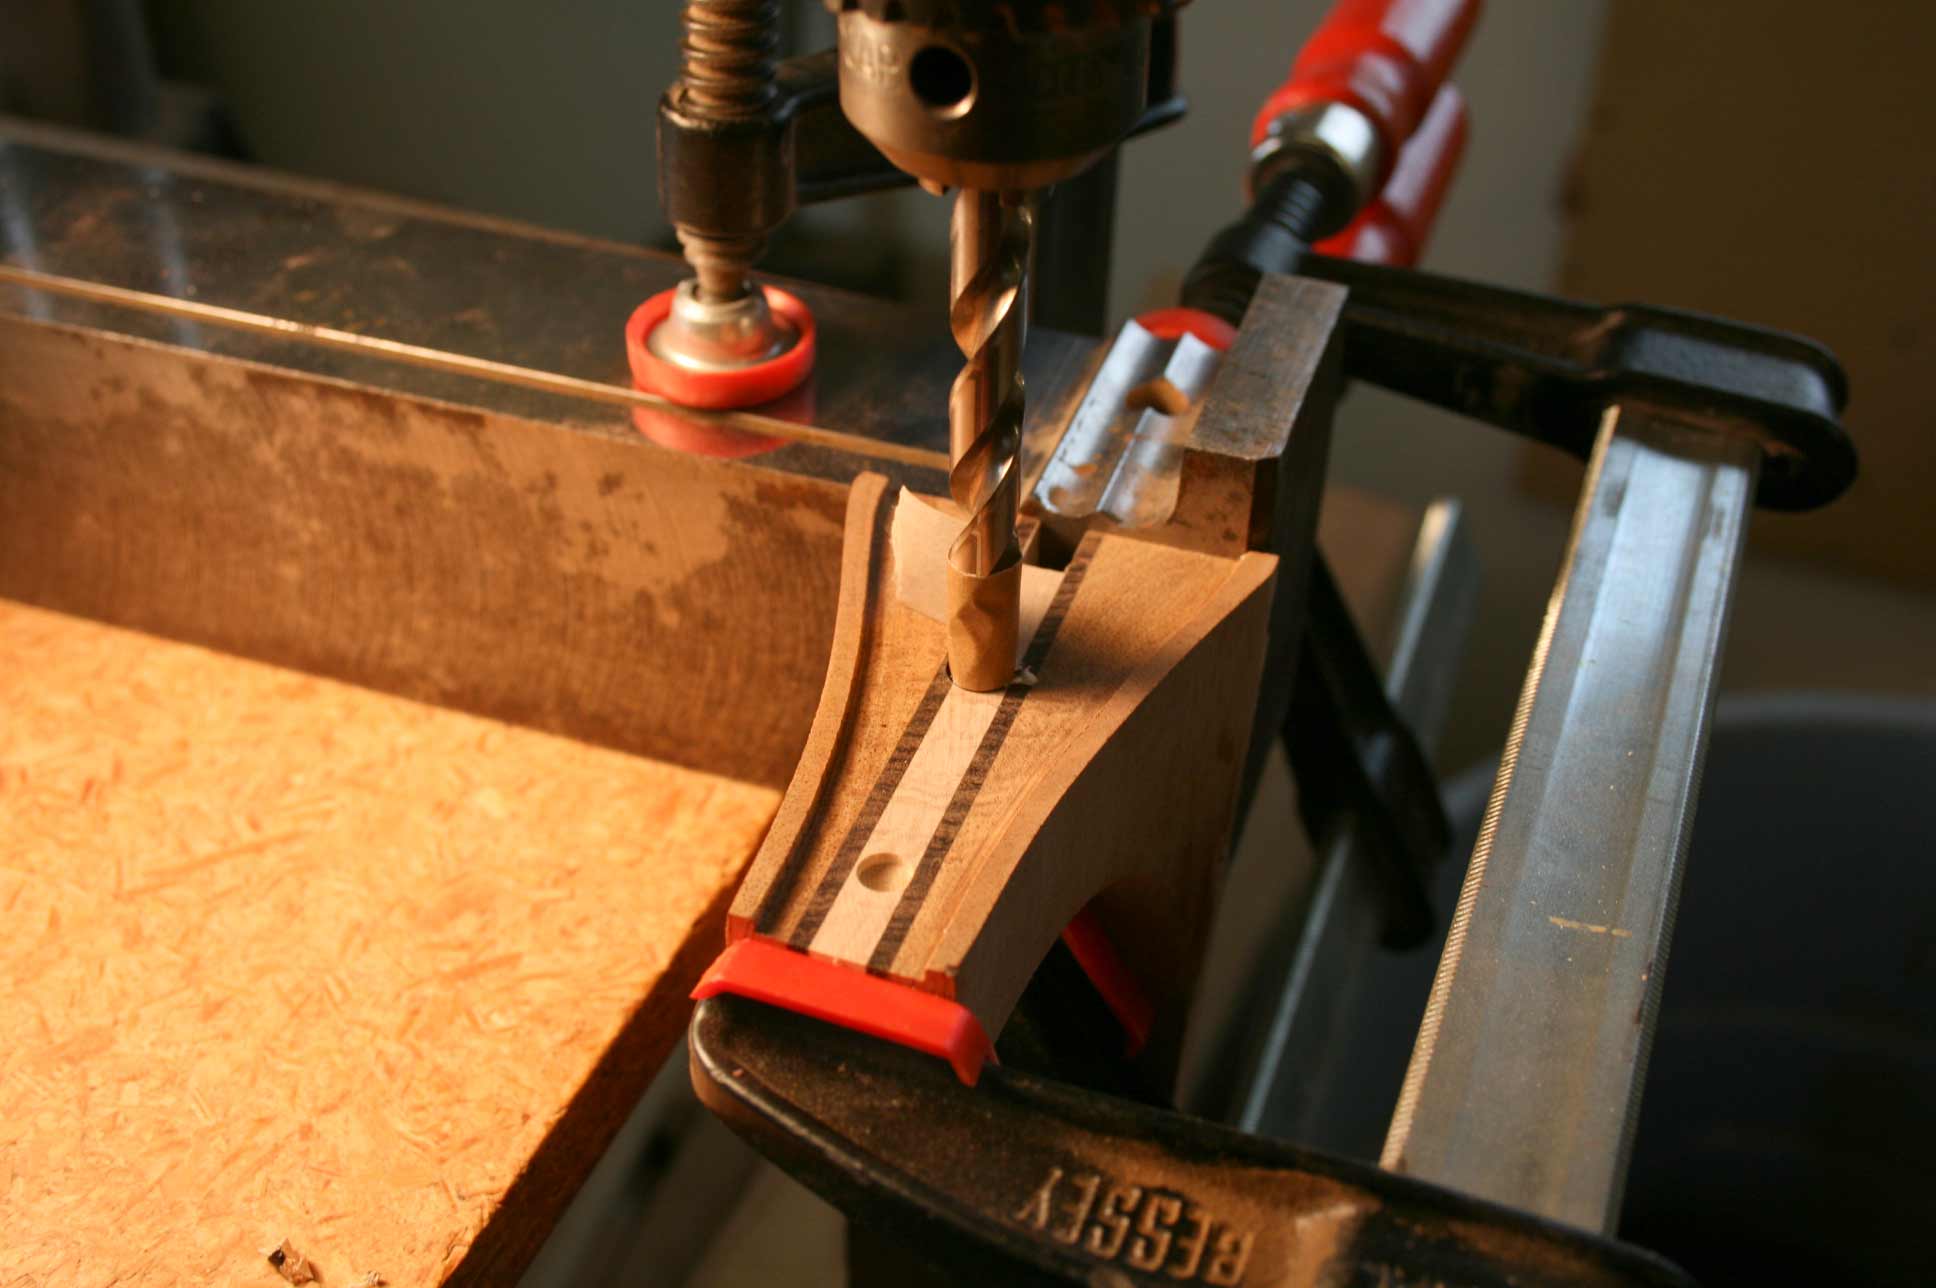 |
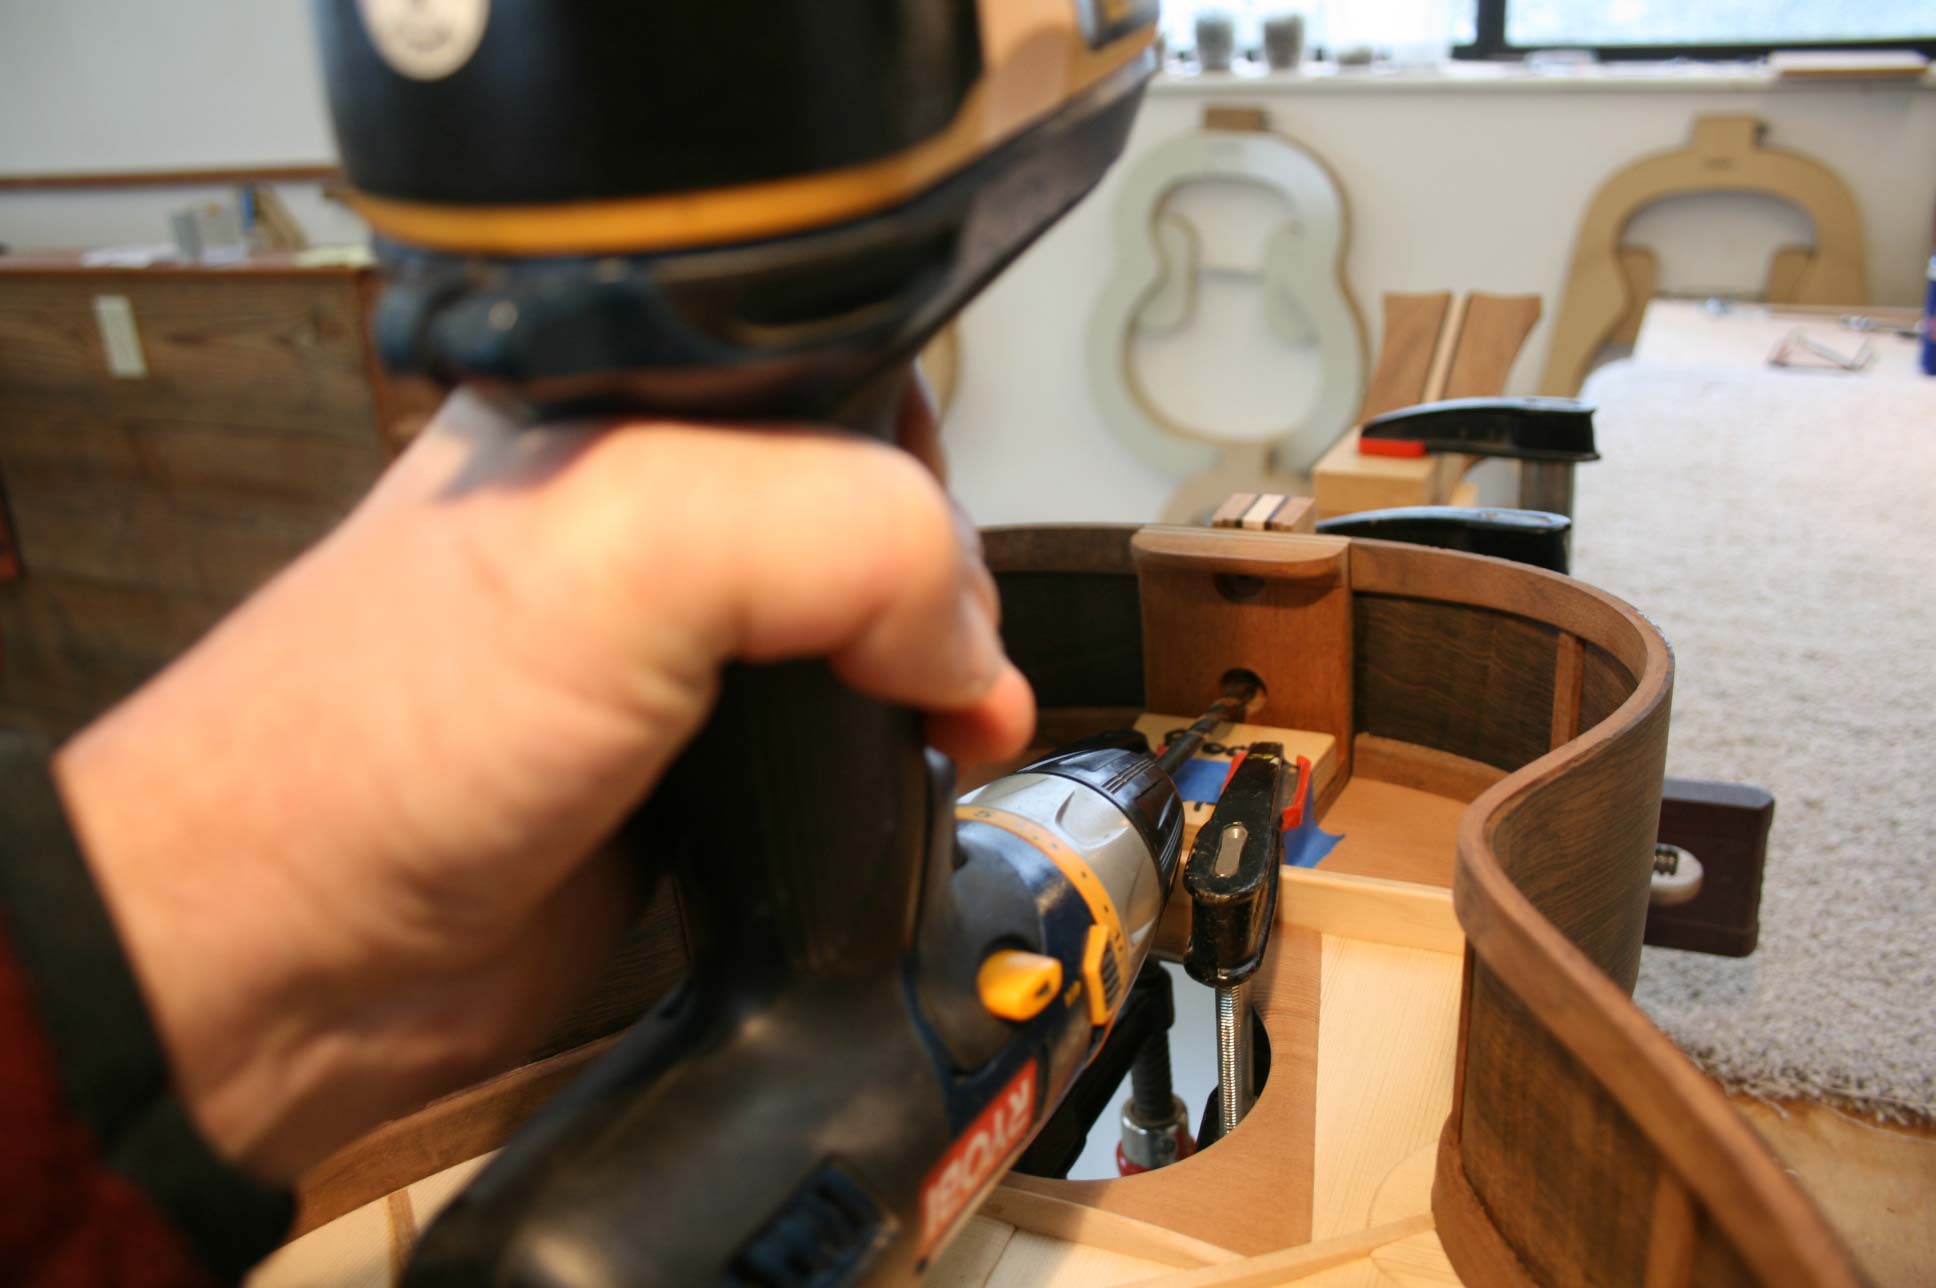
14. Clamp the steel chunk in place. Remove the 1/4" drill bit and chuck up either an 11/32" diameter drill bit for a dense hardwood neck or 21/64" for mahogany. Drill 5/8" to the point of the drill deep.
15. Make a flat bottom drill bit, 11/32" or 21/64". Drill down through the previous hole to a depth of 9/16" + 1/32".
|
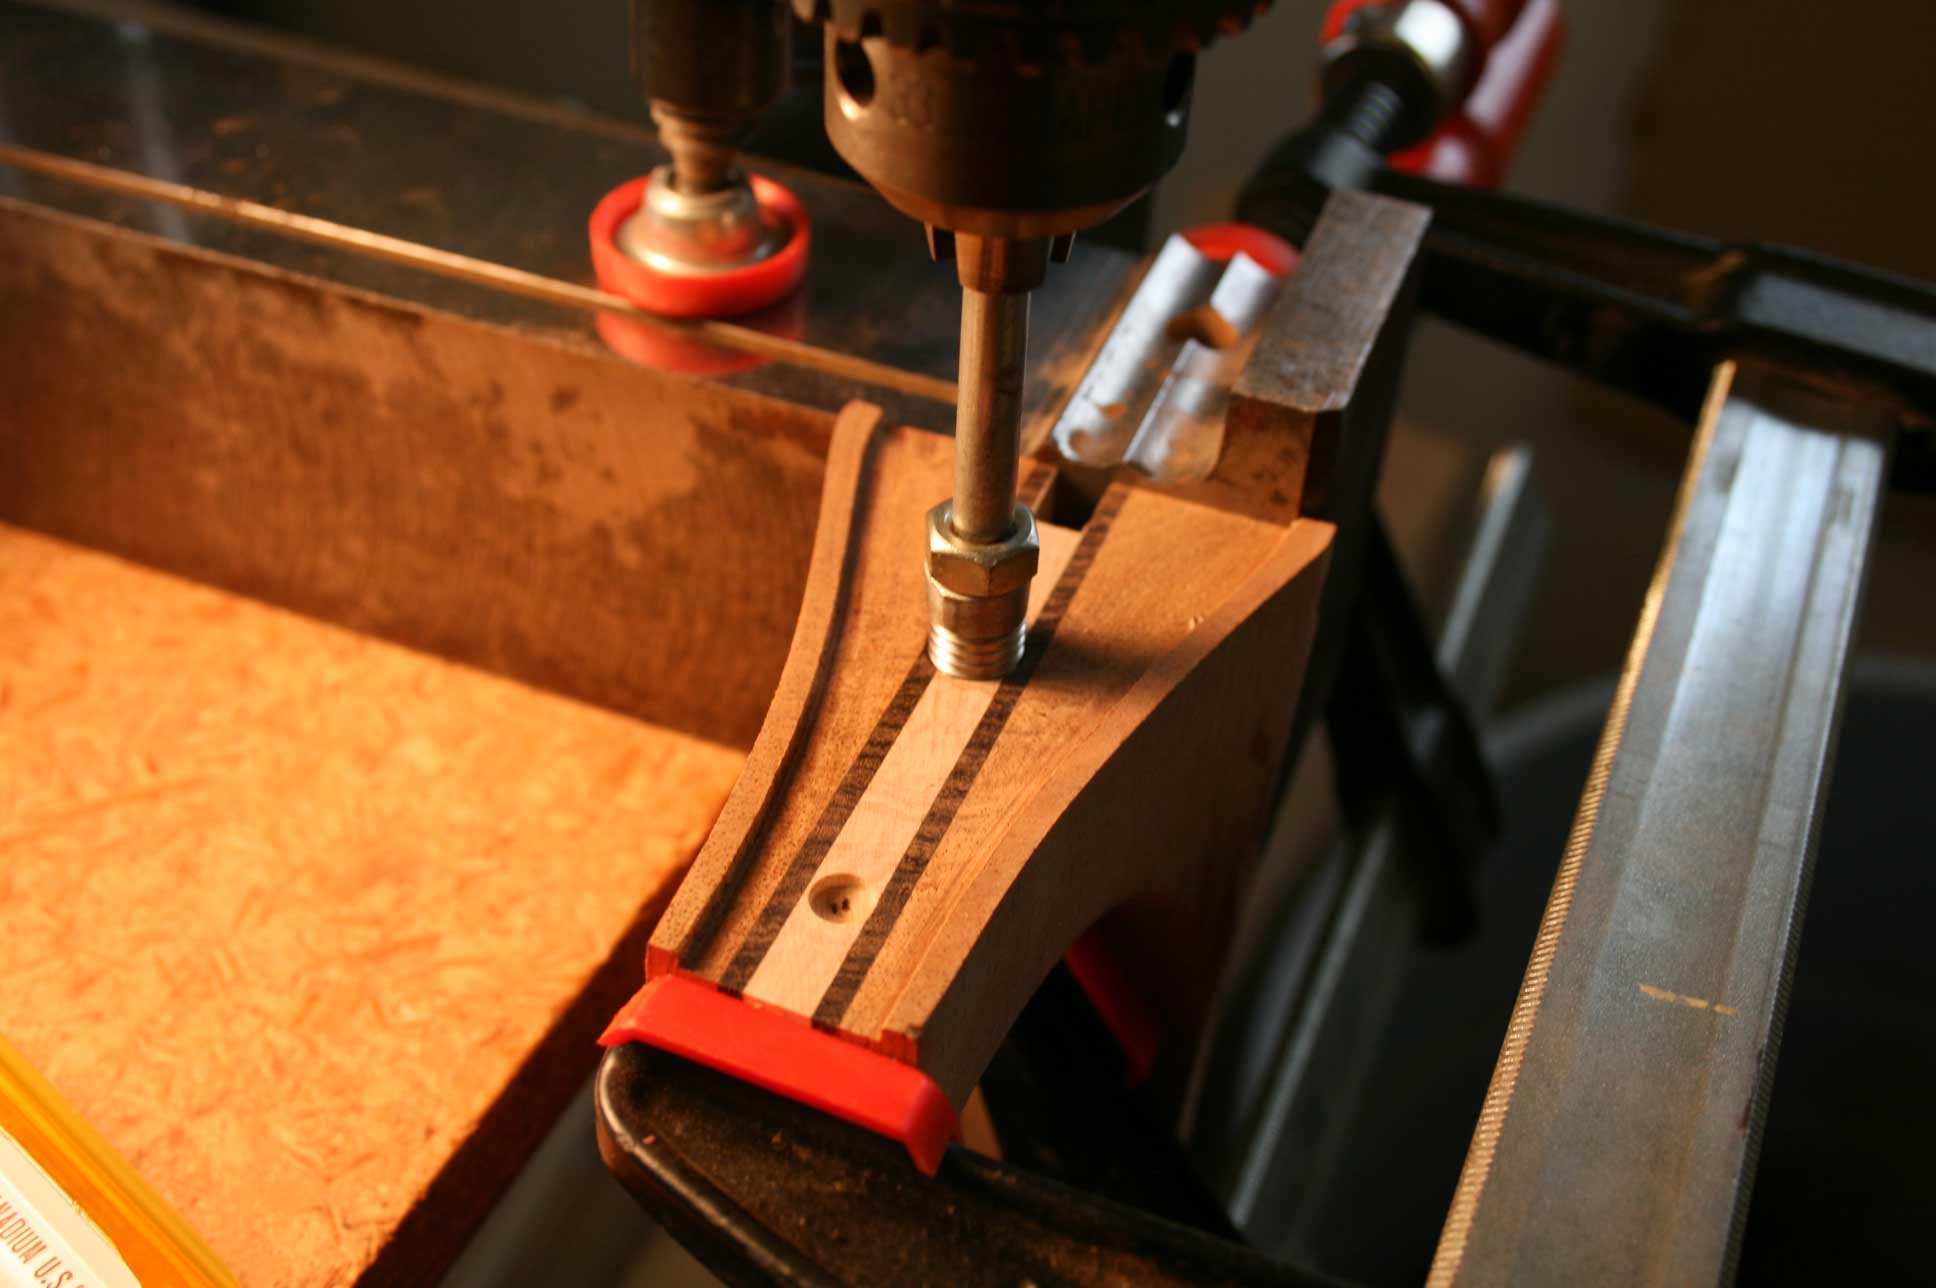 |
16. Chamfer the sharp edge with a countersink by hand. Screw a threaded insert on the installation tool with the slot toward the neck. Turn the chuck by hand while using some downward pressure on the drill press and continue turning it in until the insert is slightly below flush. |
|
We offer these fixtures for $63.00 which includes shipping in the US. They are made with a CNC and are very accurate. Click here to purchase...
If you prefer to make this yourself, we can email you a drawing upon request. |
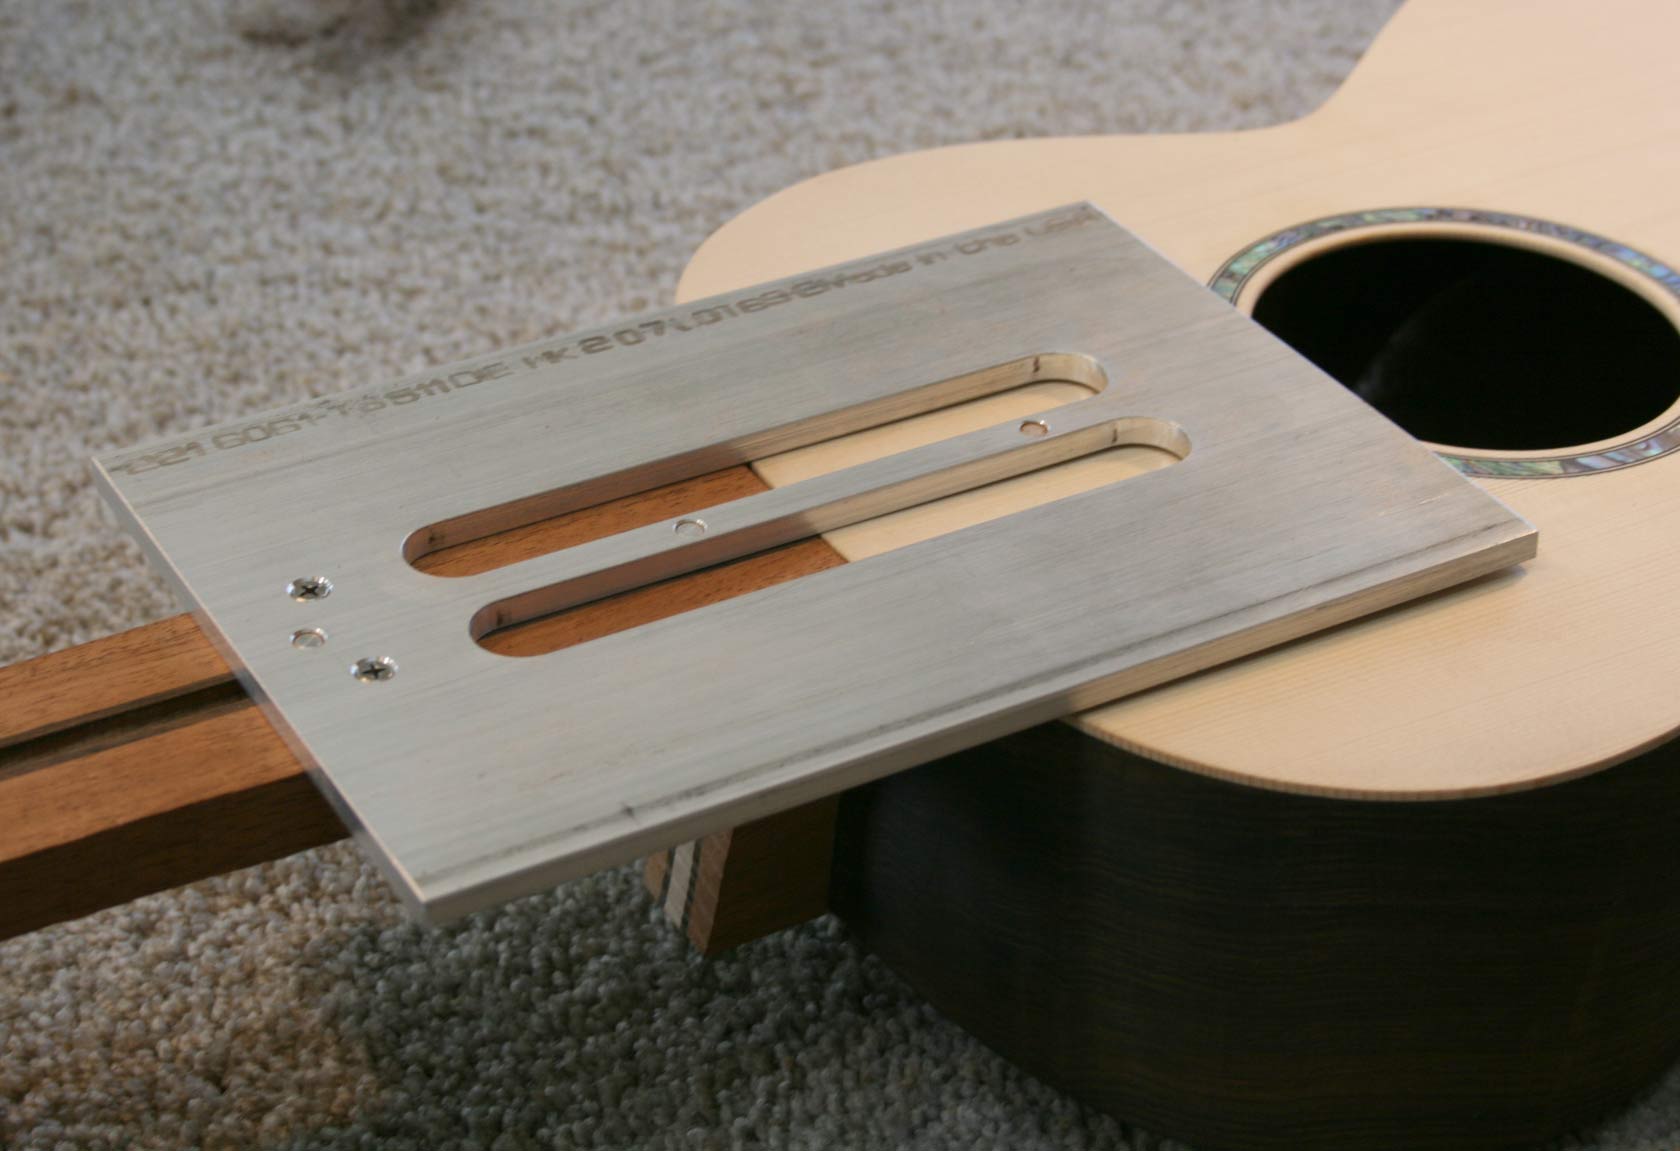
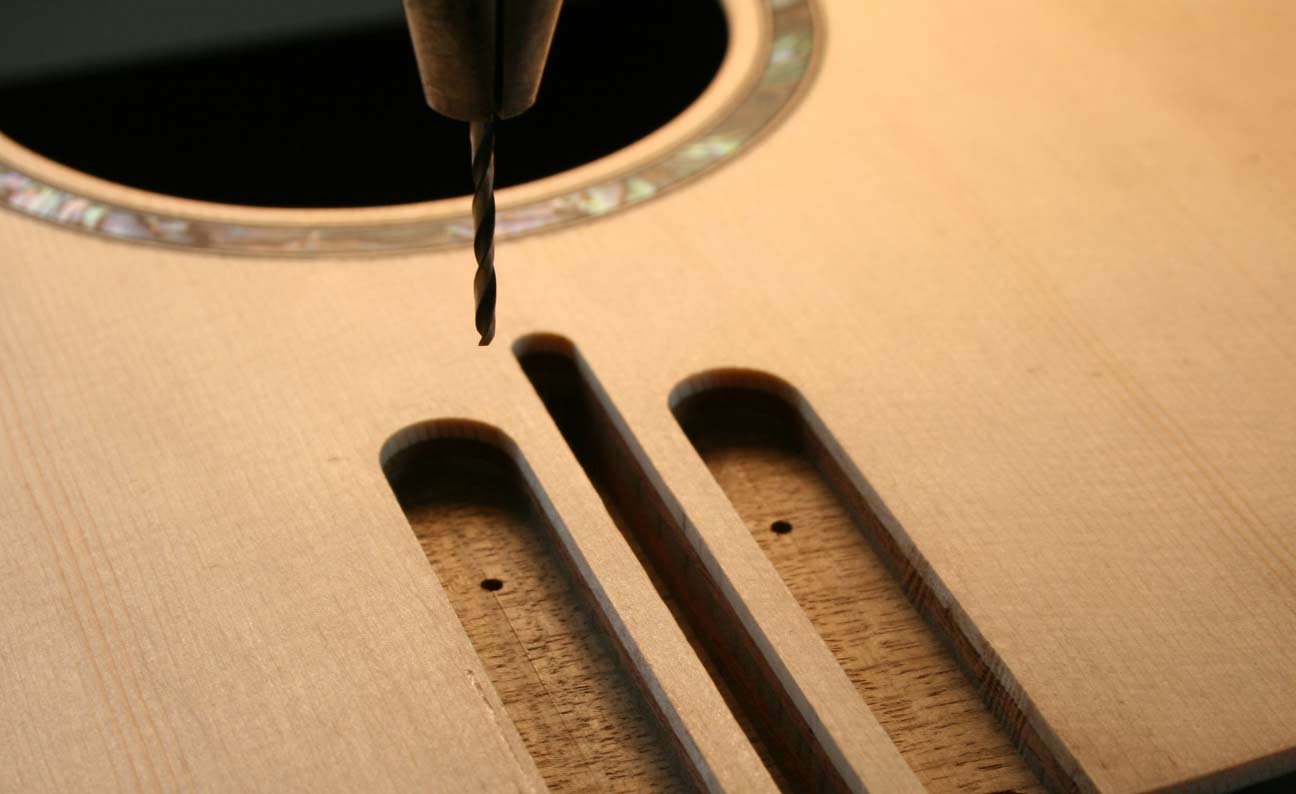
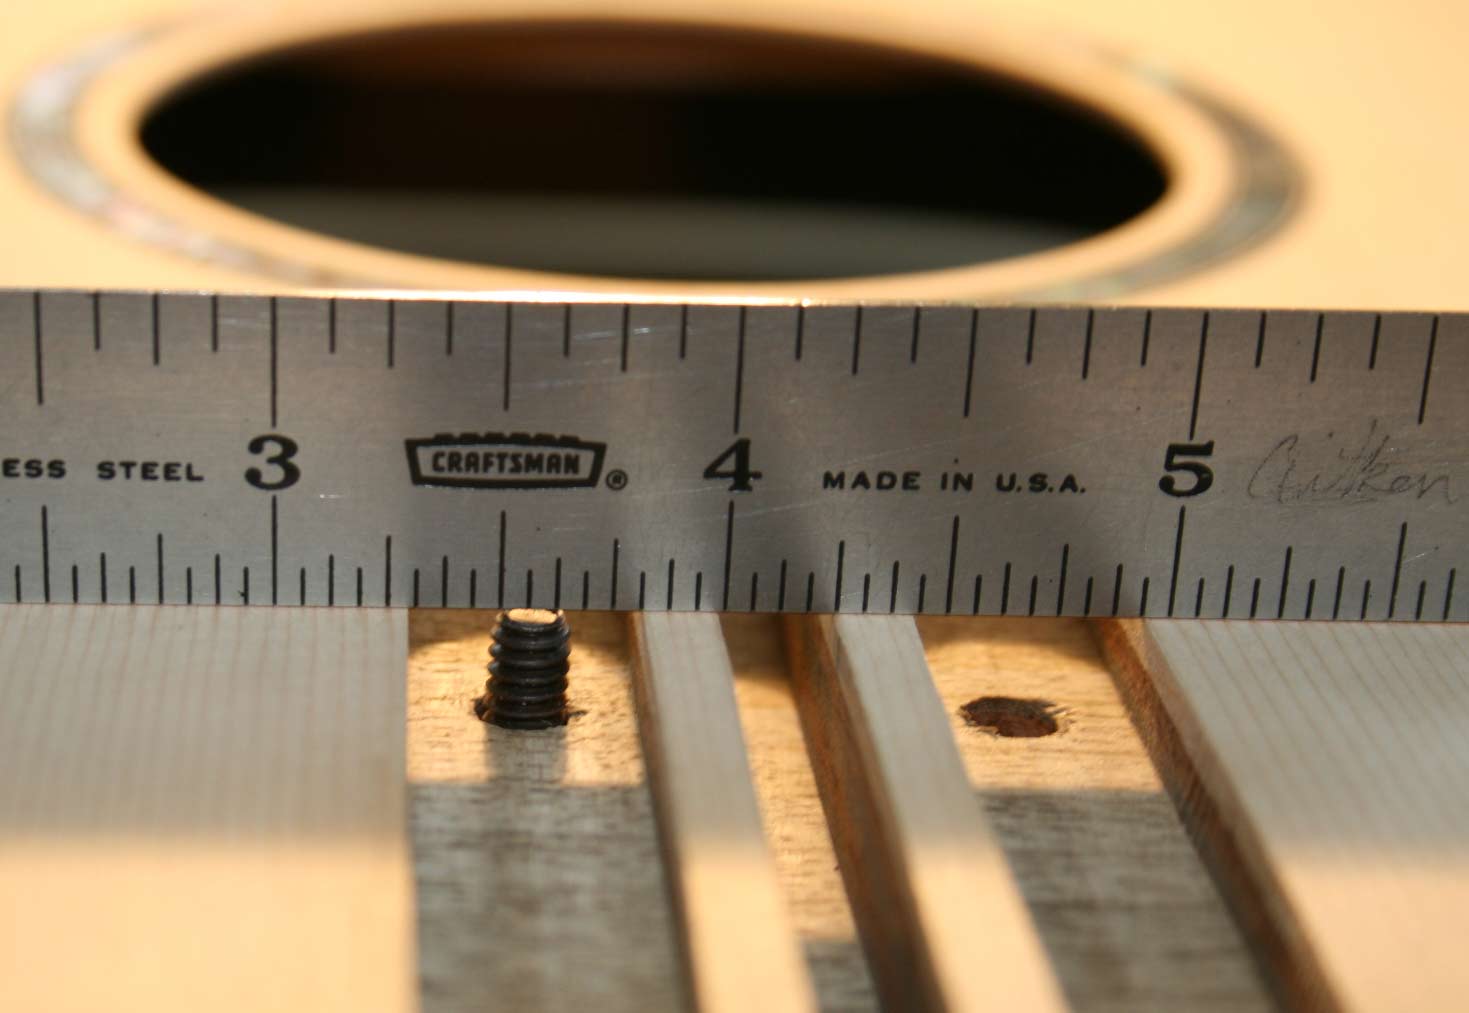
17. Bolt the neck to the body and check alignment. You may have to drift the body holes up or down a little to get the top edge of the neck flush with the top.
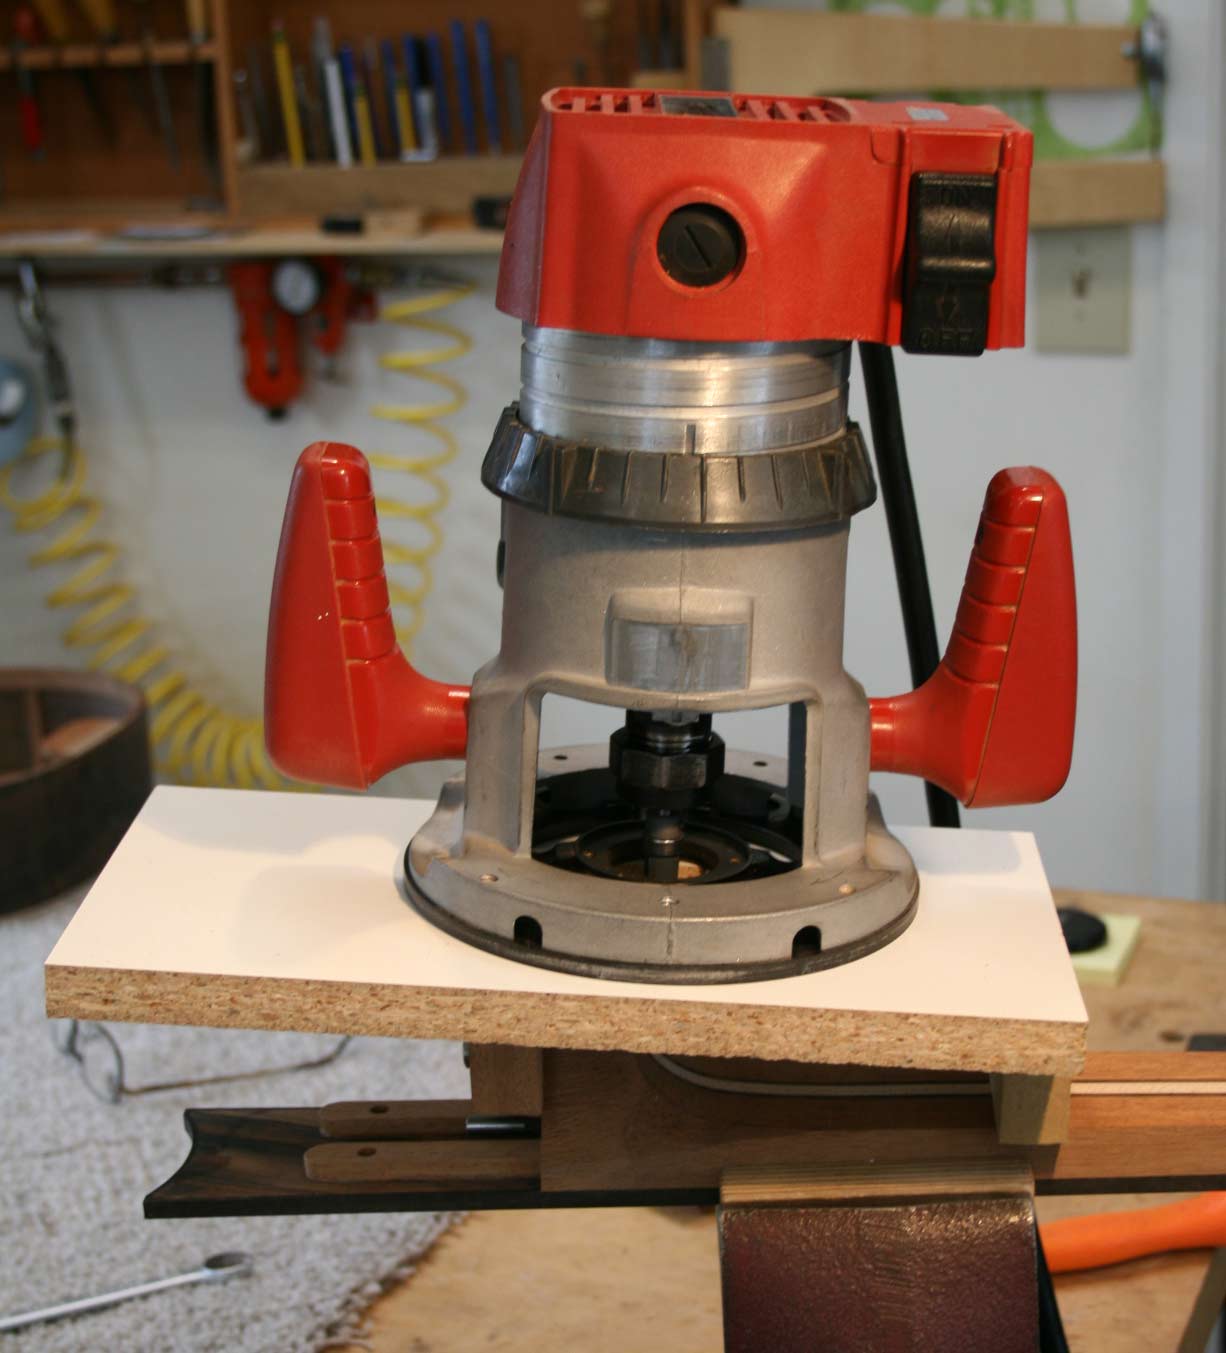
Rout the slots for the alignment bars as shown on the drawing. The finished slot in the guitar should be .520" wide, 5.780" long and .255 deep.
If you are using our router fixture or one that you made, have a piece of scrap wood with a slot routered in it like the one in the neck for the truss rod. Practice first on this scrap piece of material to get the feel of using the fixture and for setting the depth of the bit. Center a 1/2" pilot bushing on your router (we use this setup with a number of fixtures and so have a dedicated router). With a 1/4" wide, flat bottom bit, set the depth to .255", just a few thousands deeper than the alignment bar is thick.
|
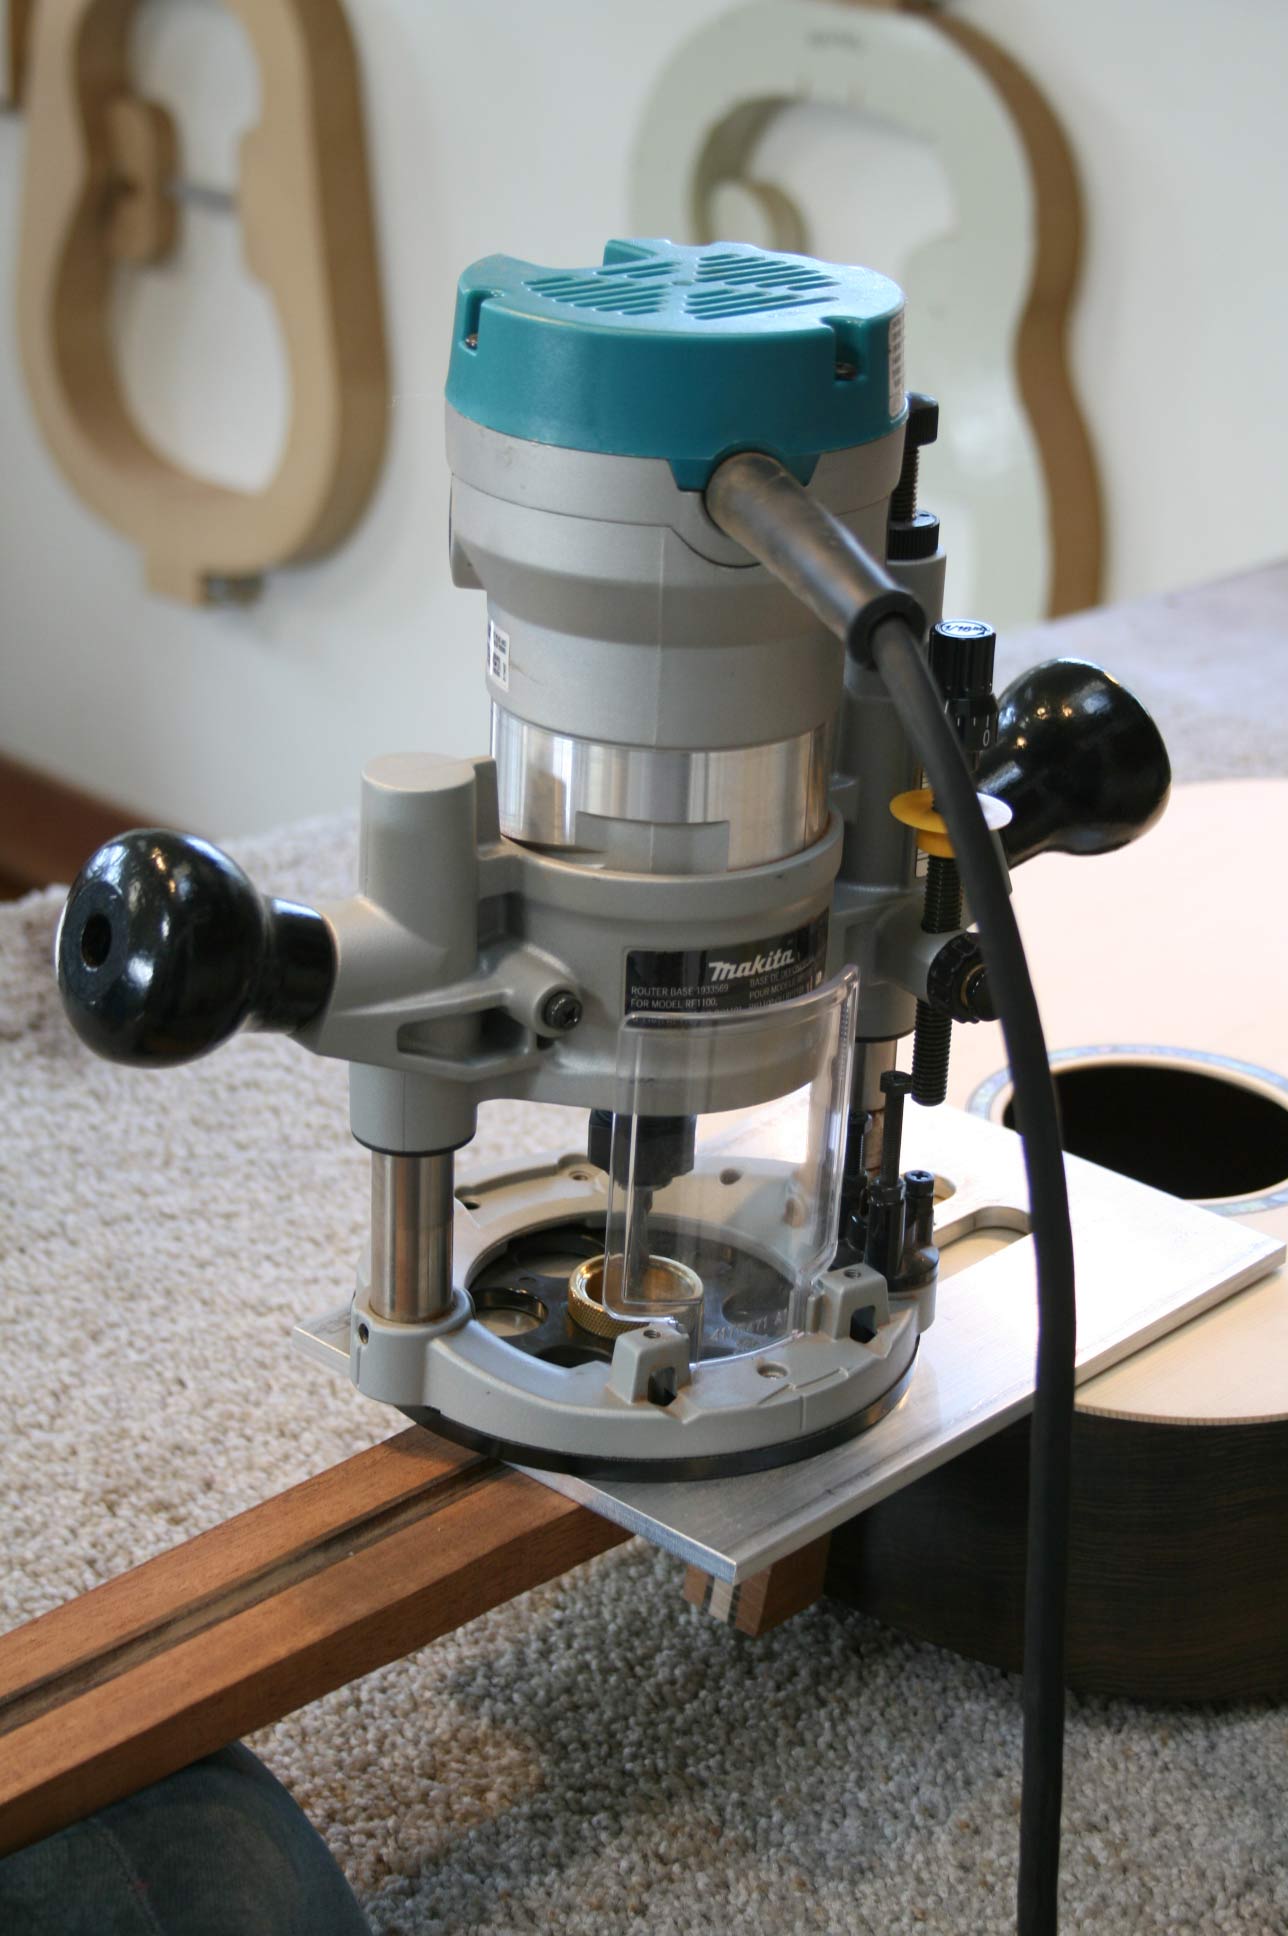 |
Mark 3 3/8" down from the top edge of the guitar. Align the edge of the oval slot in the fixture on this mark. Fasten the jig to the neck with (2) #6 x 1/2" long screws. Rout the slots. |
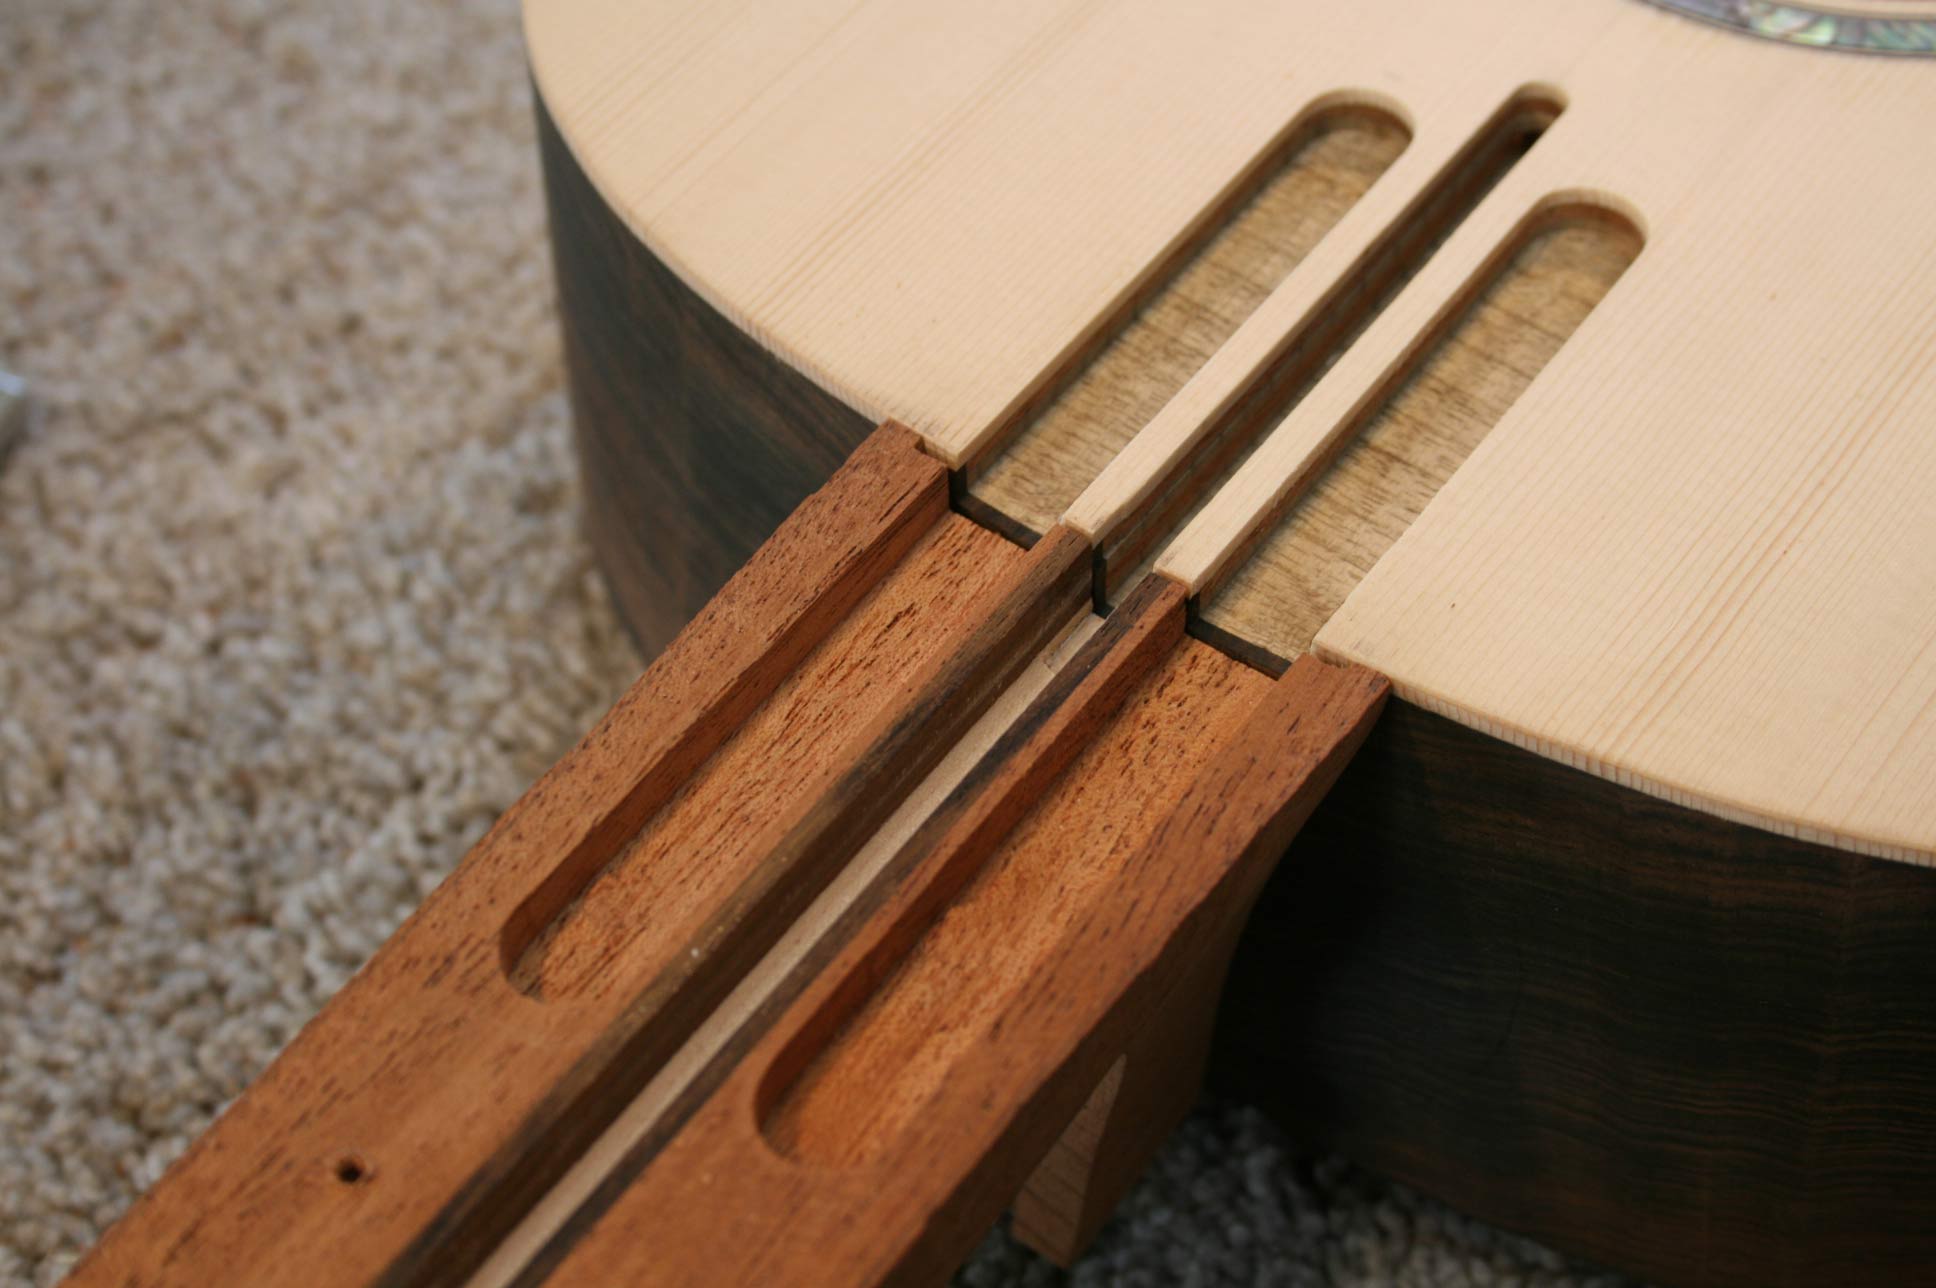 |
Check the completed slots for size. |
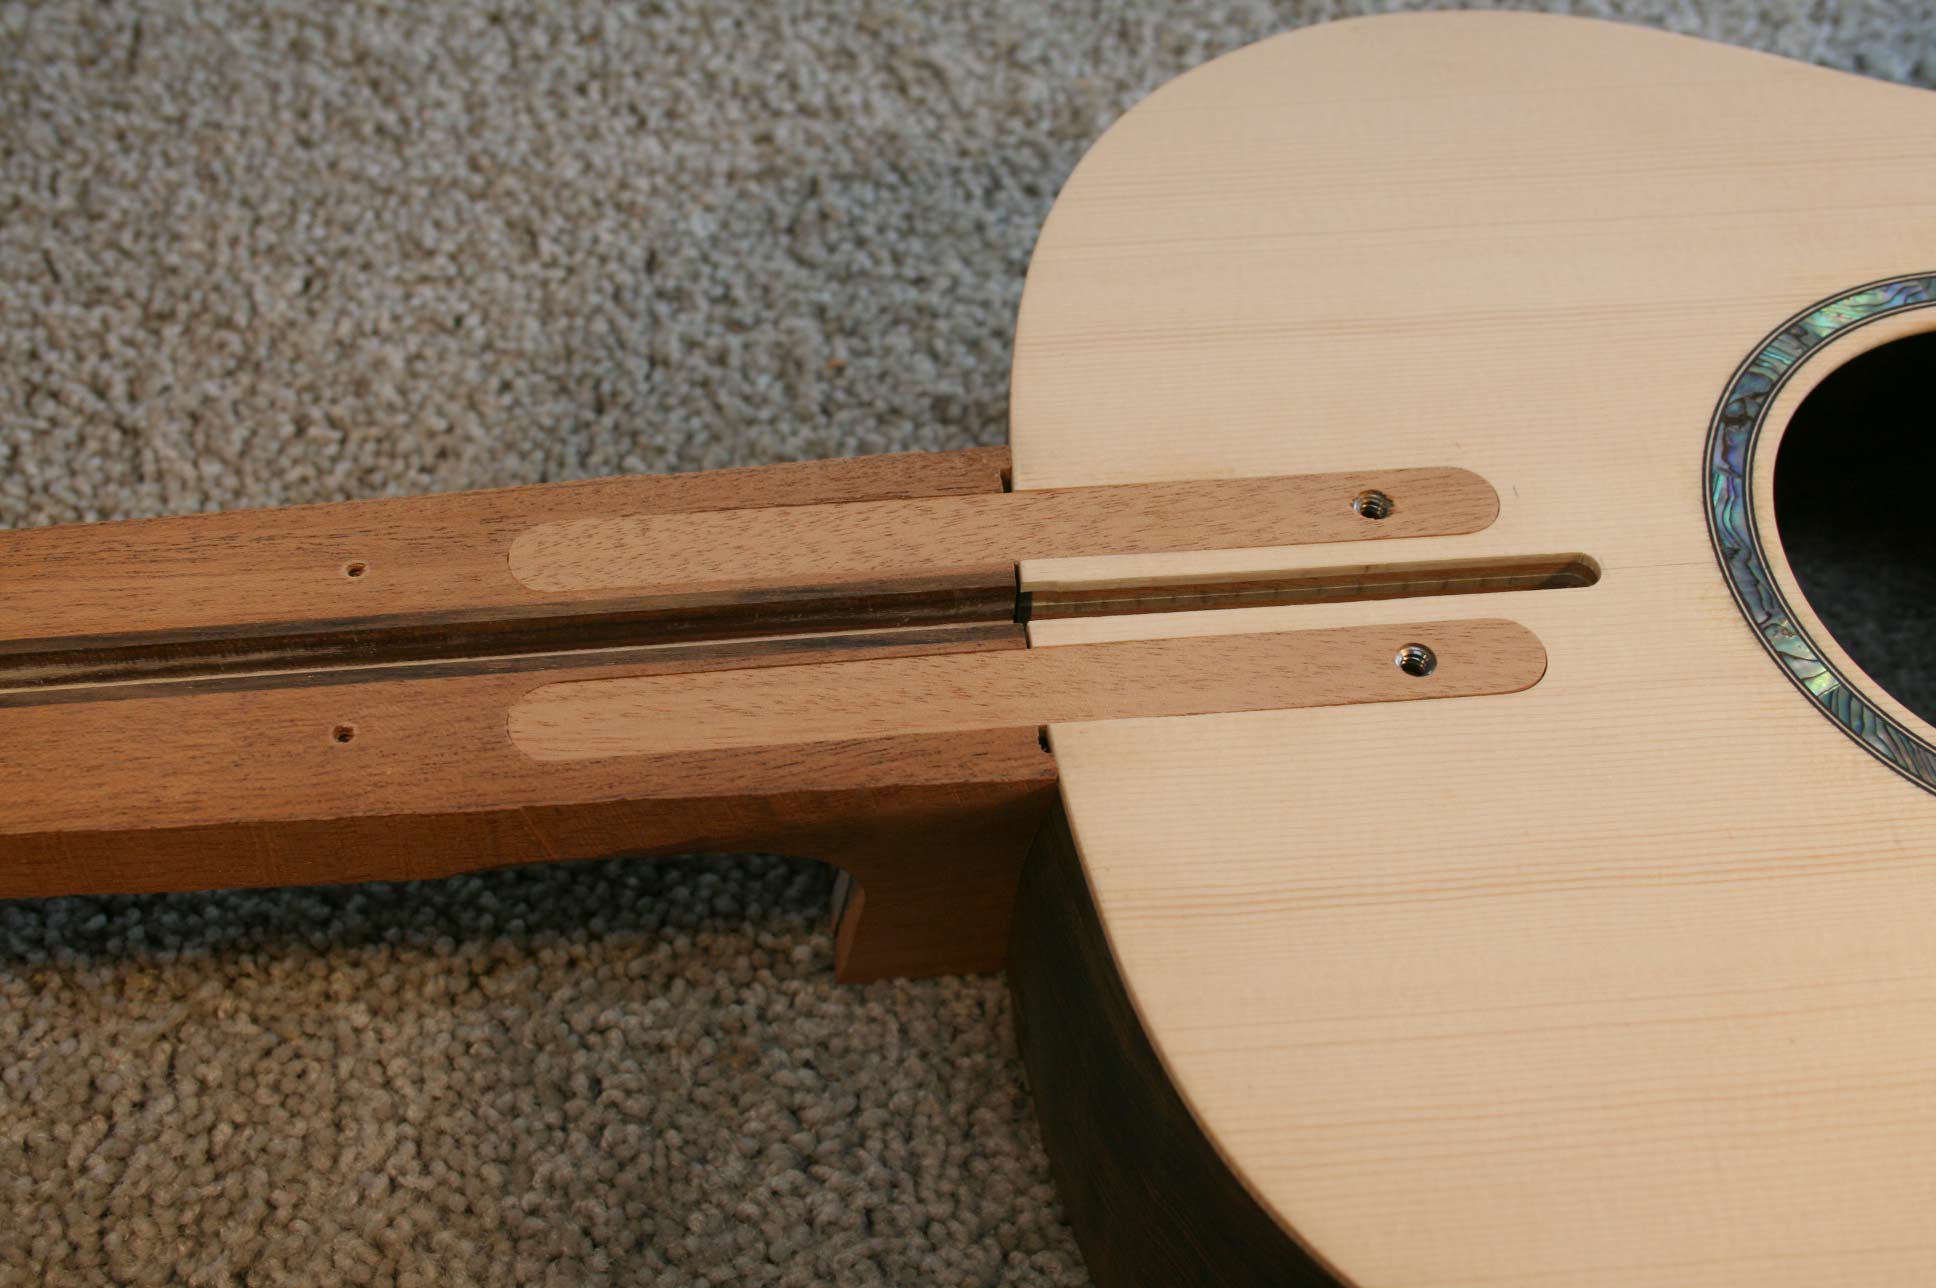 |
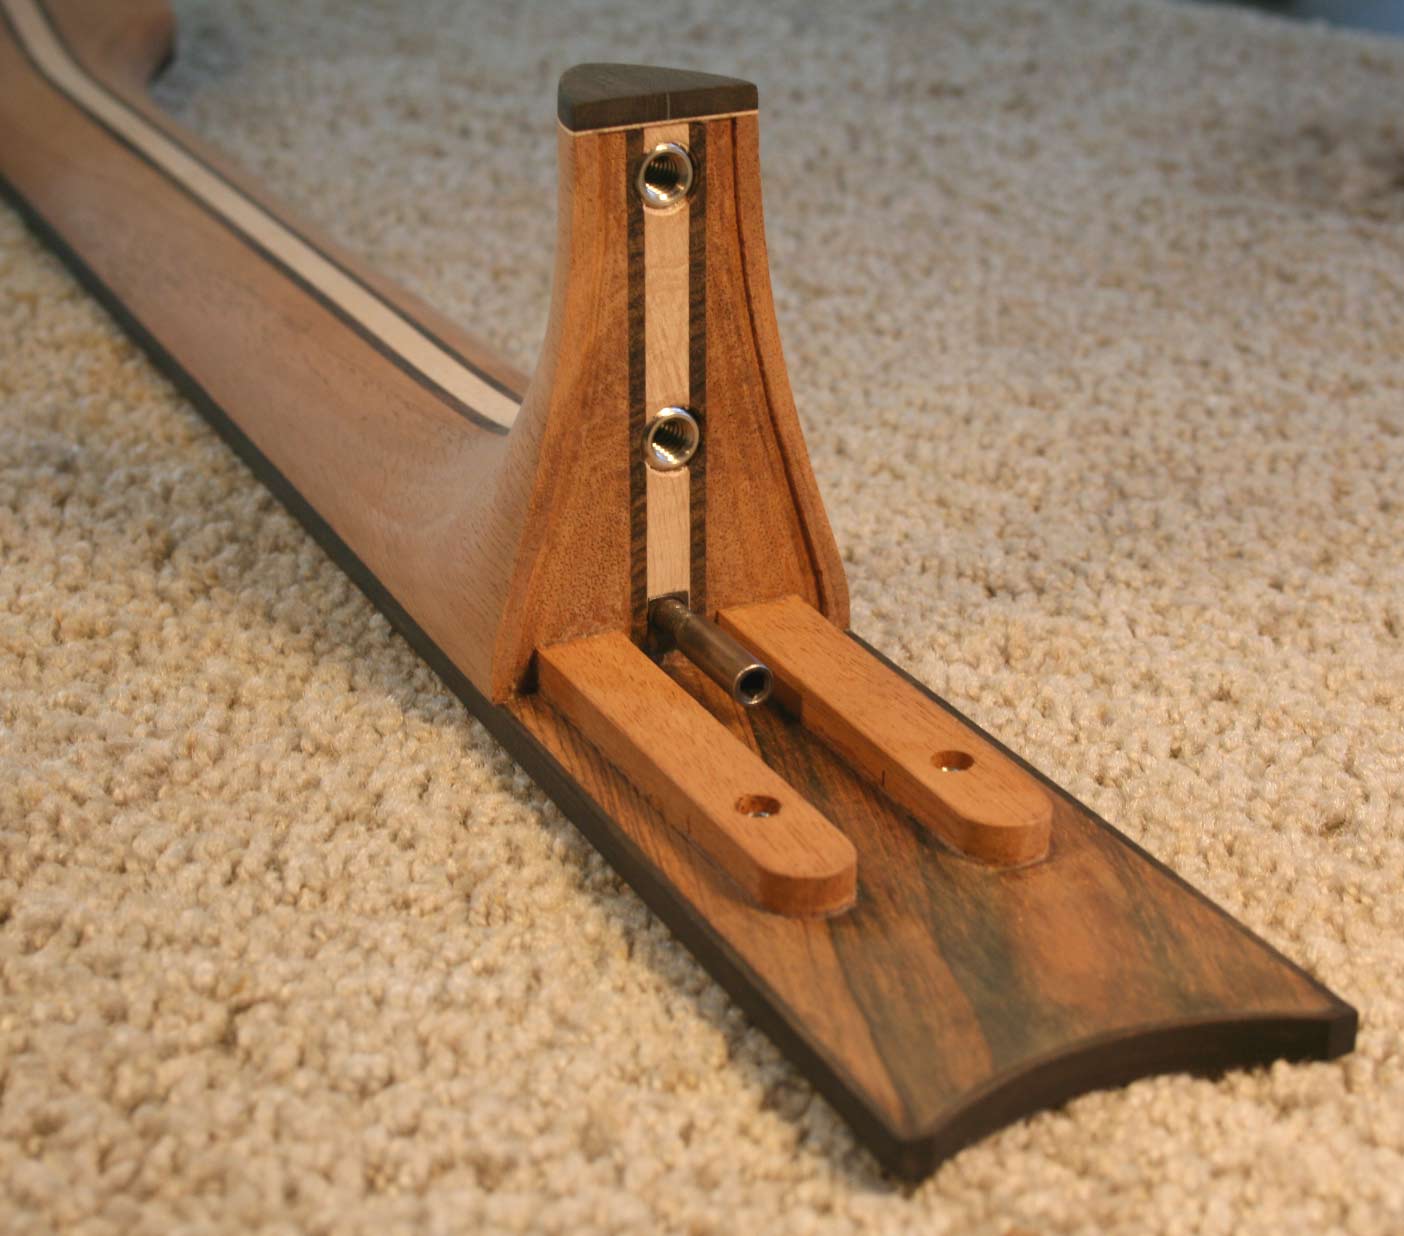
18. Check the fit of the alignment bars to the slot. They should drop in without being forced and be just a hair below the surface of the neck and body. Slowly remove material from the bars with 240 grit laid on a flat surface as required. Push the bars toward the neck so the clearance is on the body side. |
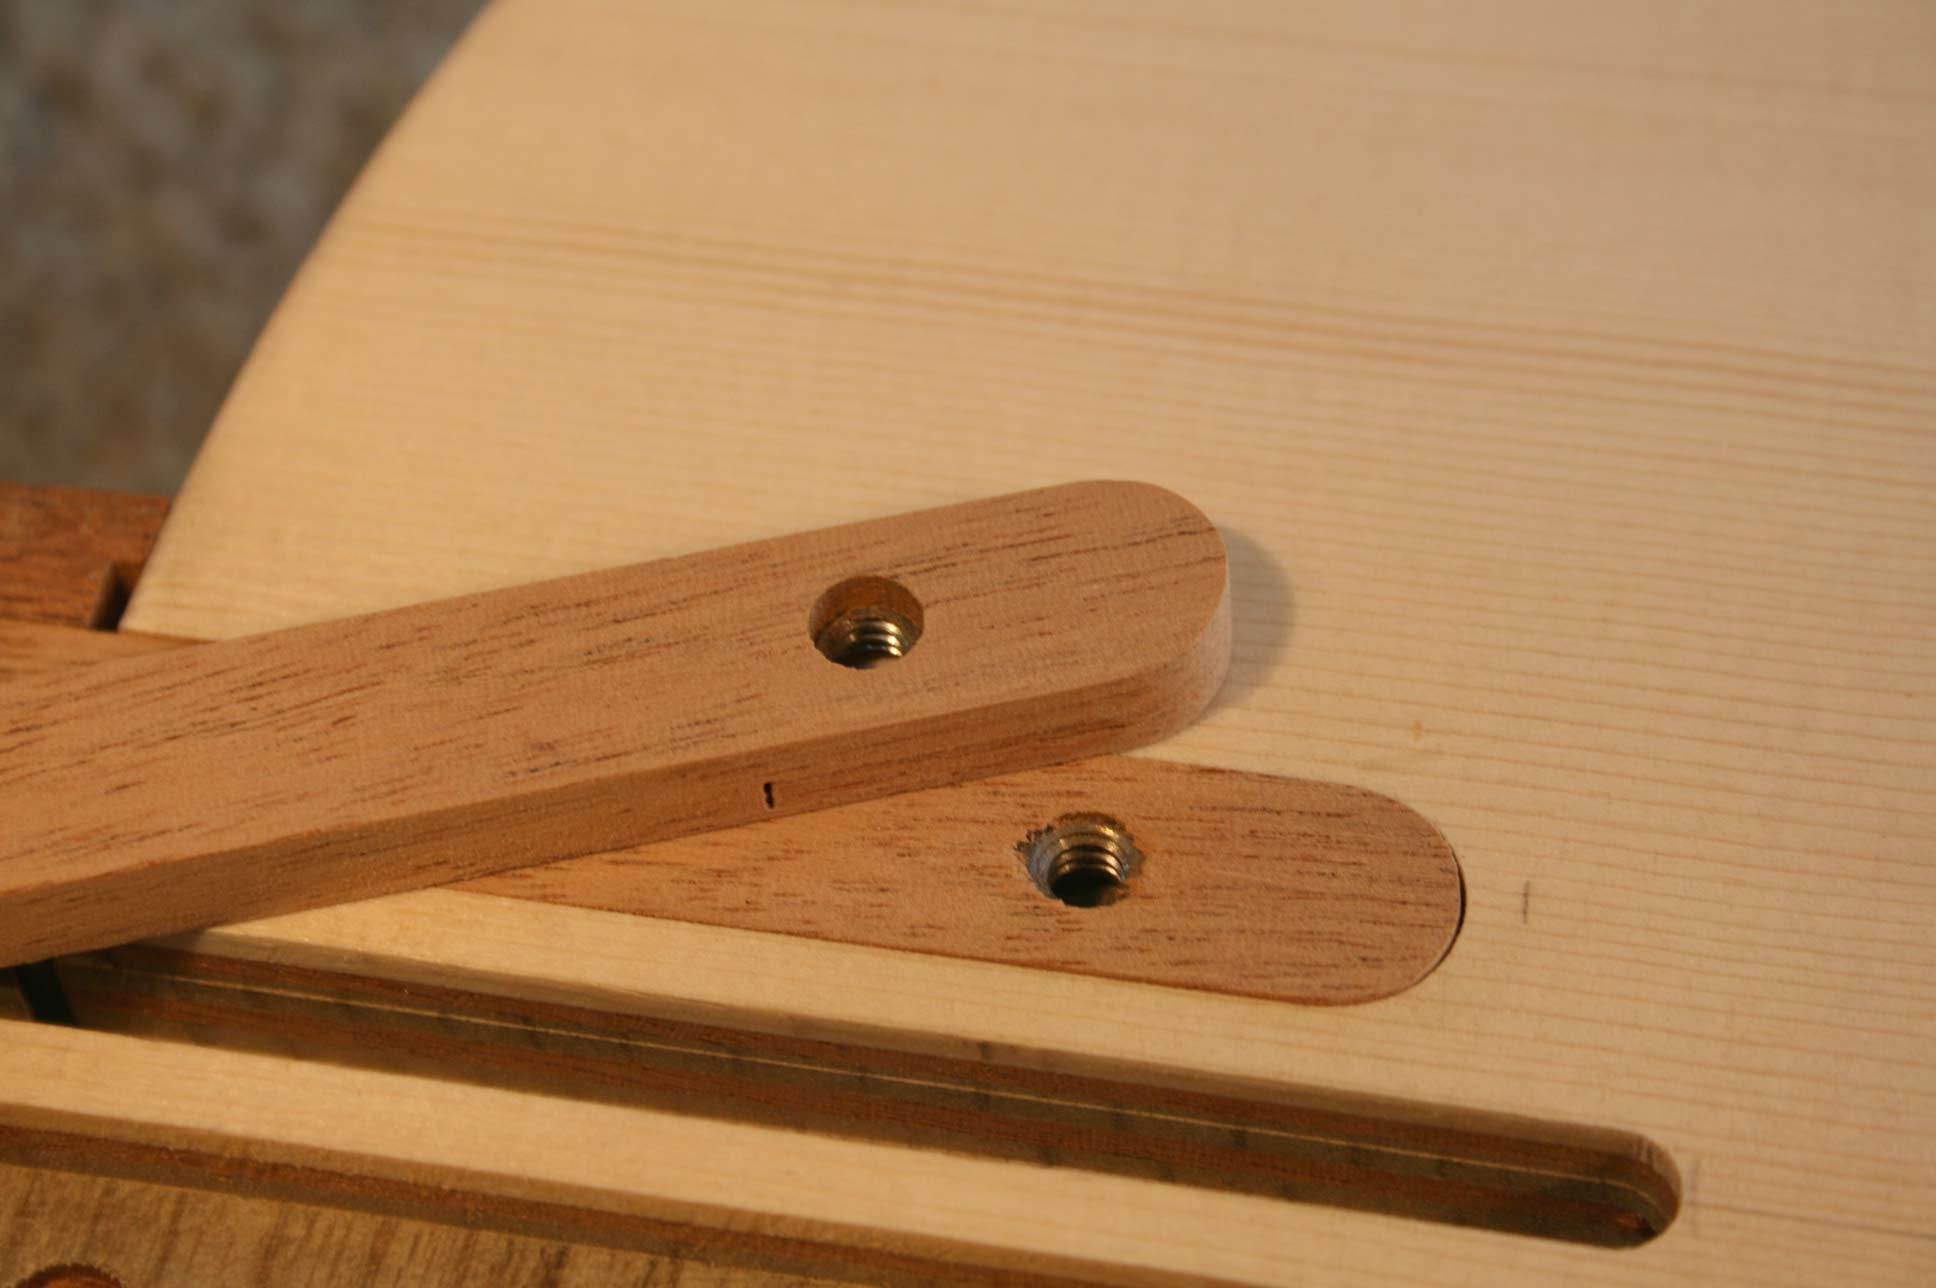 |
Note that the threaded insert is not centered in the alignment bar. Place the closest side up as shown in the bar in the neck. |
 |
19. Glue the bars in the neck. Put a little Titebond in the cavity in the neck and on the bar but very sparingly near the body so the squeeze out does not cause a problem. |
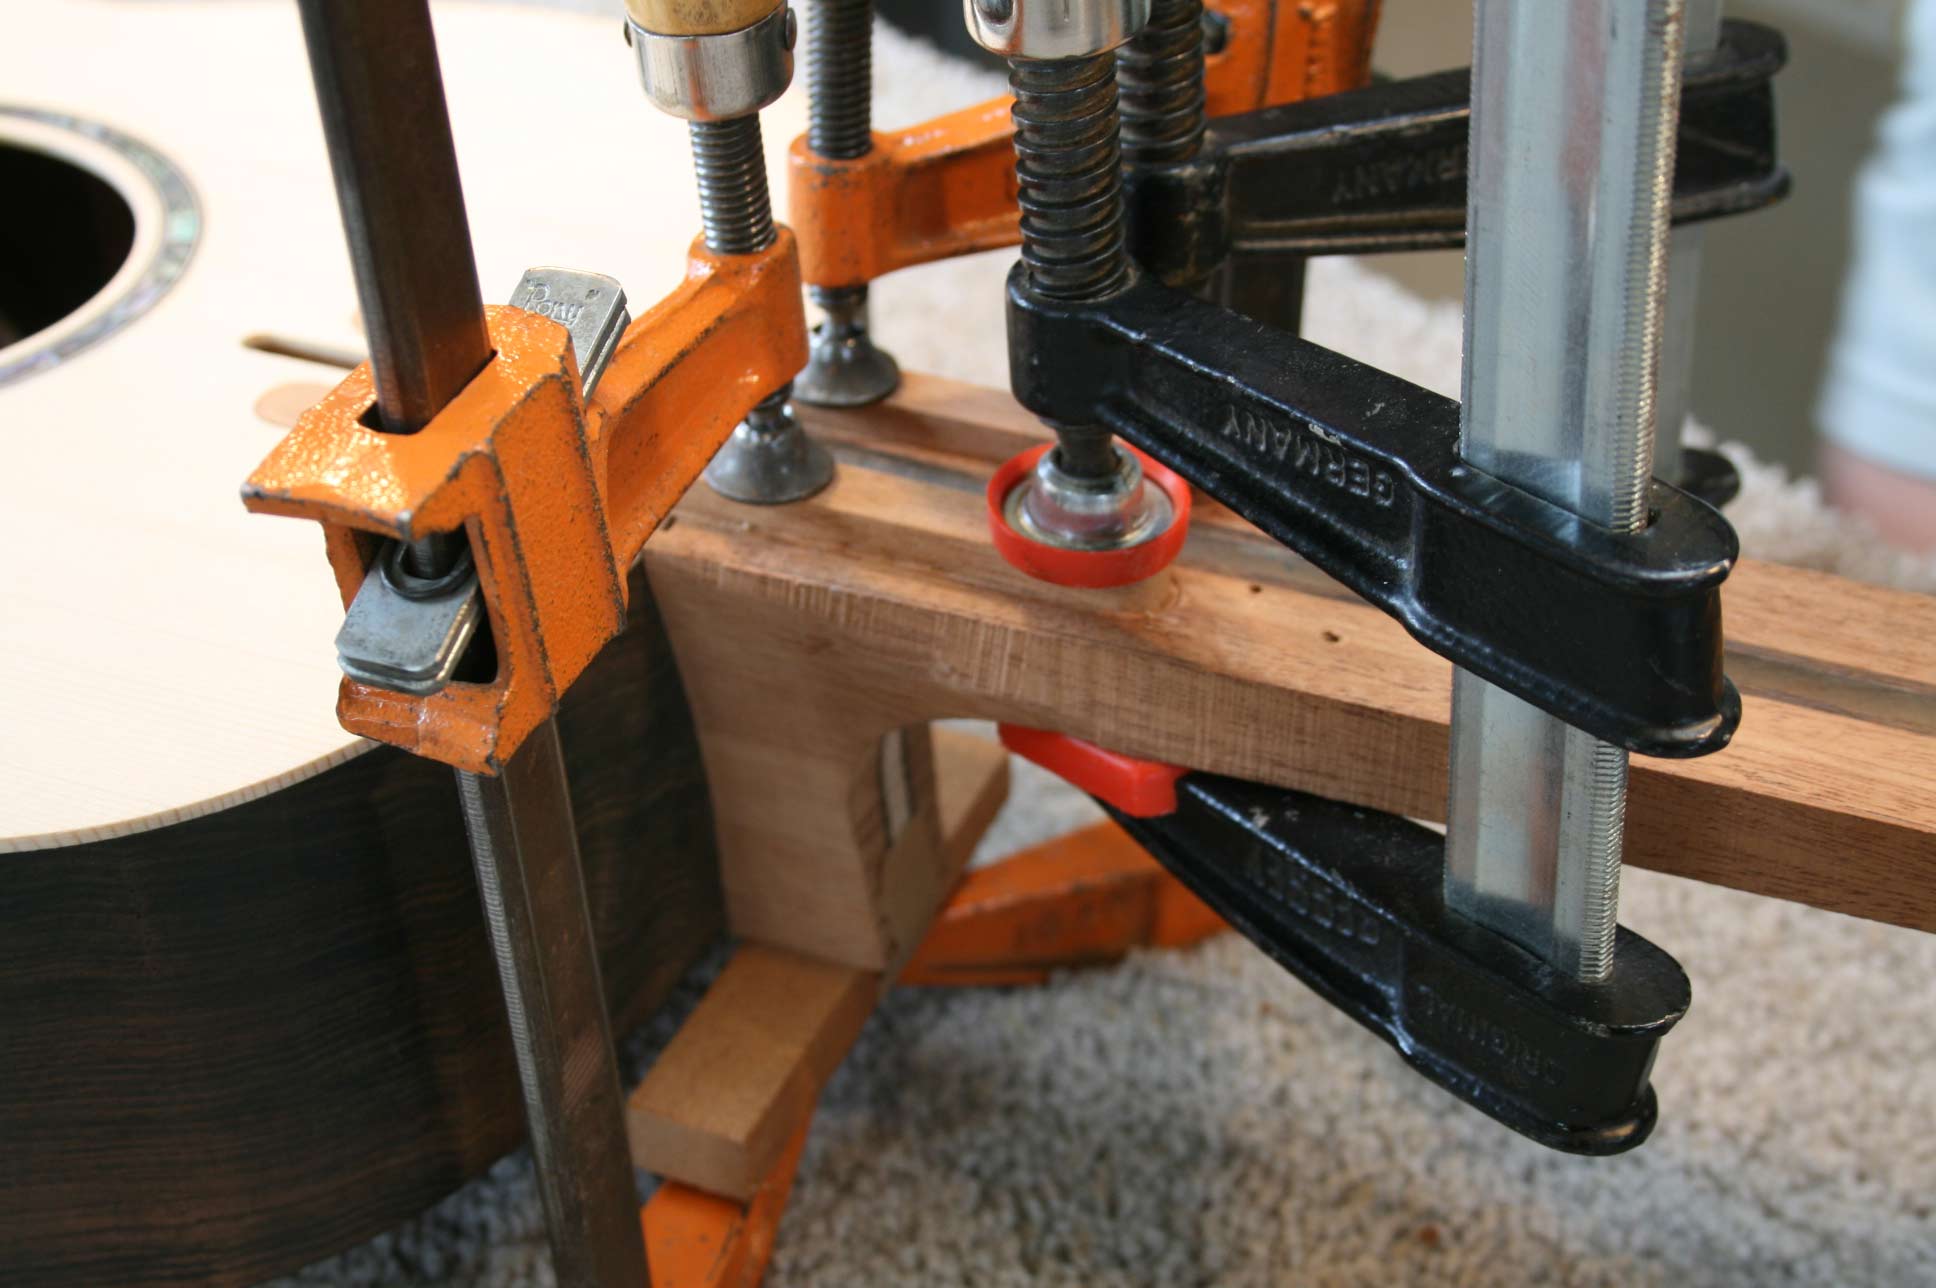 |
I use a piece of masking tape to hold a clamping caul under the heel. When the glue is dry and the clamps removed, mark the center of the #10 insert in the neck block below before removing the neck. |
 |
20. Place the Truss rod in the slot and glue in a filler so there is no way the rod can rattle in the slot. There are good instructions for this on Allied Lutherie's website: http://www.alliedlutherie.com/truss_rods.htm The main thing is use a small amount of epoxy and light clamping pressure.
|
 |
21. After leveling the filler strip, glue on the fingerboard. We use epoxy for this too for two reasons: 1) epoxy is not water based and will not cause any back-bowing of the neck and 2) it will fill the little gap over the alignment bars.
Shown is the clamping caul we use in the shop. It is 3 laminations of 3/4" MDF and has been milled flat. It is hollowed in the center to clear the radius in the fingerboard.
|
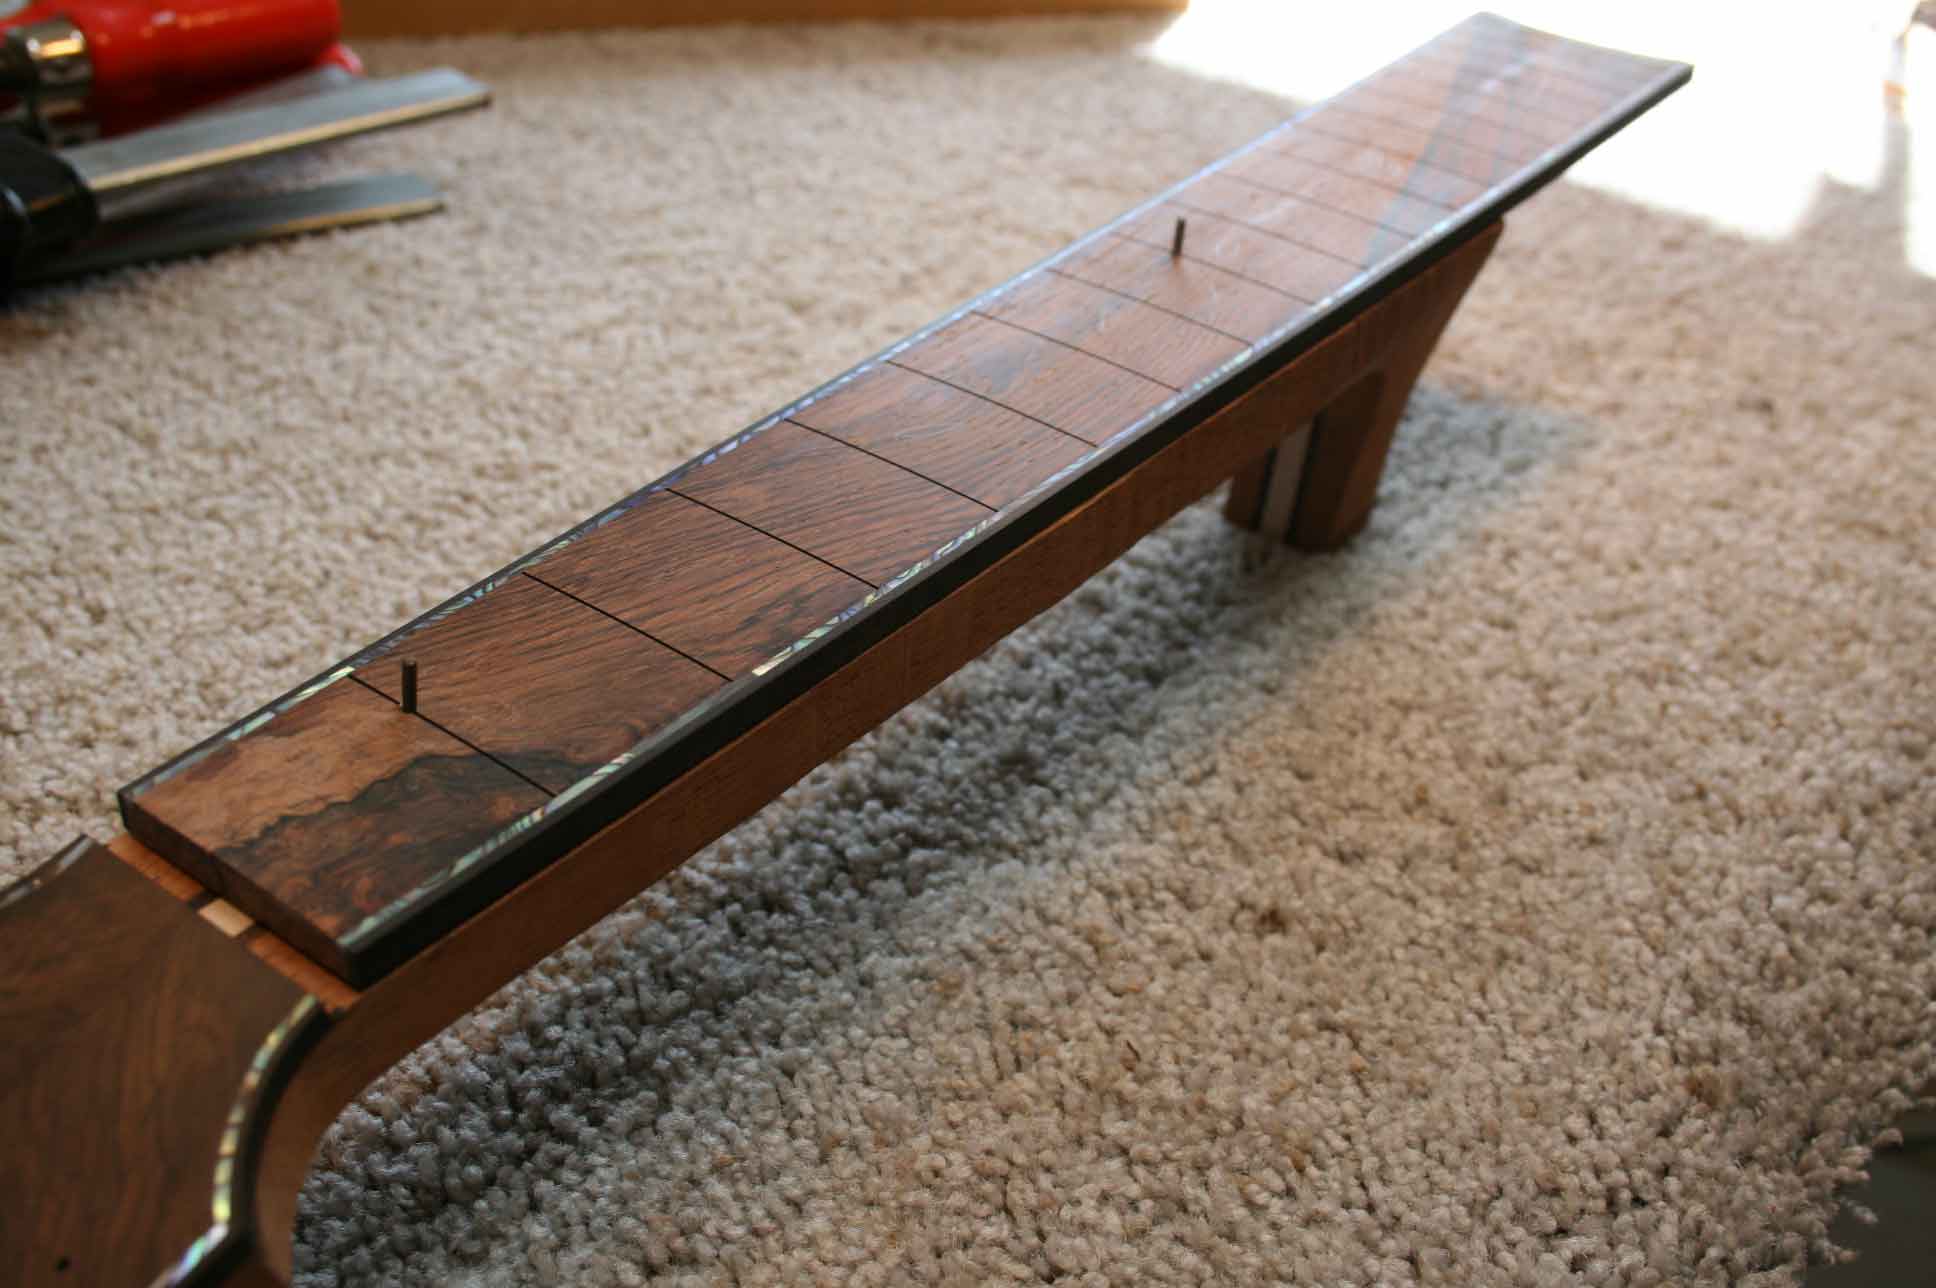 |
The lateral kerfs in the caul are to clear the alignment pins. Two pieces of a 1/16" drill bit works great through the fret slots and keeps the fb from sliding around during the glue process. Heat them with a torch to remove the temper and make them less brittle. A little wax usually keeps them from sticking but if one does get stuck, a little heat from your soldering iron will get them free.
|
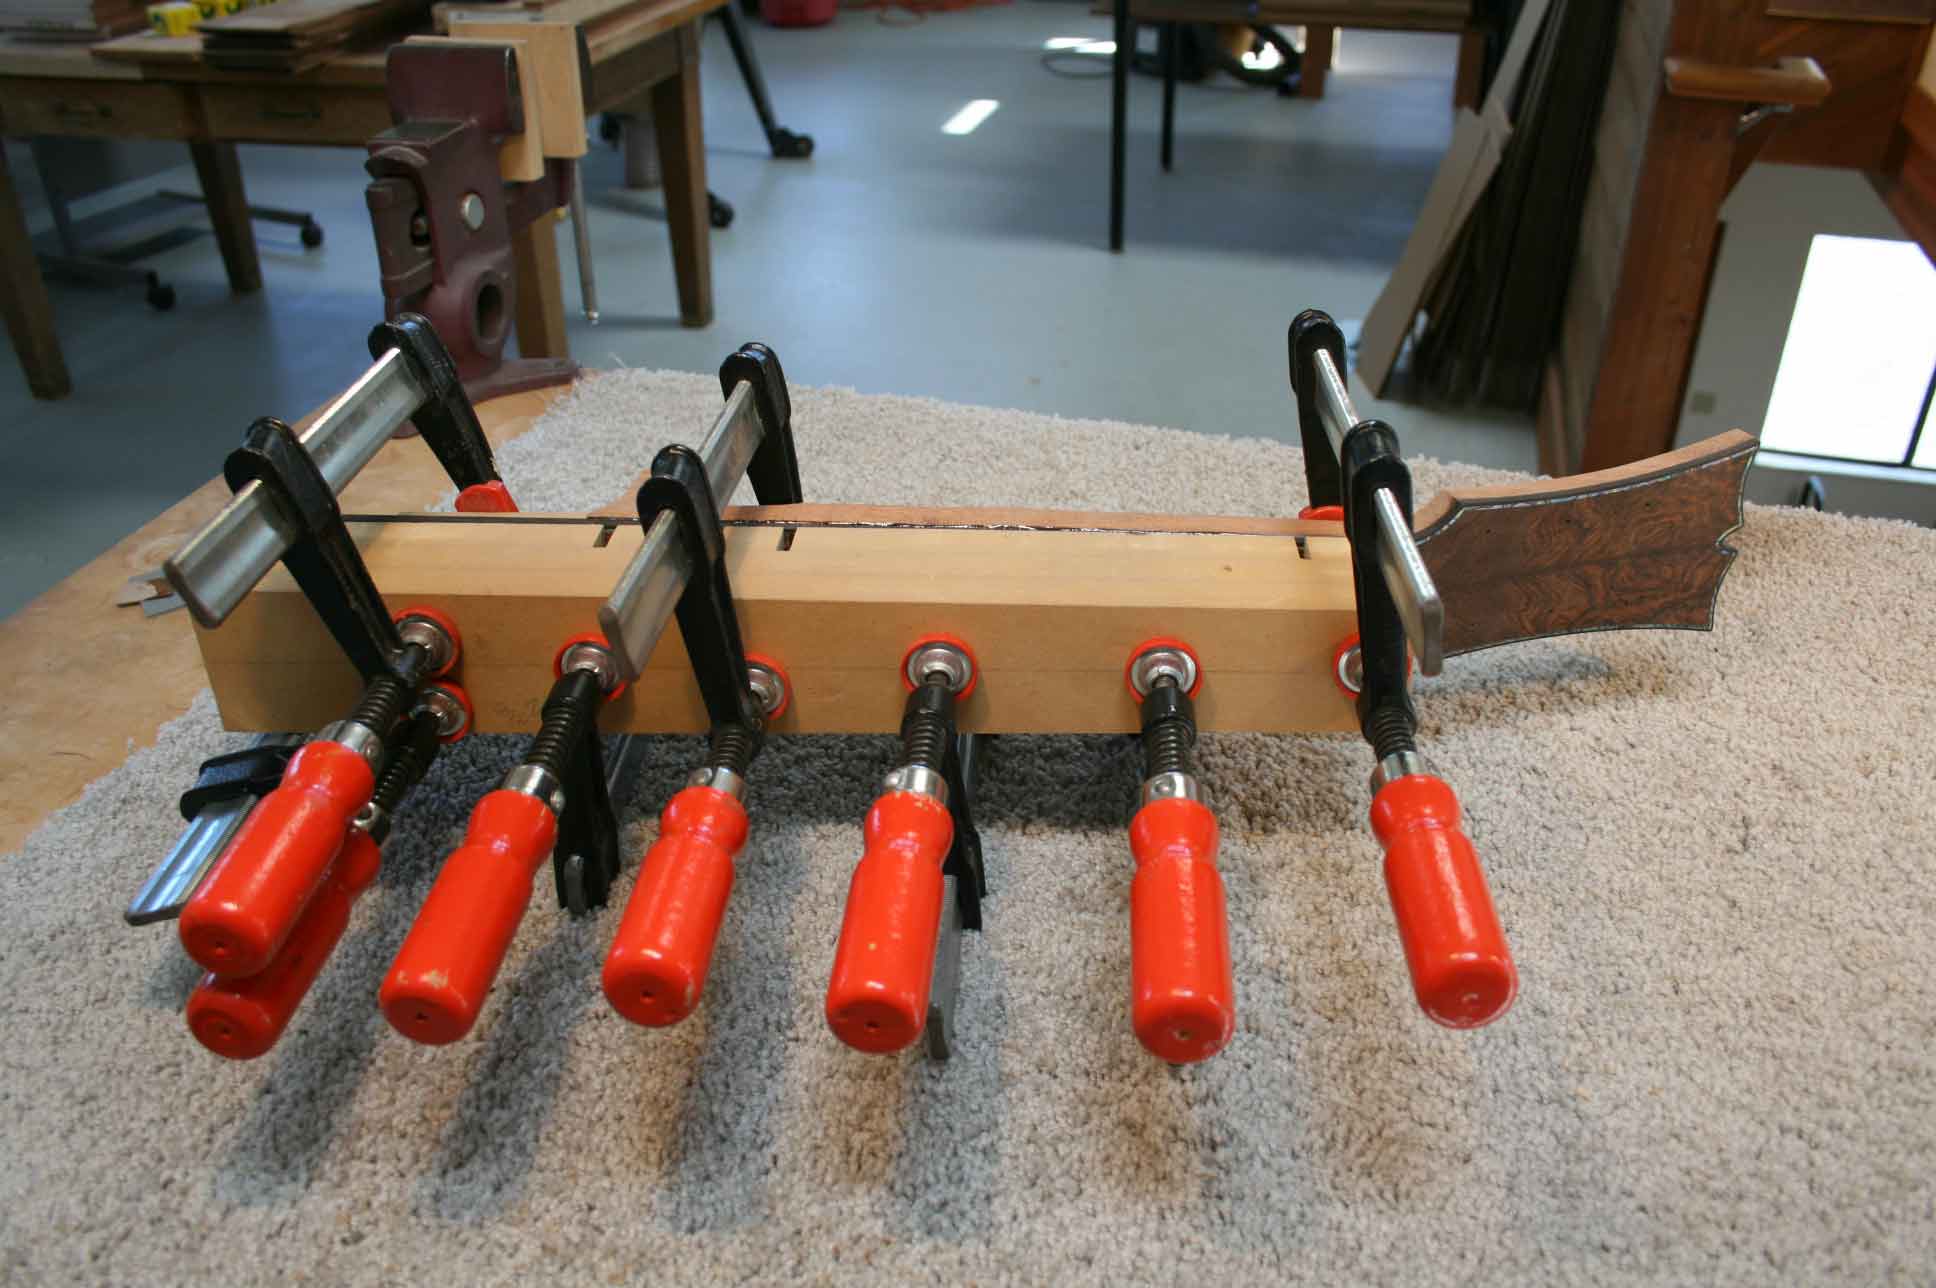 |
Clamp with moderate pressure and remove the squeeze-out at the nut space and around the alignment bars. |
 |
22. Back to the body: At the drill press, prepare to drill 1/16" diameter holes in the neck block where the center of the threaded inserts were located in the alignment bars. Shim the body as required to drill at 90 degrees to the top. |
 |
Drill through the top block. |
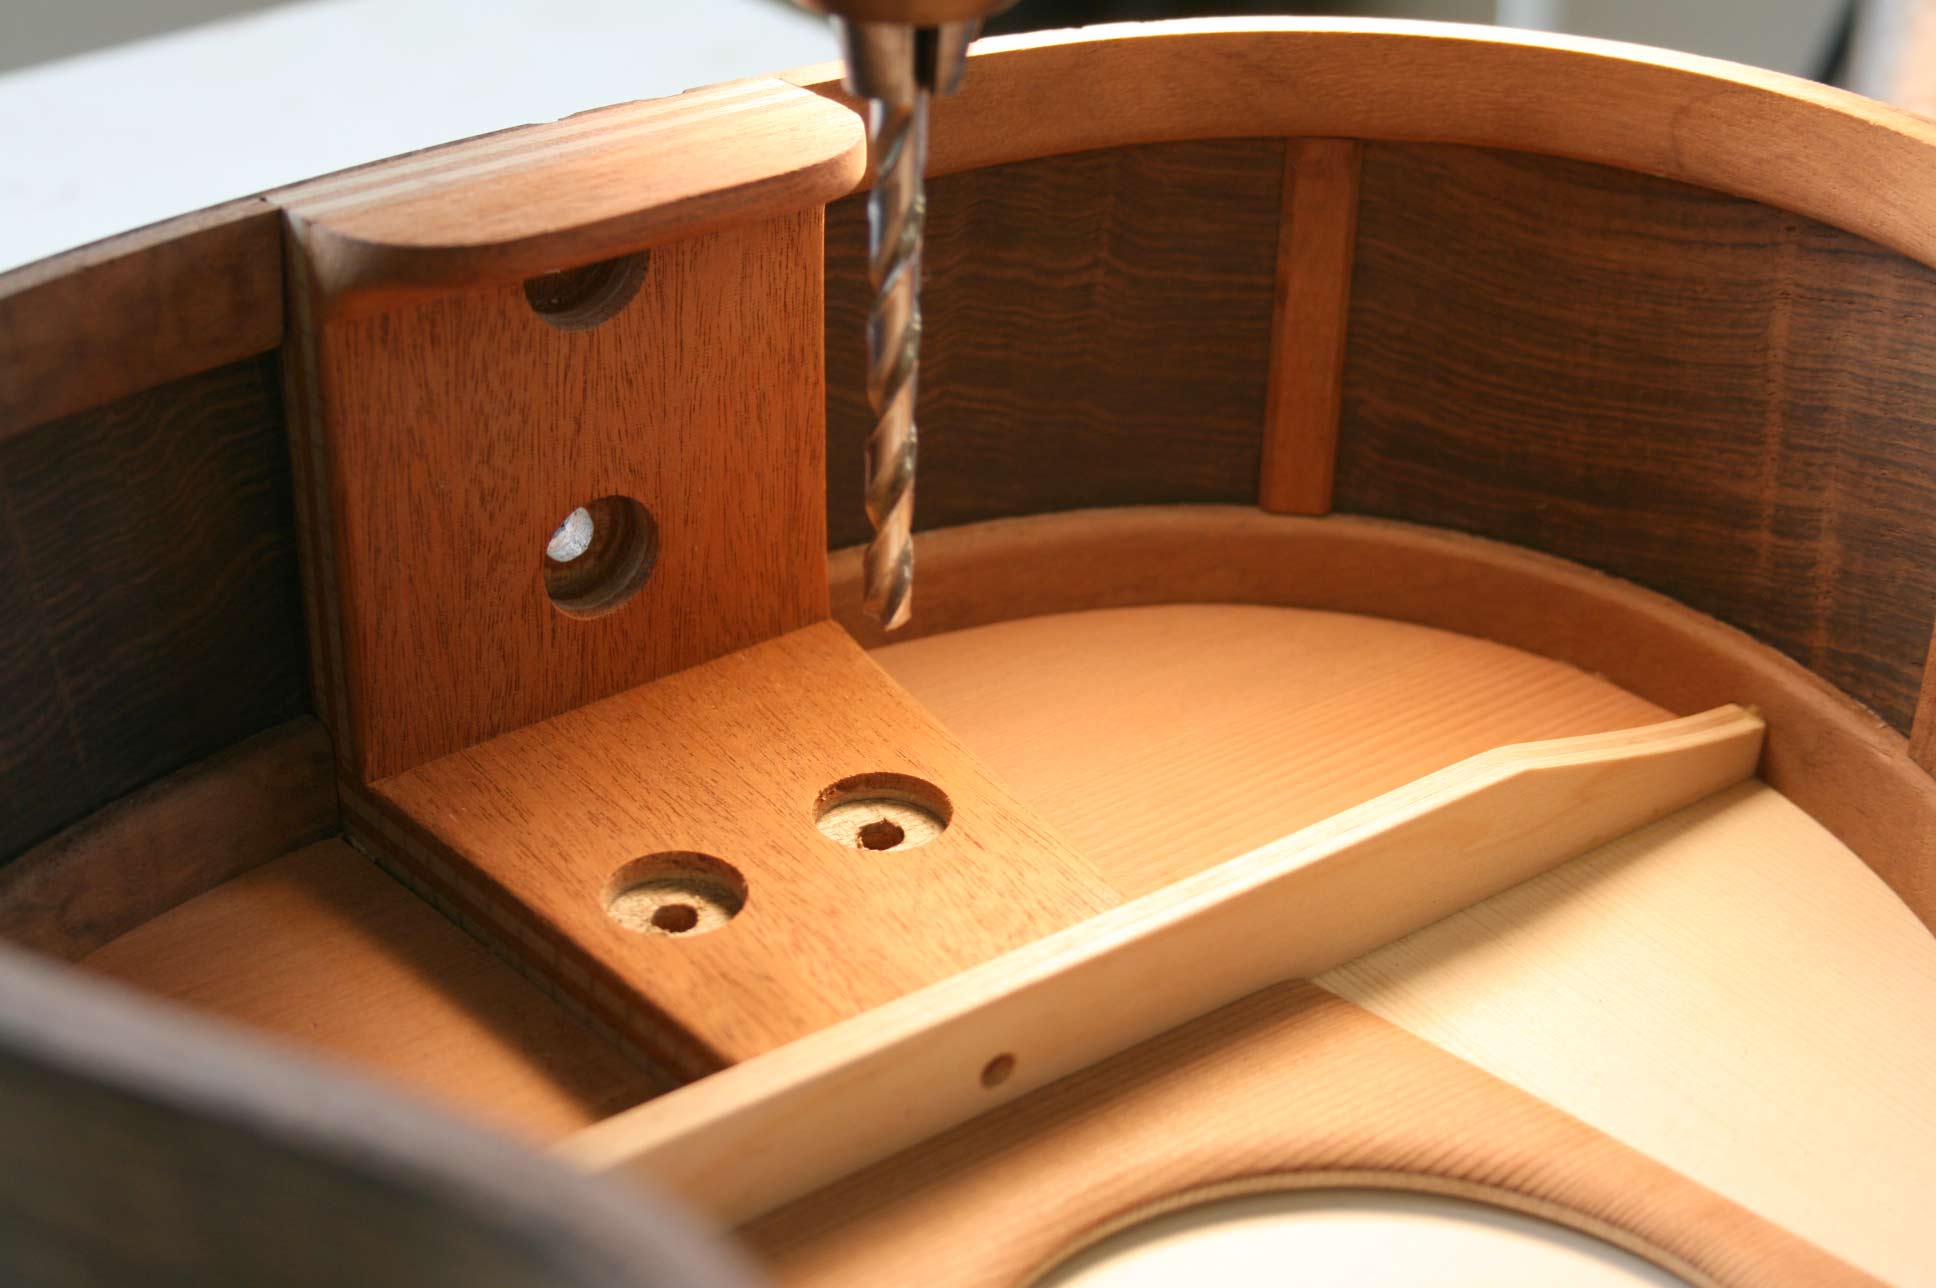 |
23. Pad the drill press table and counterbore 5/8" diameter x .125" deep. (this measurement was taken with a top that finished out at .095" thick. You may have to adjust accordingly) Drill 7/32" diameter through as shown. |
 |
There should be clearance between the end of the #10 bolt with the washer on it and the top so it doesn't bottom out against the fingerboard. If there is no clearance, either shorten the bolt on the grinder or add flat washers. |
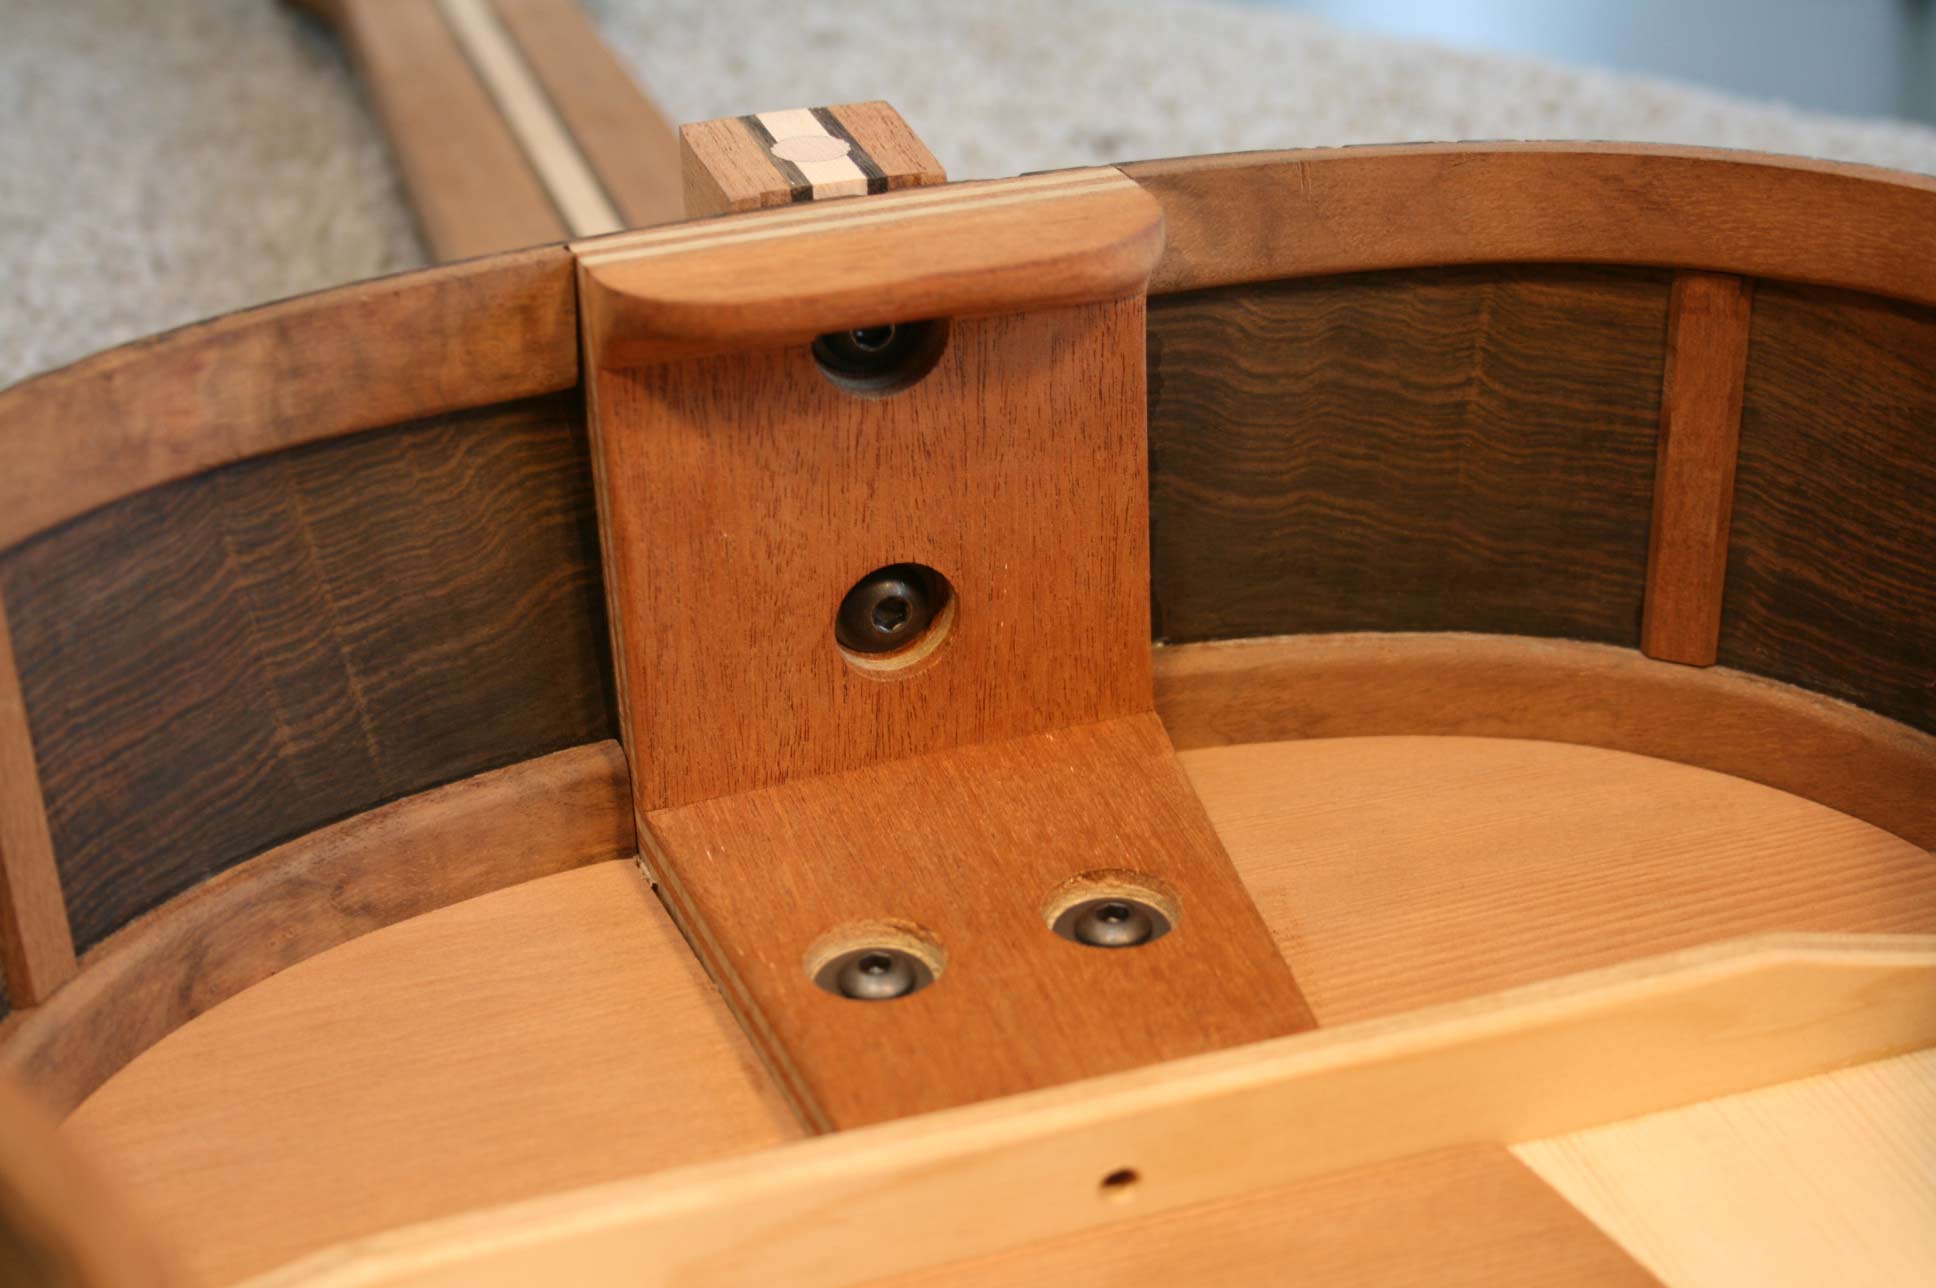 |
24. Bolt the neck to the body and check the finish fit. Just use moderate torque on the bolts. The Belleville spring washers will insure that things will stay tight. That's about it! |
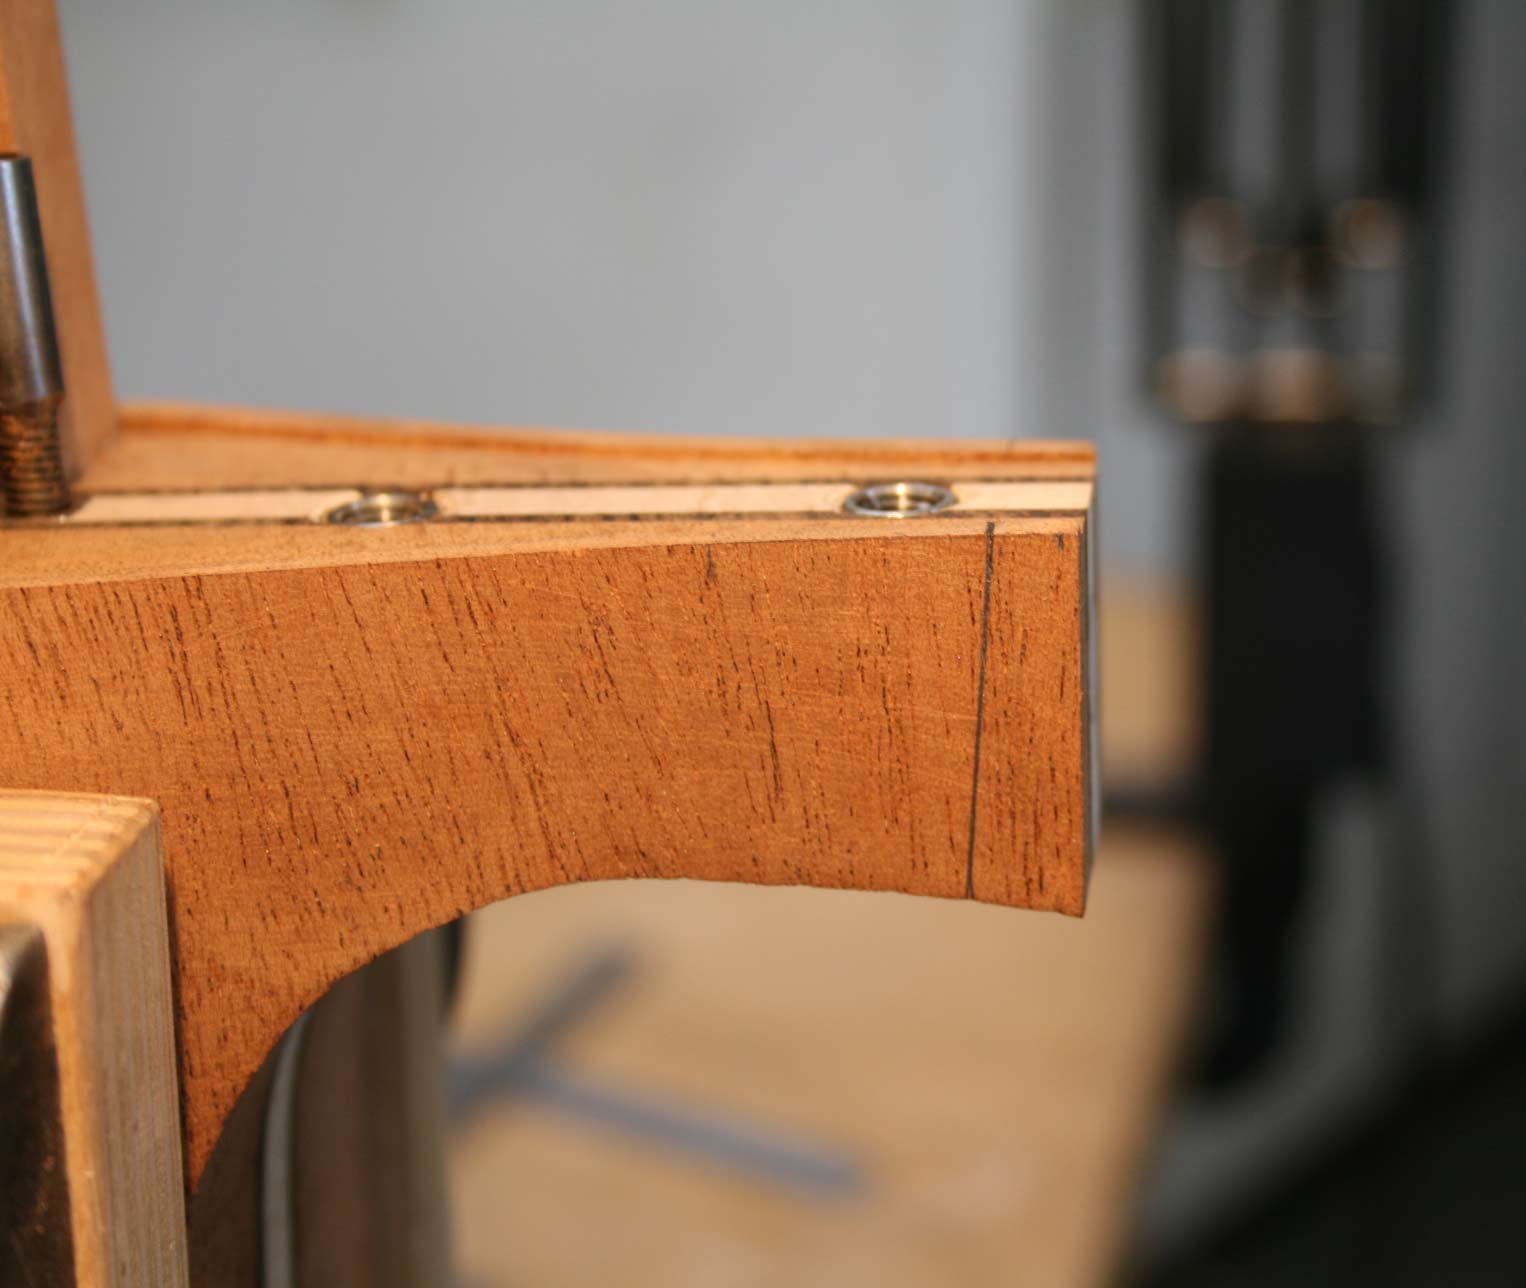 |
To finish off the heel, we make a mark where the heel meets the top edge of the side. Make another mark the thickness of your heel cap down from that top edge mark, in this case 3/16". We angle the heel 5 degrees to match the 15 foot radius we use to dome the back. This makes the top of the heel cap end in about the middle of the binding. |
|
|
You can saw and sand flat to the line. If you have a few to do, a router fixture is easy to make. This one has a block with a 5 degree angle on the top edge. |
 |
The block is bolted to the lower threaded insert through a slot. |
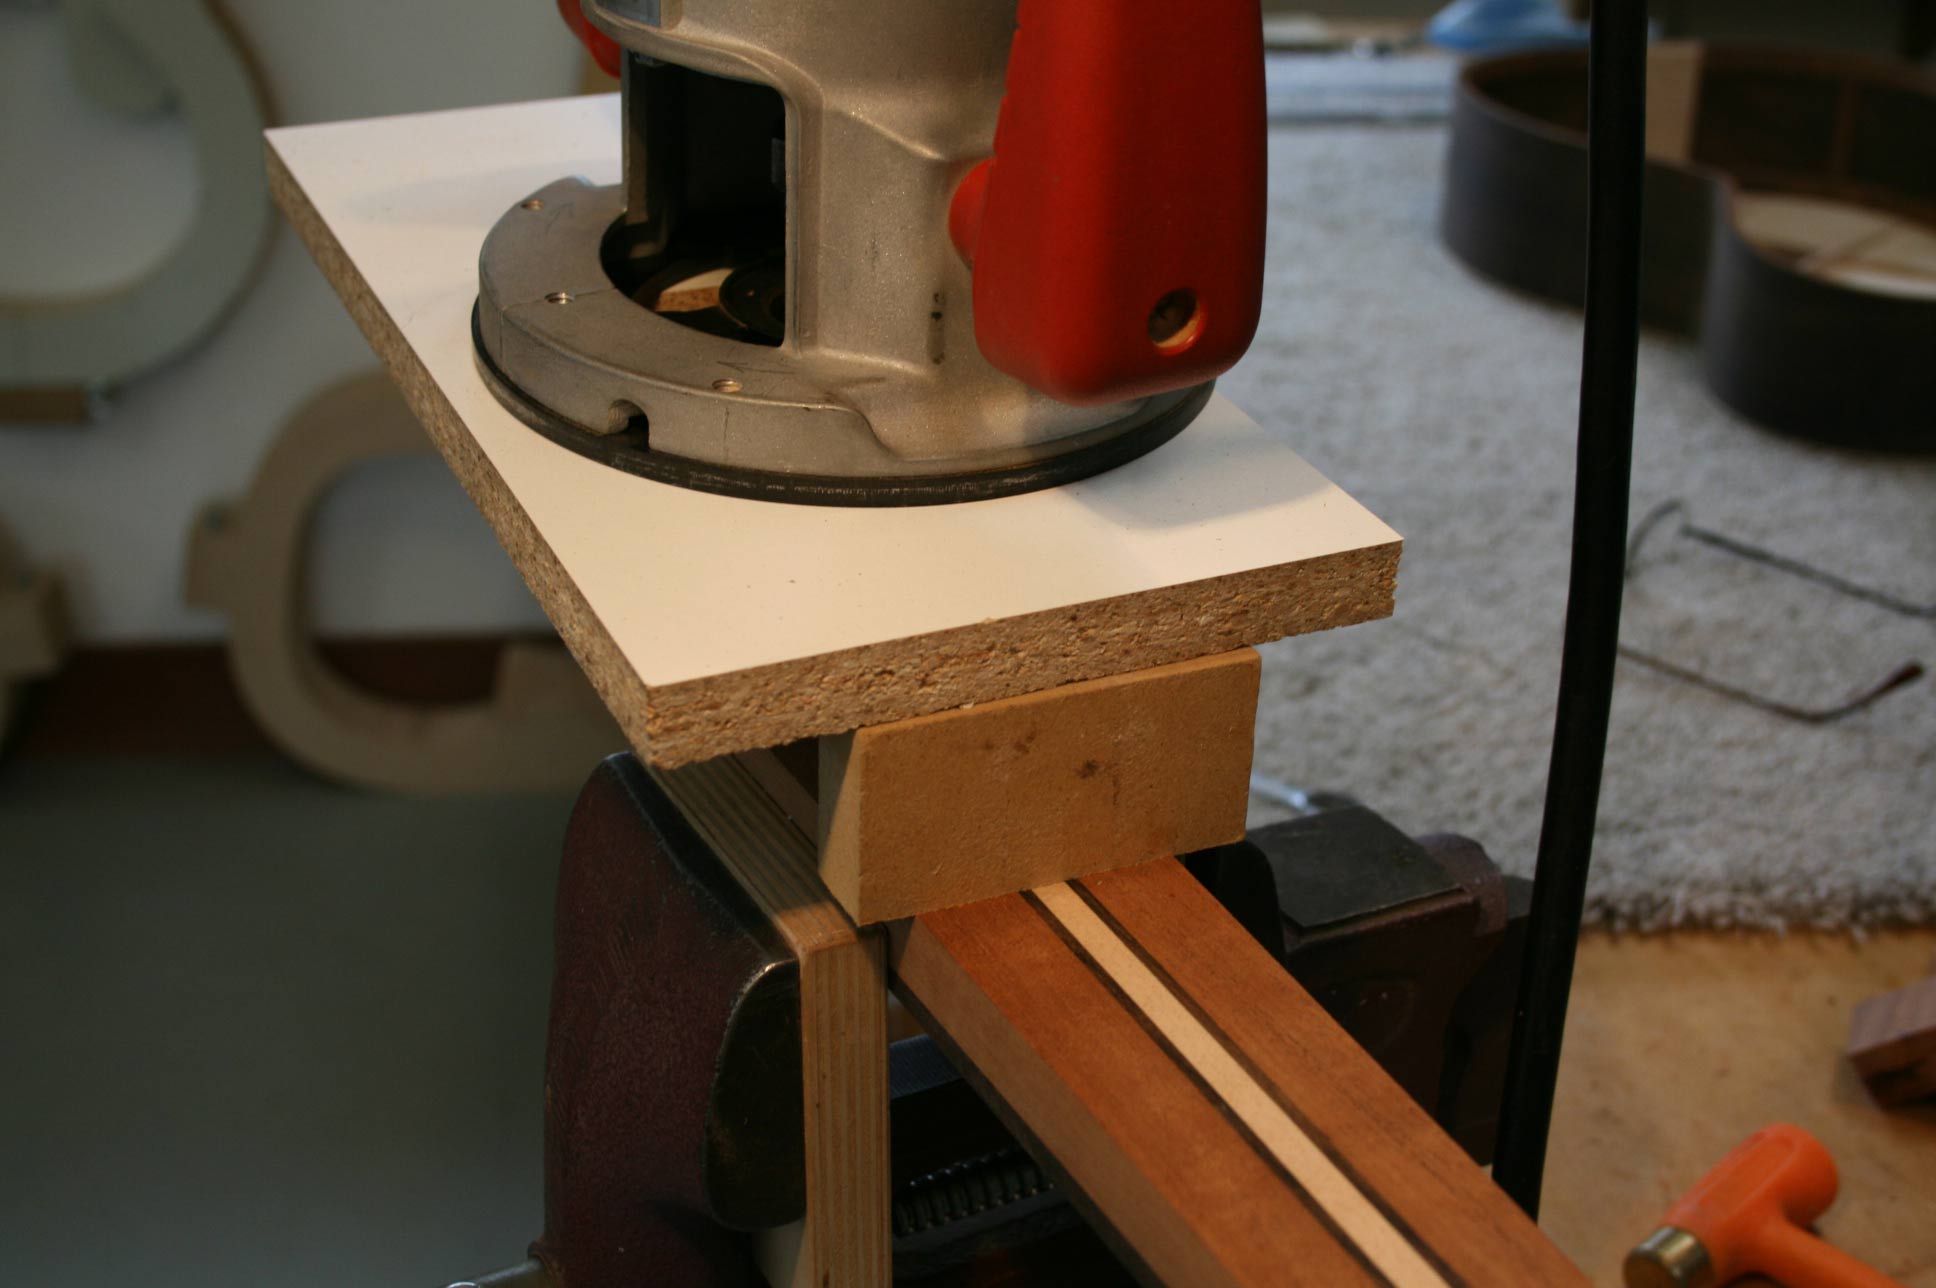 |
A small loose block in the front keeps things parallel and steady. |
 |
Well, the next undertaking is to shape the neck. We offer a drawing set and help file for that task too. The drawings also show you how to make a clamp tool to hold the neck steady during the shaping process. To show our appreciation for our great customers, mention this help file offer and we will take 20% off the price of the drawing set. |